1953 chevy truck ad

1953 chevy truck ad

Friday, June 24, 2016

The Gray Ghost Borders are now Less Secure...Maybe?!?

Just a quick note to let everyone know that I've removed the automatic HTTP to HTTPS redirect. The photo website that I use (photobucket) does not support HTTPS and my photo slideshow would not show on my blog.  The photos are a huge part of the experience that I want to create, so not having the slideshow was unacceptable.  I struggled for several days, trying to figure out how to make them show, without abandoning photobucket and redoing all of the links in all of my posts.  I suppose I could just leave the old posts alone and photobucket alone and start from this post forward and use a different photo site, but that is a ton of work, that I feel is unnecessary.

So, if you load the blog and do not get the photo slideshow on the right, reload it in HTTP and the slideshow should appear.  If it does not, please leave a comment so that I can try to fix it.

I'll let everyone know what the final resolution to the problem is.

For now, how about a random pic to whet the appetite?


Of course, it's not really a pic of the truck.  It's a scan of the datasheet for my truck model, highlighted for your reading pleasure.  Enjoy.

Sunday, May 22, 2016

Steering Through Life's Mysteries or the Wheel of Restoration

In keeping with my theme of doing some level of restoration on the interior of the truck, while leaving the exterior kinda of ratty, I removed the steering wheel from the steering column.  This will enable me to do a thorough restoration of the actual steering wheel and give me better access to the dash and the steering column.  I will sand down the rust and crusty primer and then prime and rattle can paint each.  According to many posts on the truck forum that I belong to, the Rustoleum color #7272 is a very close match to the original dash color.  I'll get some of that in the future, when I'm ready to paint the dash.  The steering column appears to have been some color of gray.  I'll do some digging on the forum to see if there is a modern equivalent.  But for now, my attention is on the wheel.

As a reminder, here is how the steering wheel looked while it was in the truck:


Here is how it looked when I got it out and onto the workbench.

Front:


Back:


A couple of things to take away from these shots, other than the messy workbench:

1.  The steering wheel has many cracks in it.
2.  The wrap has worn away in many places.
3.  The wheel has areas with no paint, some original paint, some primer and some other paint drips.
4.  A lot of dirt and grime in the area where the horn button sits.

After getting the wheel onto the bench and taking those before pics, I set about trying to get that green wrap off of the wheel.  It had clearly been there for a very long time!  So long, in fact, that some areas (as noted in #2 above) had actually been worn away.  So you might think that it would be pretty easy to just pick at it and flake it off or peel it off in big pieces.  Well, not so much. Apparently, this was the top of the line steering wheel wrap back in the day.  It had some kind of adhesive on it. Which means that what was left of it was still very much stuck to the wheel and where there wasn't any wrap left, there was glue.  OMG!  Like everything else so far, what should be an easy job becomes a bit of a chore.  Any way, armed with a small pick, I started flaking away the wrap, working my way around the wheel.  It took about 1 1/2 to 2 hours to work my way around.  When I was done, this is what I had:


Can you see the small little flakes?!?  Yes, there are some large curls of wrap, but can you see the small flakes?!?  Also in the top right you can see a can of Goof Off.  It was moderately effective at loosening the glue's hold on the wrap and allowed me to get the pick under an edge without damaging the steering wheel material.  What I was left with, though, was a spiral outline of the wrap.  At first, I thought the wrap had actually molded the steering wheel material.  But when I looked closer, the spiral outline was all the glue that was left on the wheel.

Well, you can't paint over glue, so I got the Goof Off out again and went at it.  First scraping glue with the pick and then wiping with the Goof Off.  It was pretty slow going, so I switched to acetone. The acetone was much more effective than the Goof Off, even though the Goof Off smelled much stronger.  Since the wrap covered all sides of the wheel where it was applied, I have to wipe with the acetone all sides of the wheel.  Unfortunately, even with the acetone, the glue does not come up completely on the first pass.  I spent another couple of hours working the pick and then wiping with the acetone until I needed a fresh air break (yes even with the garage door open, the fumes were pretty bad).

Before I took the break, I did do some mild sanding with a 220 grit sanding block.  Some of the areas of the wheel looked as though there was some kind of a build up on it.  I didn't know what it was, but decided I wasn't going to paint over it, so it had to go.

Here is a before and after shot after picking, scraping, wiping and sanding:

Before:


After:


It's easy to see the spiral glue marks in the before pic, especially if you click on it and enlarge it. The glue marks are lessened and in some cases gone in the after pic.  Clearly, I am not done with this phase of the effort.  But brain preservation dictated a break....

Here is a close up of one of the wheel spokes.  Because the wrap covered this area completely, the original paint was preserved.  It was good to find some of the original paint, as it takes all of the guesswork out of deciding what color to paint the wheel.  Here's the closeup:


This shot really shows it all.  Here you can clearly see the primer (which ran when it was sprayed on...) the original paint, the wheel material, the glue and where I've scraped at it and the remnants of the glue spirals.

Here is a closeup of the worst cracked area.  I'm going to use the epoxy putty to fill this in, once I've gotten it all cleaned out.  Here's the crack closeup:


It looks pretty bad.  Hopefully, the epoxy putty will do the trick.  If not, then I'll have to replace the wheel.  I'm really hopeful that I can fix it and save the wheel.

That's all for now.  That's as far as I've gotten.  I wanted to do this update, as the next phase will take me a while to complete.

Don't forget to vote in the test poll from my last post!  Not many of you have voted...and I know that you're out there.  So get out there people and vote!  Please.

Sunday, May 15, 2016

Poll Test v2.0 (Revised Poll)

Hi Everybody,

I'm working on a new post and I want to include a real poll in it to get your feedback.  Google, by way of Blogger, doesn't make it easy to put polls into individual blog posts.  Instead, they want you to put it in your layout.  That would make it appear in every post....  Not the best approach, unless you wanted to keep the data generated by the poll and then mine it for...wait for it...MONEY!

I did some research and think that I've found a way to do it.  It seems straightforward, but involves switching from the GUI that blogger uses to the html interface.  I'm not really conversant in html, so it could be a challenge.
So, in order to test my polling prowess, or my html prowess or both, I've come up with a silly poll to see if it works.  (I can't see the poll in the preview mode, so I'll have to go live with the post to see.) The poll is below, but first a couple of requests:

1.  Please try to fill out the poll.  It is only 1 question with a couple of possible answers.  Just pick 1 answer.

2.  If for some reason, you can't see the poll or it doesn't work, please leave a comment that specifies what went wrong.

I need that feedback, because the next poll will allow you, the reader, to help me decide on a part of the Gray Ghost that I'm going to work on next!  I've got the part already picked out, but could do it in 2 different ways.  I'm going to let you help me decide!

So for now, the test poll (OBTW, it anonymous!)


Friday, May 6, 2016

Securing The Gray Ghost Borders And Checking A Box

Hi All,

Just a quick note to let you know that Blogger has changed the settings for the website.  The URL now includes "https" instead of just "http".  If you use the old "http" you will get a redirect to the new address.  So, if you've bookmarked the old address, you should update the bookmark.

On a different note, I've added a feature at the bottom of my posts.  It's a set of check boxes to like, dislike, etc my posts.  I'm just short of 1,000 page views and have only received a handful of comments.  Clearly my audience is shy or my posts are boring....  I thought this would be a quick way to get some feedback, so come on readers and Gray Ghost fans: check a box!

Here's a previously unpublished pic of the Gray Ghost to get you motivated!


Of course, its the heater!  I'll be taking it out and doing a restoration on it.  This style of heater uses a unique circular heater core.  It has 2 semi-circular halves that are soldered together with an inlet hose on one half and and outlet on the other.  There are some companies that refurbish these cores, but I think I'm going to use a new product that fits the same space (is circular) but is one piece and includes a 12v blower motor.  Most importantly, it's the same price as refurbing the old one.  Sounds like a win-win.  Now I just have to get the funds together....  Story of my restoration life.

Friday, April 8, 2016

Light Down the Rabbit Hole

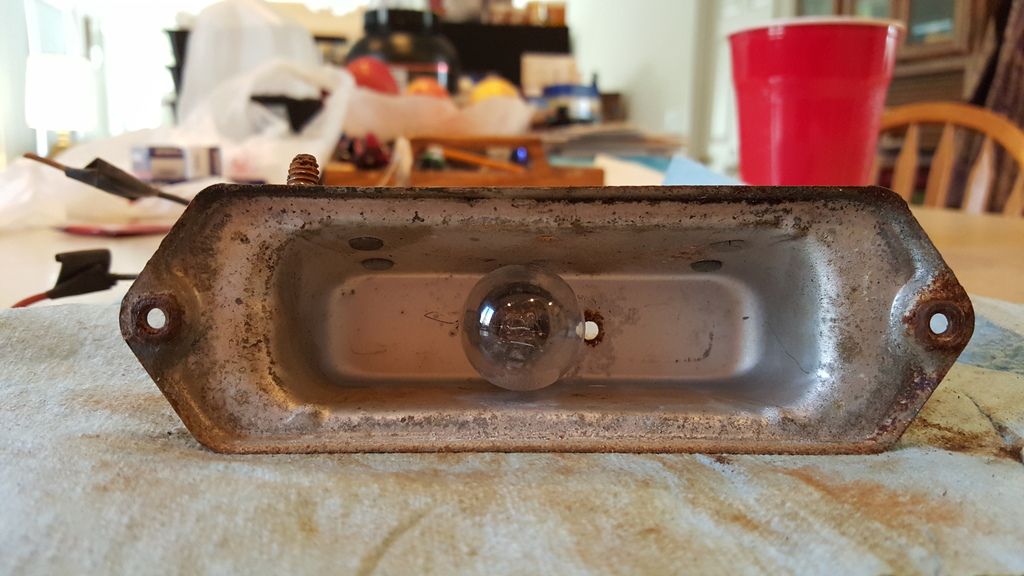
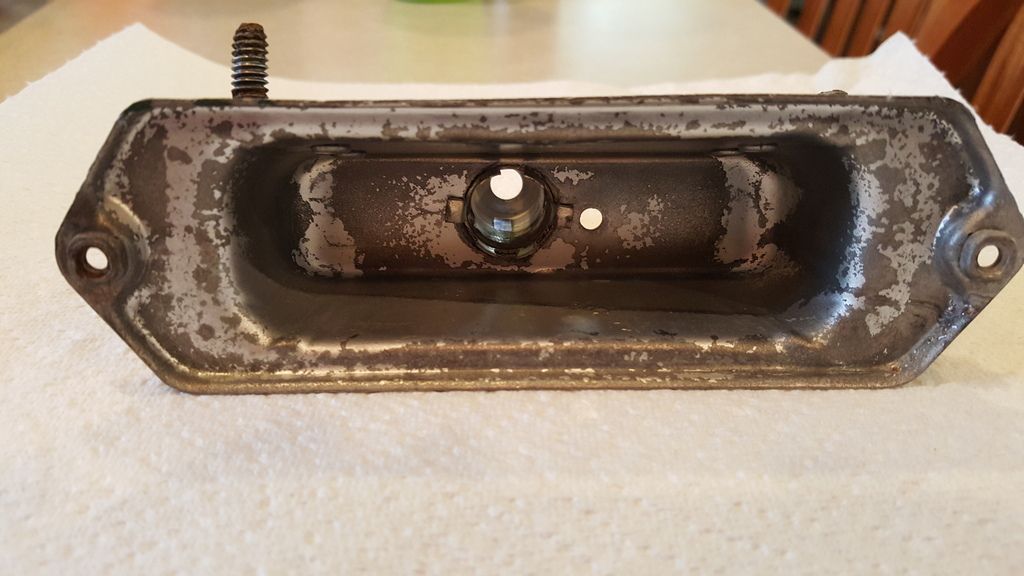
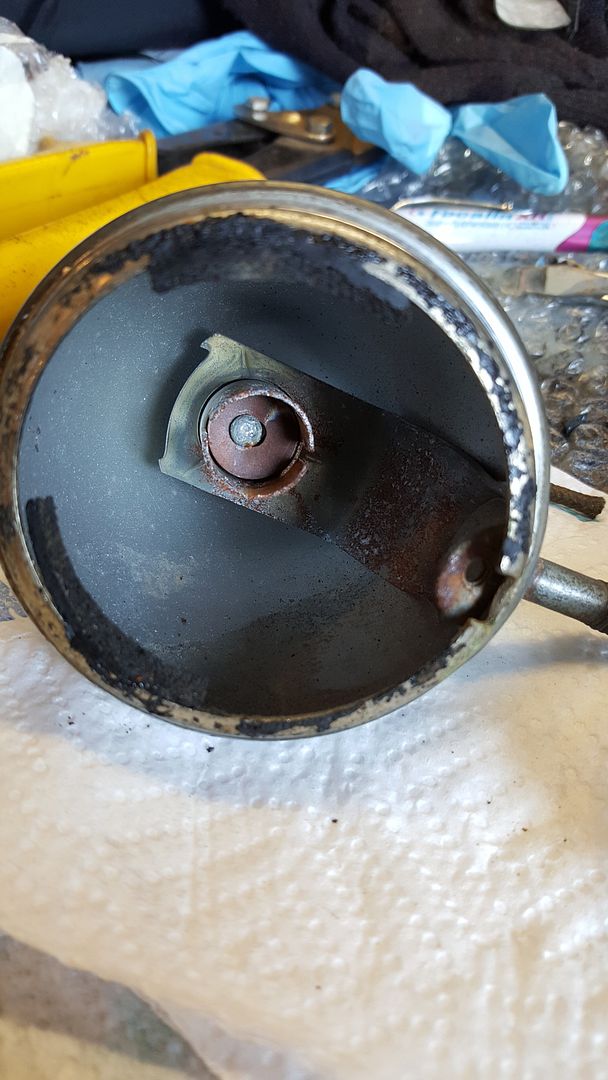
A funny thing happened when I was searching for mounting brackets for my restored backup lights.  I found a really nice pair of Dietz Model 909 driving lights.  The lights are pretty old, but I'm not sure exactly how old.  They are very sturdy and made out of very thick metal, which made restoration pretty easy.  I started work on the light that was the rustiest.  I started by disassembling the light assembly.  The bulb is held in the light by a ring on the outside and pinched together by a nut and bolt.  Remove the nut an bolt and sort of peel the ring off of the housing.  The bulb then easily comes out.  The electrical connections are made by two slip on connectors that attach to screws on the back of the bulb.  Initially, the ground connection is through the bulb housing.  This was really rusty and I decided that I would use two wires to the outside of the housing, similar to how I wired the backup lights.  Later, if I want to do a frame off restoration of the truck, I'll do the same for the Dietz lights and re-establish the internal ground. But for now, I'll just ground through an external connection. Here is a shot of the inside before restoration:


In this shot, you an see some overspray from when I painted the outside.  I did one side at a time, although if I were using a media blaster, I would do both sides at once.  But since I was doing it by hand, I did one side at a time.  In this pic you an also see the clip on the right side.  This is for a tab molded in the glass bulb that holds the bulb in one position and keeps it from spinning around while it is bouncing down the road.  You can also see the old ground connection.  I cut that out.  For the full restoration, I would grind off the rivets and separate the mounting part from the housing.  This would give me the opportunity to add a new ring connector for the internal ground. That is some time down the road however.

Here is a shot of the restored and new parts:


You can see the restored interior.  Although  I used a self etching primer, it didn't quite match the original color, but it is green like the original.  The nut and bolt that pinched the ring together had to be replaced.  The new one is stainless steel, so hopefully it won't rust.  The ring was also stripped then primed and painted.  The bulb is a 12 volt replacement (model 4412) and is really a tractor light, but it is the replacement for the 6v bulb (model 4012).

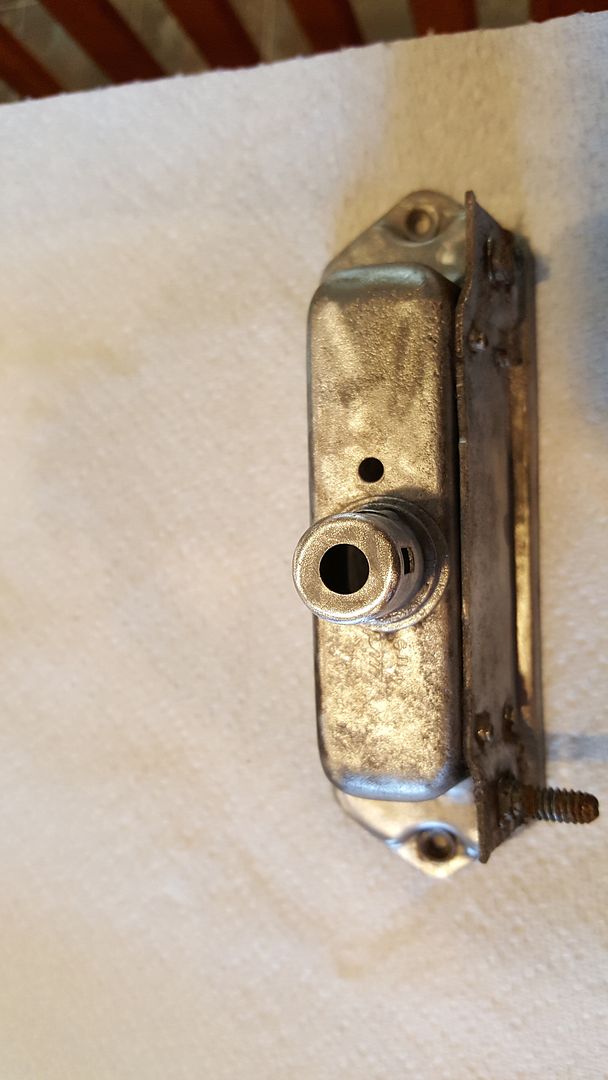
Here is a shot of the exterior of the housing and other parts:


The exterior of the housing was stripped of rust and then primed and painted.  The painting turned out to be a weird adventure.  I had bought a can of gray spray paint last fall for use on the steering column.  I didn't get to that last fall, so I decided I would use it on the lights.  When I tried to use it, blobs of paint shot out of the can!  I was really dejected, because it meant sanding it down and starting over.  However, when I looked at it closely, it looked like I could knock down the high spots and just paint over it with a new can of paint.  When I did that, it looked like a heavy duty textured paint like one you would see on industrial equipment.  I loved it!  So, the other light will get the same treatment!  In this pic, you can see the screw tabs on the light bulb for attaching the electrical leads. You can also see the bolt that attached the light housing to the mounting bracket. This bolt looked a little buggered up when I got the light, but I chased the threads and it turned out to be fine.  I added a new stainless lock washer and nut and it is good to go.  For the wiring, I got 12 gauge wires and made each lead a 5 foot lead.  That way, I would be sure to have enough wire to reach when I installed the lights.

Here is a side shot of the housing after final assembly:


Fitting 2 12 gauge wires through the small grommet was difficult, but doable.  I had to put the wires through the grommet, then install the grommet into the housing, but it worked.

Here is a front shot of the light after assembly:


I did test the functionality of the light after assembly and it worked fine.  I didn't take a pic of that...not enough hands.

Here is a shot of the mounting brackets that I will use for these driving lights:


It is clear from the pic that these are 2 different brackets.  However, you can also see that even though the shape of the brackets is different, they end up at the same height.  So for now, I'm going with them.  I'll keep an eye out for one of the top pieces that matches either one, doesn't really matter which one.  Ultimately, I want to get these blasted and powder coated, but that may be down the road a bit.  It is really amazing to me just how heavy duty these brackets are and how heavy they are.  But in a test fit on the bumper, they seem to just suck down on the bumper. I have no doubt that they'll hold fast and tight when I snug down the nuts and bolts.

So, how about those backup lights?  Well, I found a different set of brackets for those lights!  It is a nice pair of chromed brackets that are smaller than these brackets and look like NOS.  Gotta love those rabbit holes!  You never know where they'll lead you!

Friday, February 19, 2016

Cue The Mission Impossible Music

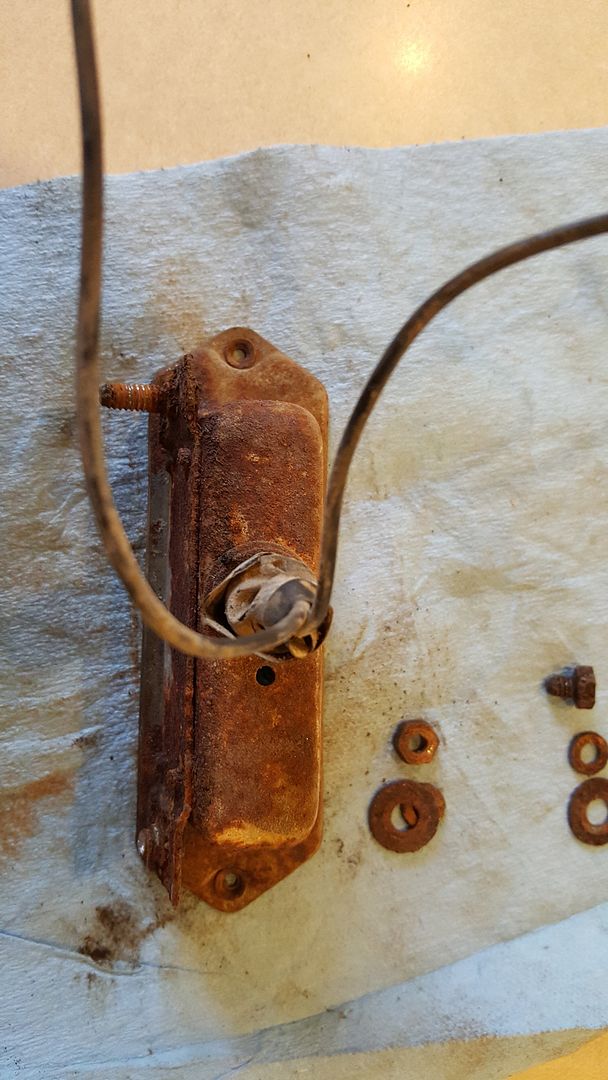
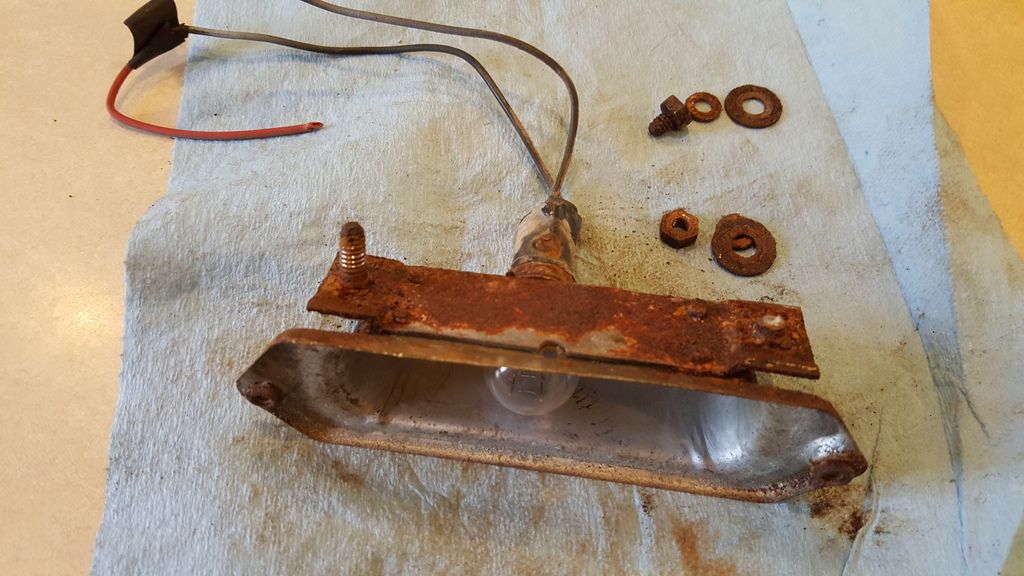
I had a little time today, so I decided to remove the passenger side park light.  It was rusted in place, so both bolts broke off while I was trying to remove the nuts.  Turns out the whole thing is really rusty and I'm not sure I can save it.  Here it is after removing it from the truck:


Here's a top view (that will not allow me to rotate it into a normal view...Photobucket strikes again):


I think that everyone will agree that this is rusty!  Instead of trying to go straight into the Evap-O-Rust, I decided to cut off the rivets and separate the bar from the housing and disassemble the all of the parts, then give them a soak.  Here is an exploded view of all of the parts front and back:


The funny thing that you can clearly see in the last 2 pics is the gray primer that the previous owner sprayed on everything (think back to the primered pencils and cigarette butts in the ashtray) is covering the outside of the glass lens.  That is why it looks kind of frosted or milky.  But when you look at the inside, it is nice and clear.  Thankfully, it comes off easily and is way less of a concern than the state of the metal housing.  I think that the bar is shot, so I'm going to attempt to make one over the weekend.  The front bezel and gasket are also shot and will need to be replaced.  If this doesn't work out, I may try to find a decent one online, if the prices aren't too high.

Currently the housing and bar are soaking...we'll see.

Wednesday, February 17, 2016

The Dangers of Hidden Rust: De-Rusting Part 3

Well, I couldn't leave it alone.  I just knew that the Evap-O-Rust wasn't getting all of the rust.  So, armed with drill bits and small punches, I set about removing the bar from the bottom of the park light housing.  Here is the whole housing before de-rusting in the Evap-O-Rust:


Admittedly, it was pretty rusty and gnarly.  Now, here it is after the initial soak in the Evap-O-Rust and polishing with the Dremel and a light abrasive wheel:


Even after the soak and polishing, you can see the pits are still dark colored (probably rusty) and I was convinced that there was rust between the bar and the main housing.  They say a picture is worth a thousand words so here goes with a pic after drilling and punching the rivets out:


And there you have it:  RUST!  Hidden from view and survived a 24 hour soak in the Evap-O-Rust. Right now, it is back in for another soak.  When it comes out, I'll polish it again and see how the pits are and if the bar is salvageable.  If it is, I'll look into getting replacement bolts.  If not, I'll try my hand at making a replacement strap.  It's hard to see, but there is a subtle bend on each end to accommodate the bolts, which are specialty bolts.  In a quick search online, it appears that these bolts are called "elevator bolts".  They fit the description of elevator bolts, anyway.  If I end up making a new bar, I may make the bend a little more pronounced to accommodate regular carriage bolts, which have a slightly thicker head.  No matter which way I go, I'll pop rivet them back onto the housing.  So far, it looks like I should be able to salvage these housings.  I'll keep you posted on the progress.

Sunday, February 14, 2016

De-Rusting Part 2

Well, it's been a little more than 24 hours and the Evap-O-Rust results are in.  Here are the before and after shots:


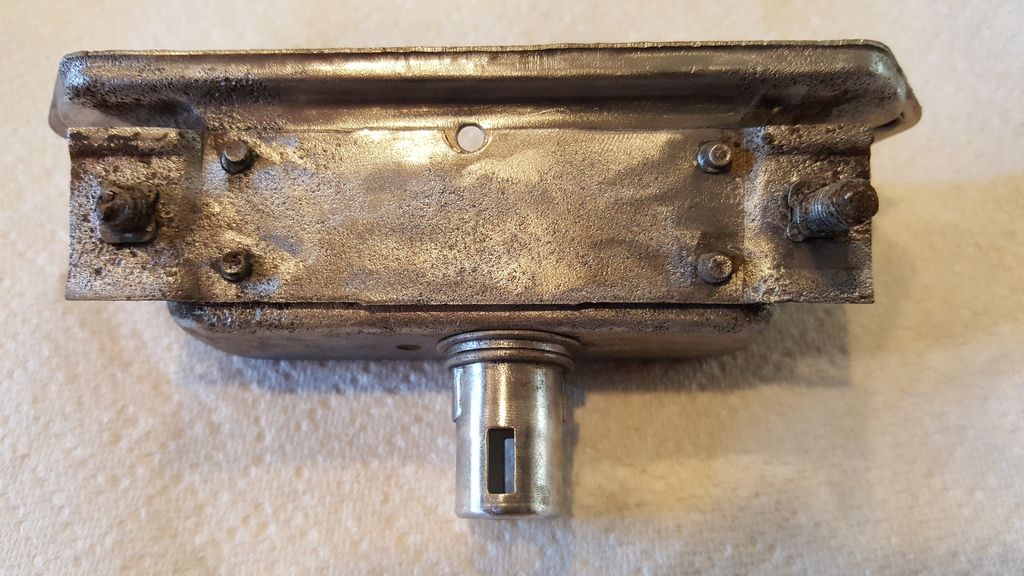
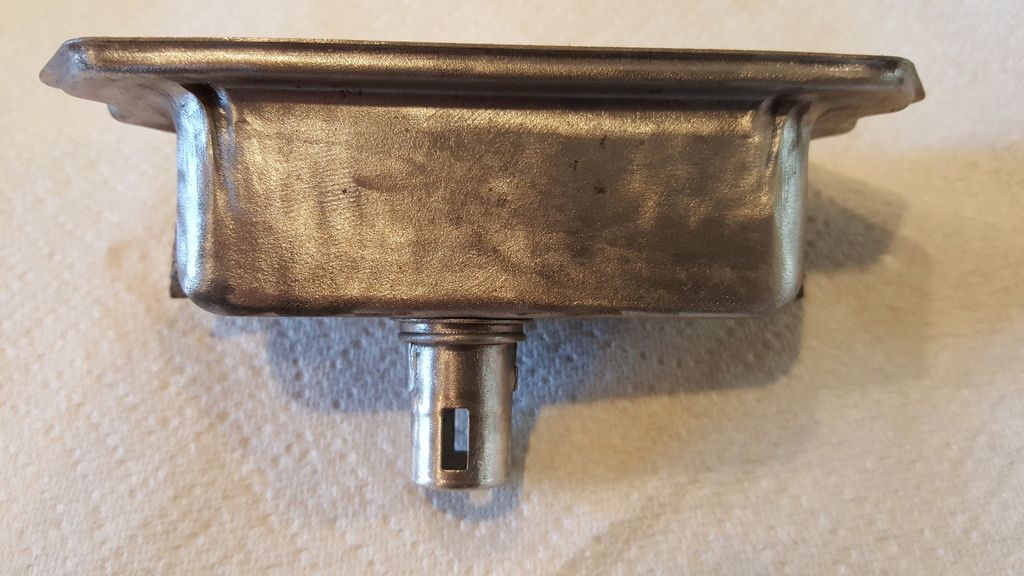
Plus a couple shots from different angles after a quick polishing with the Dremel:


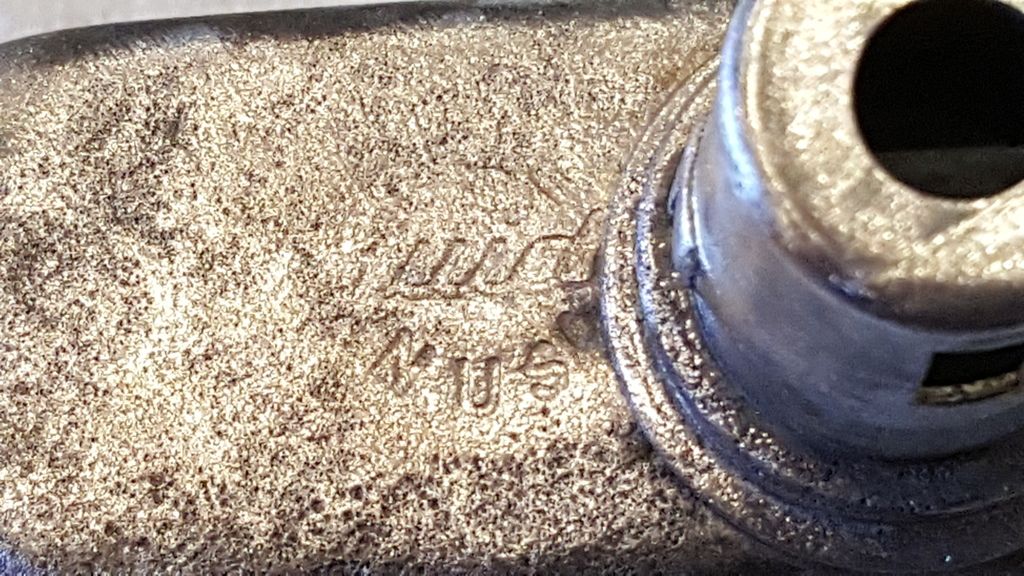
On this shot, you can make out the "Guide" maker's mark and part of the "Made in USA".  But, you can also see just how pitted the metal is from the corrosion.  The pitting doesn't go all the way through and will not be seen, since it is on the back of the housing.  So I think it is salvageable from that perspective.  I am thinking, however, that I will drill out the rivets that hold the bracket with the bad bolts and remove the bracket.  Removing the bracket will allow me to fully clean underneath it and install new bolts.  Then I can reattach the bracket to the housing, probably with pop rivets.


When I remove the bracket and do that part of the housing restoration, I'll post on that plus the painting and rebuilding of the unit.  Also, I plan to do the passenger side light, too.

In the final "analysis", the Evap-O-Rust did a great job cutting through the rust.  It wasn't able to get down into the pits, but I think it would have if I had left it in the solution for a couple of days longer. You may be able to see the difference between the straight out of the solution look and the look after polishing.  When the metal comes out of the tank, it has a dull gray look to it.  I used the Dremel and a high number (light grit) wheel and polished the gray off.  It would now be ready for primer, if I wasn't going to remove the bracket and replace the bolts.  If I do that soon, I should be able to avoid surface rusting.  If some does show up, then I'll polish it again and then prime. See you then....

Saturday, February 13, 2016

De-rusting while winter rolls on

Single digit temps outside make work on the truck kinda hard right now.  So, in an attempt to at least feel like I'm doing something, I am running a little test to see if I can salvage my park light housings or if I need to buy whole assemblies.  Since I'm doing everything on a shoestring budget, I would really like to be able to save the housings and only buy the new internals and bezel.  The glass was fine and cleaned up easily.  The outer bezel was toast, though, and will definitely need to be replaced. I'm also thinking about buying the LED insert instead of using the standard bulb.

It took a little persuading to get the nuts started on the housing.  At least I thought they were starting....  One of them sheared off and one of the came off.  So, if the de-rusting works, I'll have to replace one of the studs, at a minimum.  Here's a couple of shots of the housing from different angles:


Well, a couple of pictures tell the story.  You can clearly see that the inside of the housing is in pretty good shape.  The lens and gasket did what they were supposed to do and kept out the moisture. The backside and bottom were another story.  The last pic shows the broken stud.  I think that I can drill it out and replace it with a bolt of the same diameter.

To do the de-rusting, I'm using Evap-O-Rust.  I've used it in the past, with good success.  This housing is pretty rusty, so I'm going to be putting it to the test.  The tub that I'm soaking it in is not quite deep enough to cover the whole housing.  So this will be a 2 part effort.  I'll post an update when I get it done, likely next weekend.

Sunday, January 31, 2016

Old Man Winter Slows Things Down....

It's been a while since my last post.  At first, it was the holidays and lack of time to do work. Then, it was just plain cold in the garage and no fun.  So, I took a break.  But, I've been getting itchy to do some work, so I found some easy stuff to do.  This was a circle back around exercise and finish something that I had started several years ago: dashboard trim restoration.

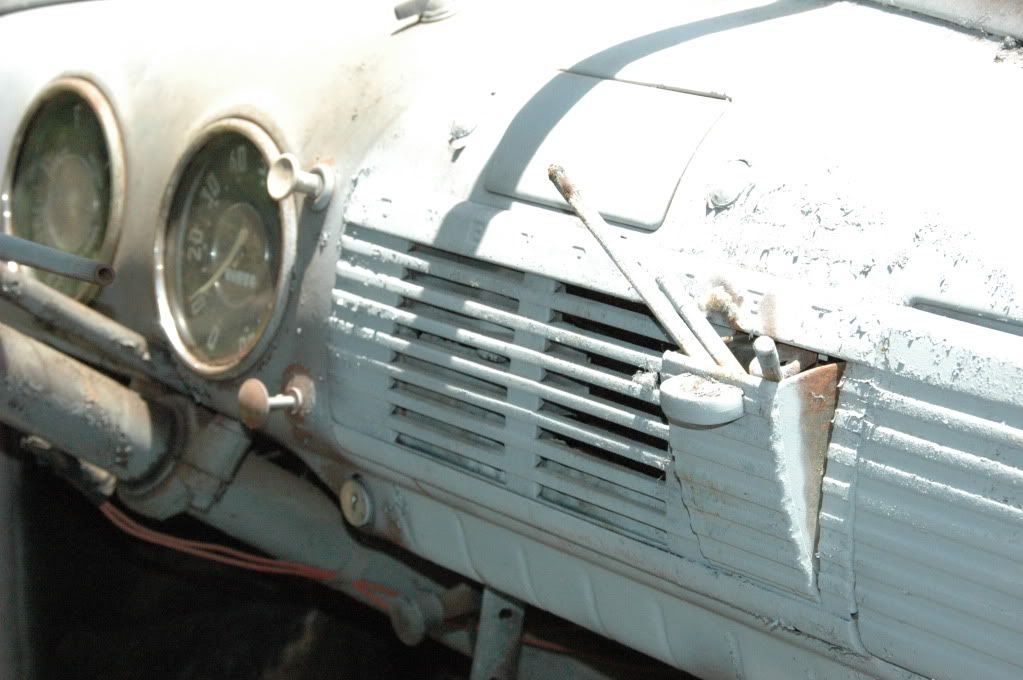
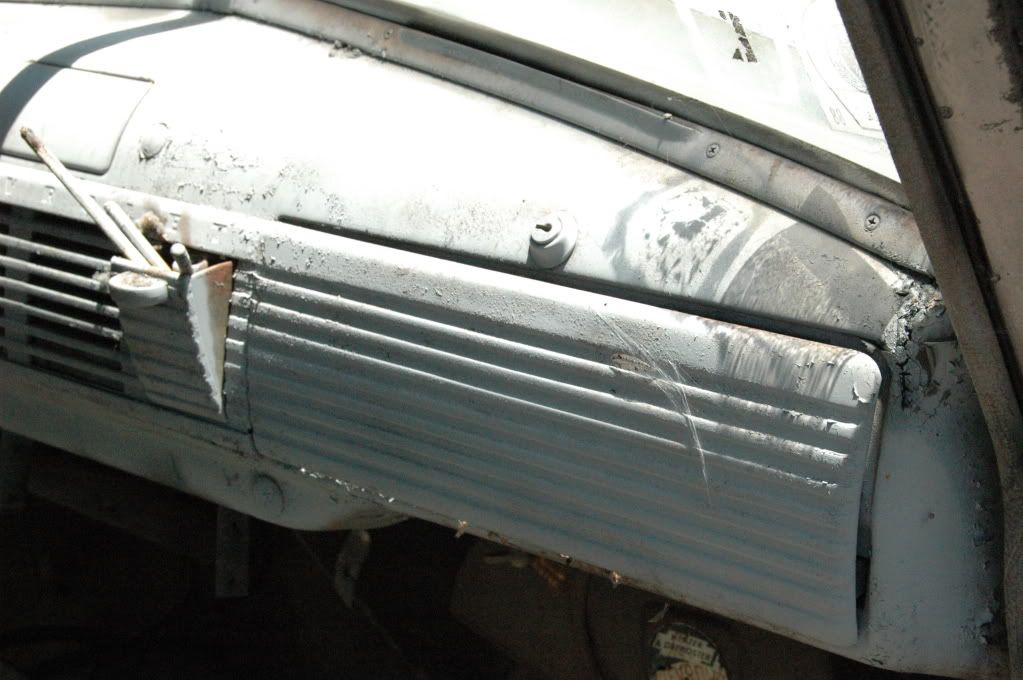
As a reminder, here is what the entire dashboard looked like when I got the truck:


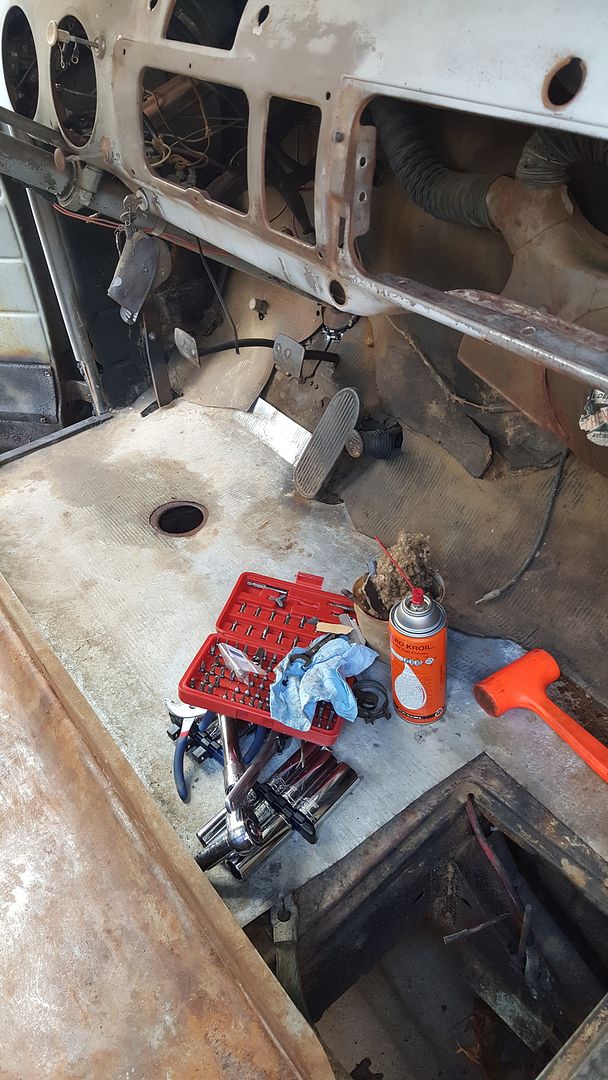
Ahhh, the flaking gray primer, the ashtray crammed full of primer gray pencils and cigarette butts and the rust.  Warms the heart!  This stuff was some of the first stuff that I removed and attempted to remove the rust from.  Here is the dash with the stuff gone:


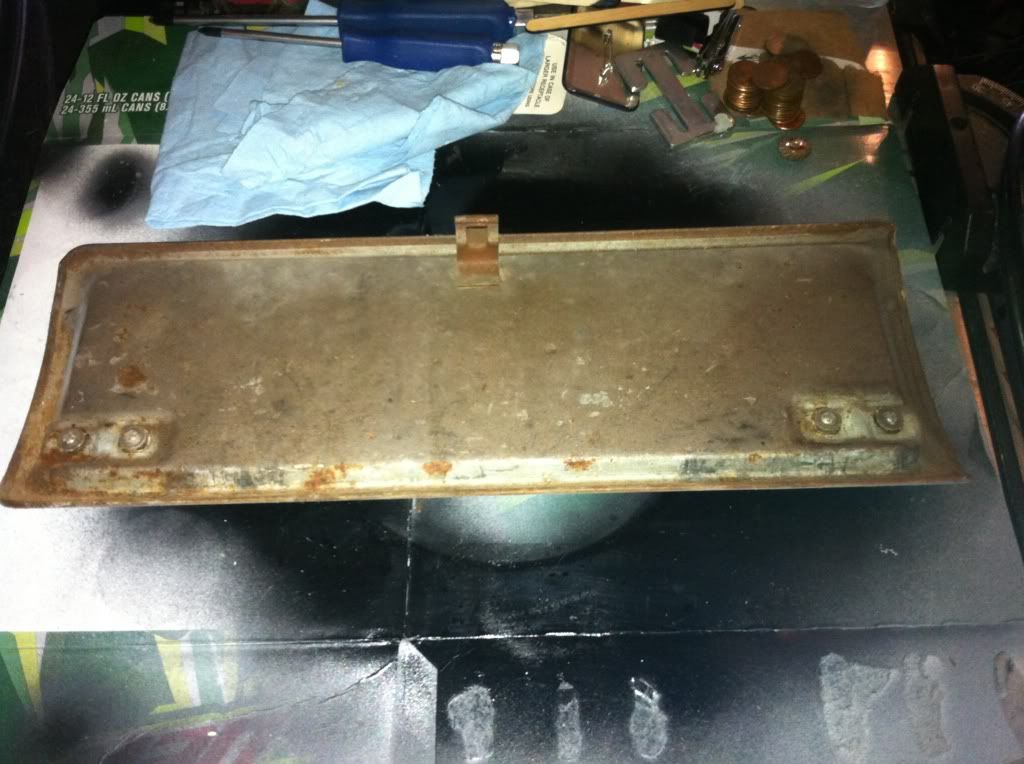
Here's a nice close up of the glove box door after removal but before cleaning:


Here's a shot of the inside of that same door before cleaning and rust removal:


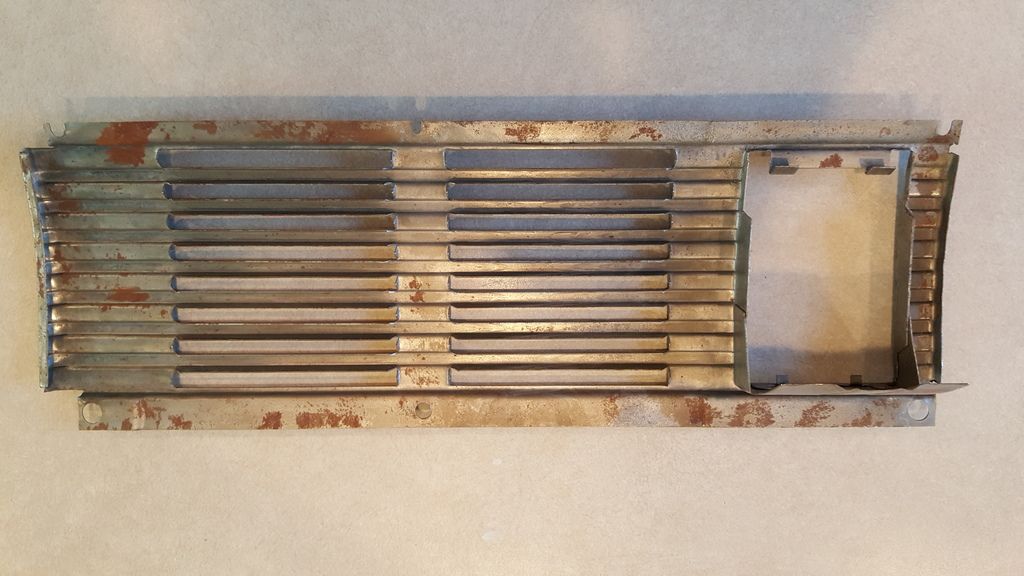
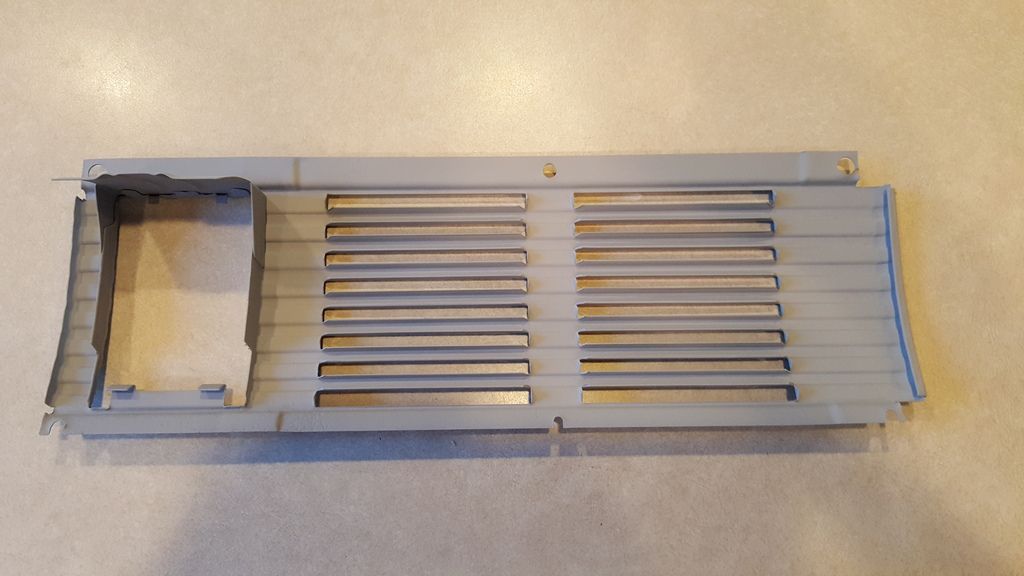
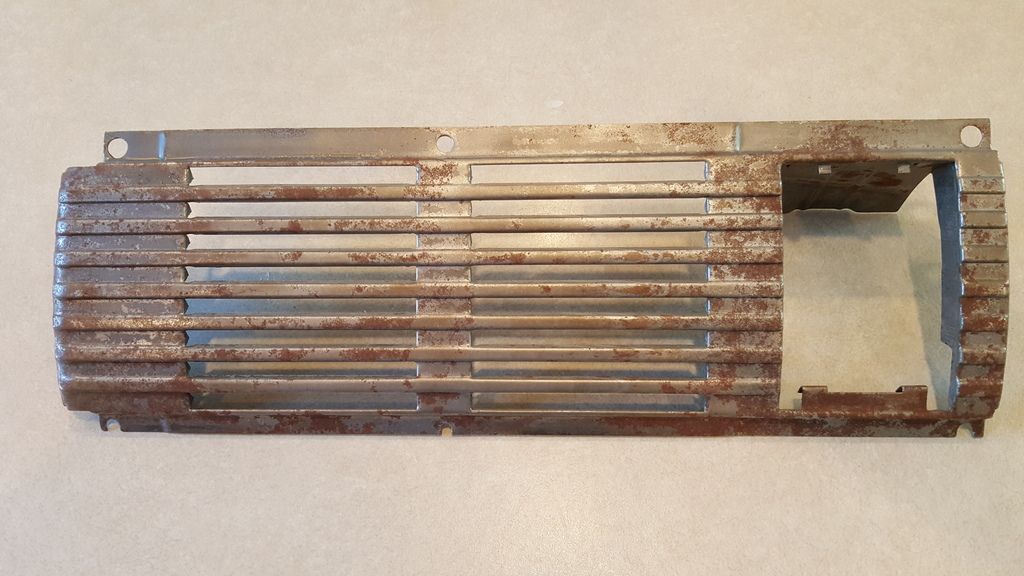
I did some work at cleaning up these pieces, as well as the trim that went around the speaker grill, the speaker grill itself, the ashtray and the lock.  For whatever reason, I never finished this work and the pieces sat in the basement for 5 years.  Last fall, I decided that I would start the circle back process and got going on finishing up what I had started.  I started with the ashtray and when that was done, moved on to the grill trim pieces.  Then winter hit and that effort stalled. Fast forward to this past weekend and I got the glove box door and speaker grill out and set to work.  Here is a shot of the grill (front and back) before cleaning:


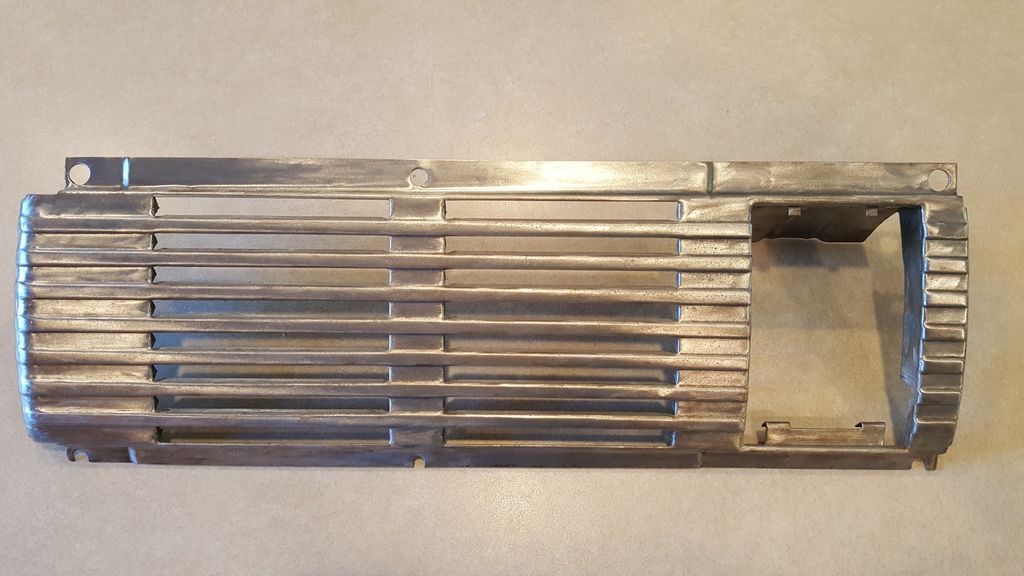
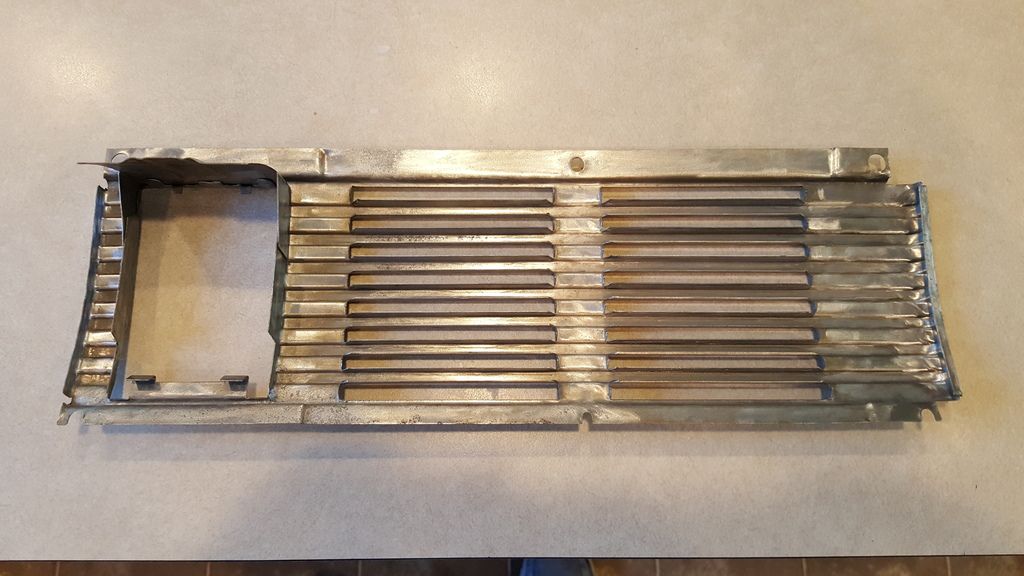
You can clearly see that after getting the thick crud off, I set it aside and it got surface rust sitting in the basement all that time.  Here it is (front and back) after getting it completely clean:


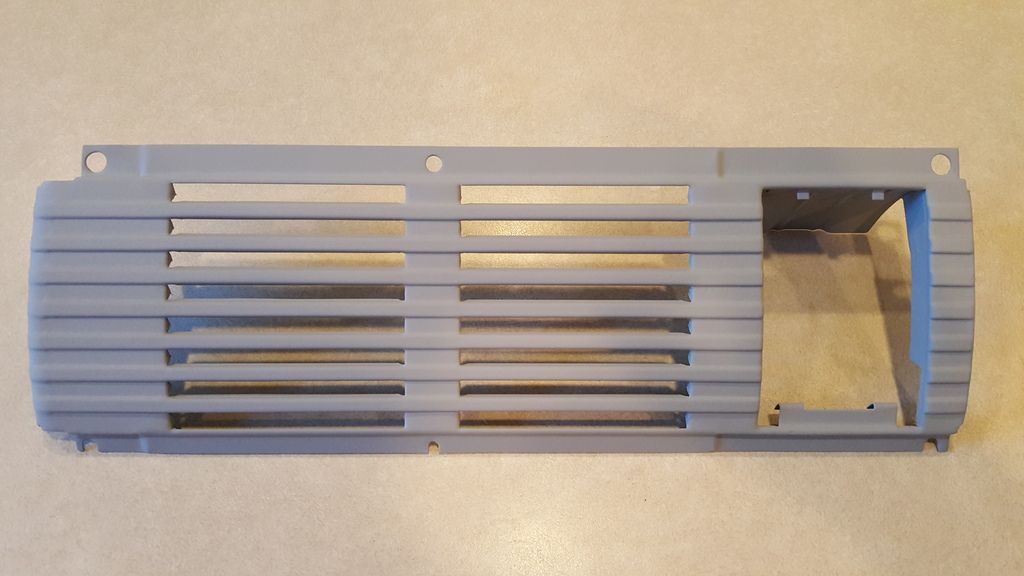
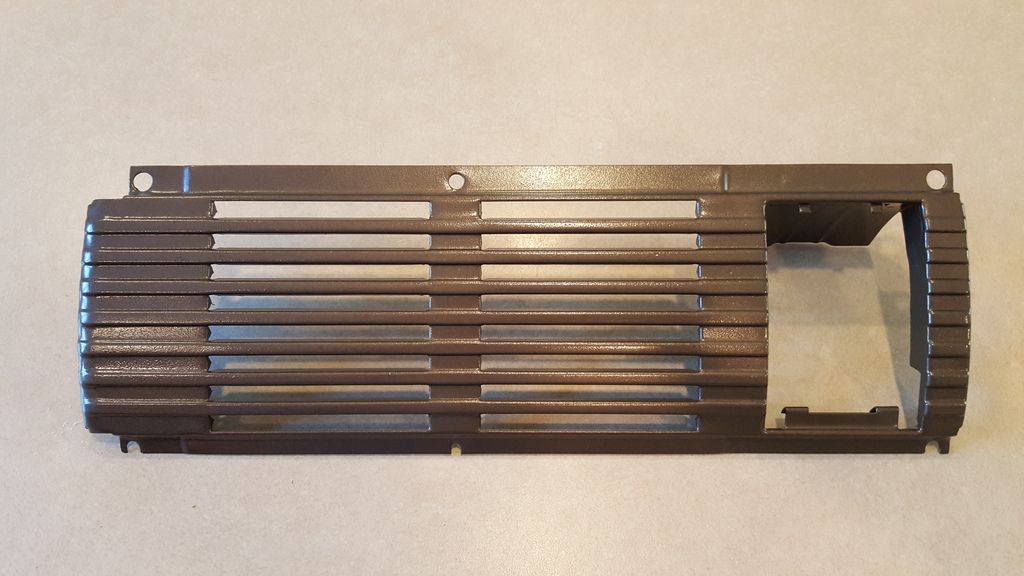
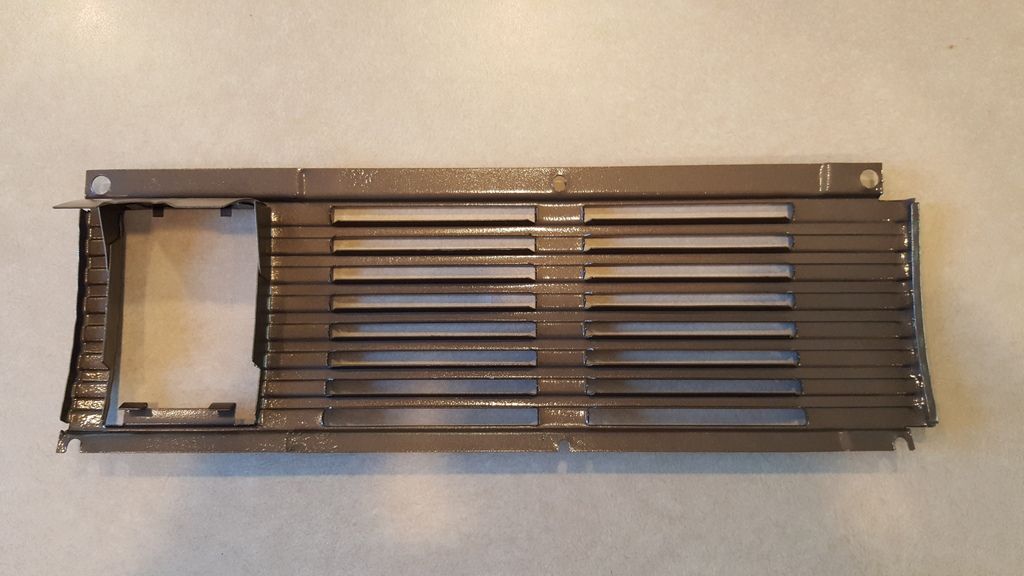
You can clearly see pitting in the metal on the backside of the grill, but it isn't severe.  Although it is severe enough that you wouldn't want to try to polish it out and clear coat it.  So instead, I primed it to ready it for paint.  Here it is:


And now for the money shots, here it is with paint:


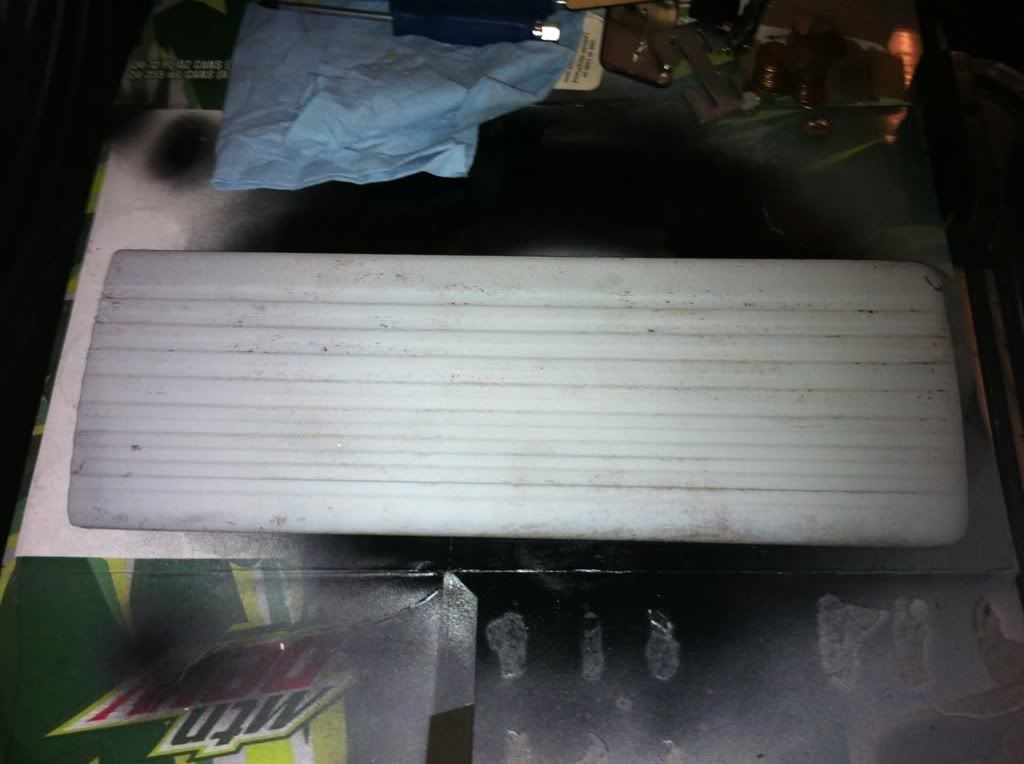
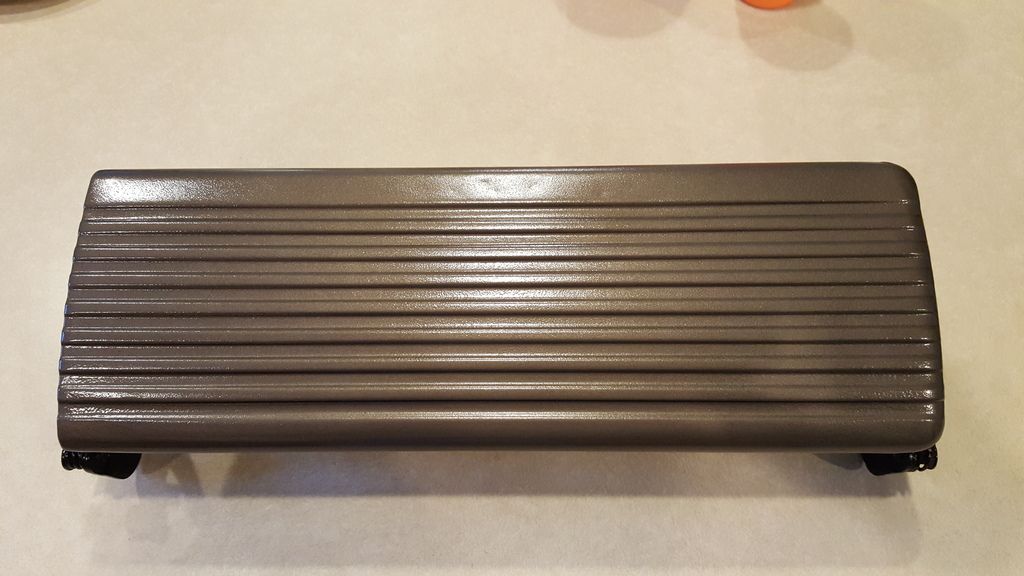
I didn't take any shots of the glove box door in the prep stages, but here is the front after paint:


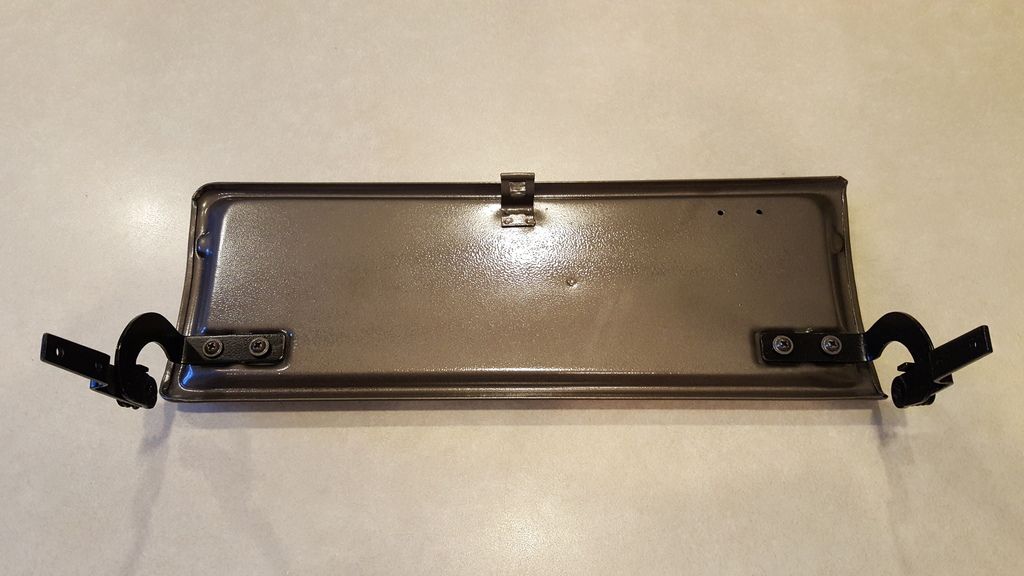
And now the back of the glove box door with the restored hinges attached:


I still need to order the letter decals for the speaker grill trim pieces.  When I do, I'll put them on and take a pic with all of the pieces lines up as they will be when installed in the truck.  I won't do that until I do some corrosion control on the dash and put a little paint down there, too.  I'm not doing a full restoration of the cab or dash, just enough to make it enjoyable while driving in it.

That's all for now.  It's still cold out there.  But spring is right around the corner and I have lots planned!  Stay tuned, same bat time, same bat channel.  For those old enough to remember.

Thursday, November 26, 2015

B-31 ! But Not BINGO!

As I mentioned in my last post, I wanted to do the rewiring / restoration of the remaining backup light (the Guide Lamp Company B-31) this weekend.  Before I got to the light, I had an idea of making a bracket similar to ones that I had seen on eBay for these backup lights.  They looked pretty straightforward, essentially just an L shaped piece of flat steel with a smaller flat steel piece that went on the opposite side of the bumper bracket.  They were held together with small bolts and nuts.  Like I said seemed pretty straightforward.  But the reality was not so much.  I got the flat stock, made the measurements and made my first bend.  So far so good.  But when I got it to the truck, I realized that the geometry of the bumper brackets (not right angles to the bumper) would require something that would pivot.  I had seen those, too, on eBay, but didn't want to spend the money to get them.  Guess what...I'll be getting them.  After making a valiant attempt at making my original idea work, I had to give up.  Wasn't going to happen.  So I'll be saving my money to buy the brackets online.  In the meantime, I went back to the B-31.

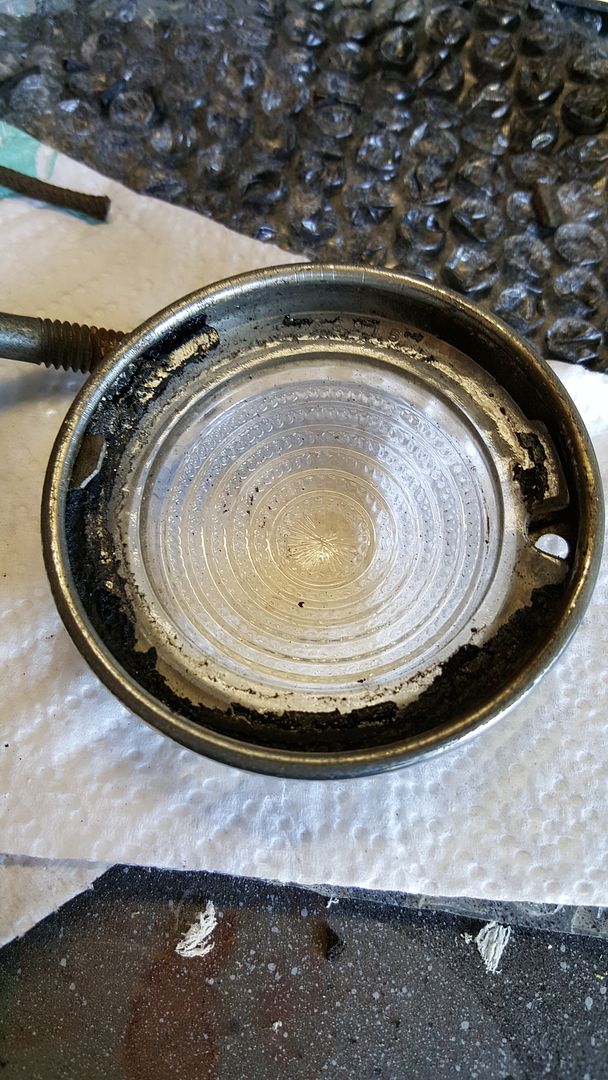
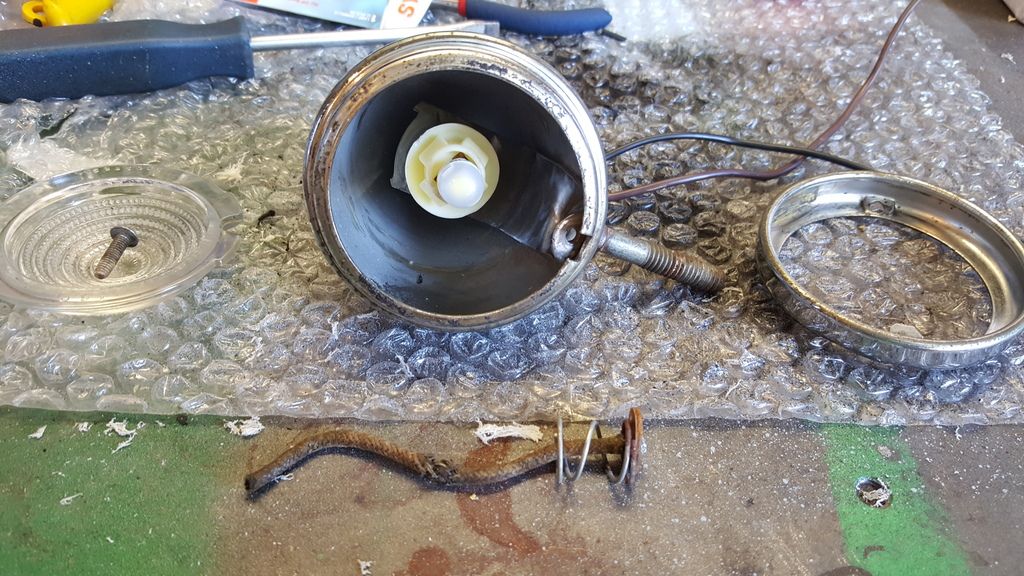
Disassembly was easy and the major parts looked like this when apart:


and this:


The black gunk in both pics are the remnants of the original gasket.  Not sure what they made it out of, but it came out in big hunks.  What remained came out with Formula 409 on a paper towel and some wiping.

You'll notice some rusting on the bulb housing, just like in the previous light.  The difference here, is that this light still has the original carriage bolt attached and it is press fit into the housing.  So it wasn't going to go anywhere.  That meant that I would have to remove the rust with the bulb housing still attached to the light housing or body.  That made things difficult.  After I was done, I was pretty happy with the rust removal, but decided that I would not paint the bulb housing like I did on the previous light.  I really didn't want to go through the masking of the interior of the housing and trying to shoot spray paint down the small opening of the light housing onto the bulb housing.  I guess that I could have done it, but likely with some mess to clean up.

Anyway, after that decision, all that was left was to trim down the bulb holder so that it fit and run the wires.  The trimming was just like the last one, so no problems there.  However, because the bulb holder was still attached to the light housing, I had to fish the wires through the bottom of the bulb holder and over to the light housing exit.  At first, I wanted to keep the original grommet in place, but the hole is small and using another piece of wire for fishing meant that I was going to try to get 3 pieces of wire through a grommet meant for 1 wire.  Wasn't going to work.  So out came the grommet and fortunately, it came out in one piece and was kind of pliable.  After that, fishing the light socket wires was straightforward.  Especially when I used my hooked pick to snag the wires from behind the light bulb holder and bring them to the exit.  After the wires were out, I reinstalled the grommet. Here is a shot of the major components after cleaning and with the new socket, wires and LED bulb installed.  You can see the old wire harness in the foreground and it is clear why I needed to replace it.


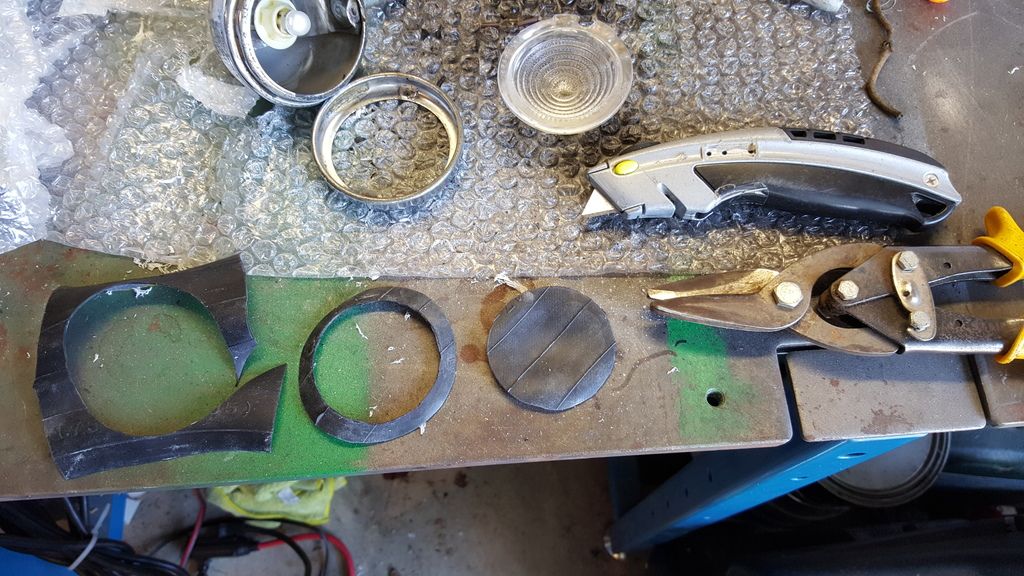
Then it was off to make another gasket.  I used the lens cover and the lens as templates for the new gasket.  The next pic shows the stages of cutting the gasket and the tools to do so.


Basically the stages are:

1.  Cut out a chunk of bicycle inner tube big enough to make the gasket and then cut it down the middle to make a square.
2.  Using the glass lens as a template, mark the outer dimension of the gasket and cut out the circle. I used the trimmers to cut out the circle.
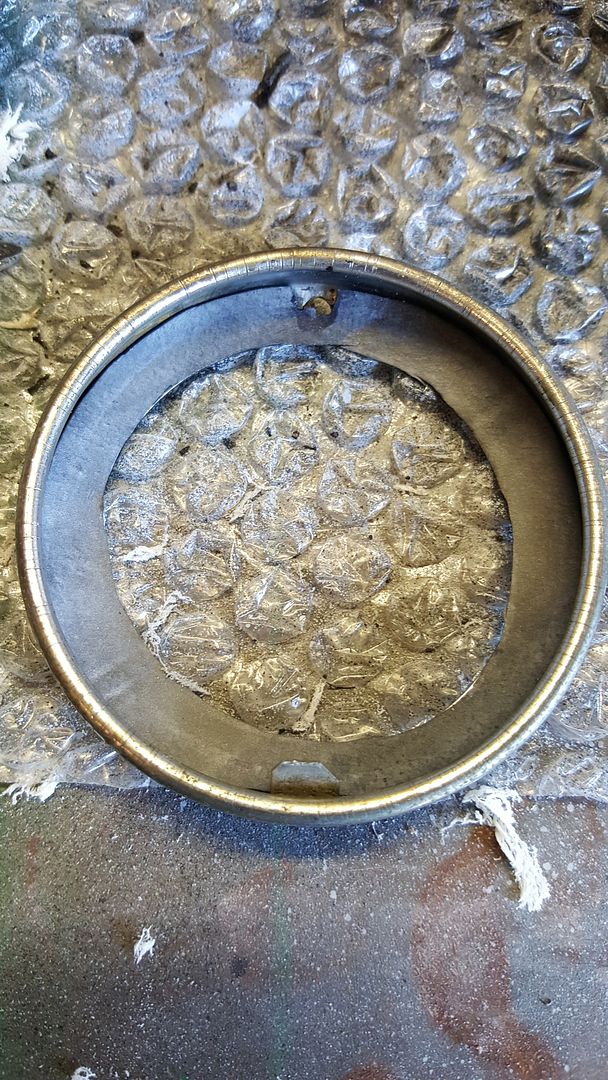
3.  Then put the circle into the lens cover and put the glass lens into the cover, but put it in backwards.  That way you can mark the rubber circle for the inside ring, using the lens cover.  I first used the box cutter to trace the outline of the inner circle.  Once I had gone around the circle a couple of times, the box cutter broke through in one place.  Then I used the trimmers to cut out the remaining parts of the circle.
4.  Put the gasket back into the lens cover and mark the opening for the drain hole.  I used small scissors to cut this out.

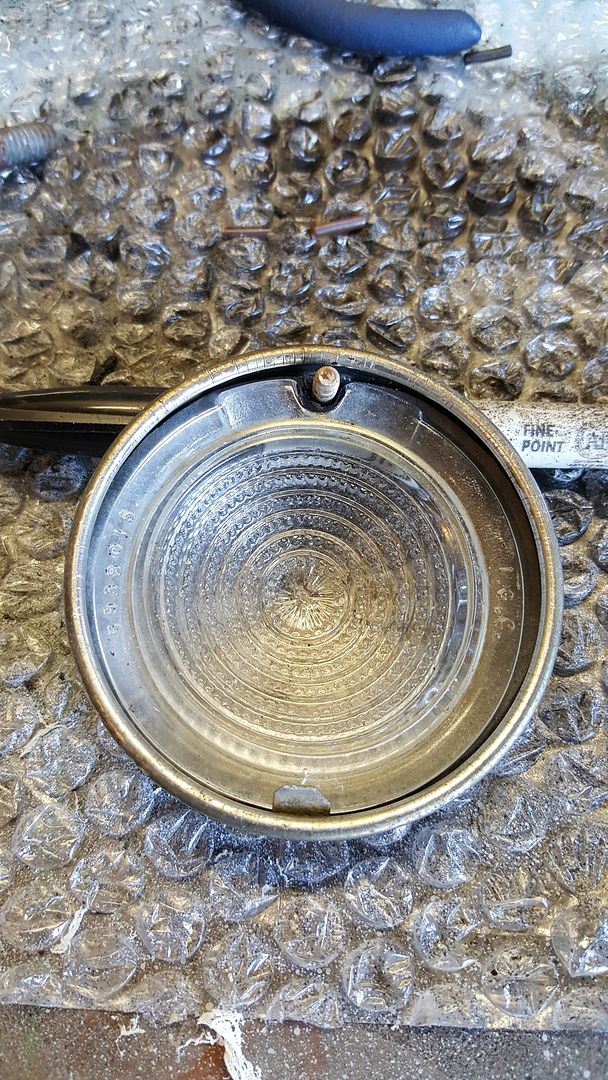
The test fit after all the cutting looked like this:


Here it is with the glass lens installed and the attaching screw through the hole.


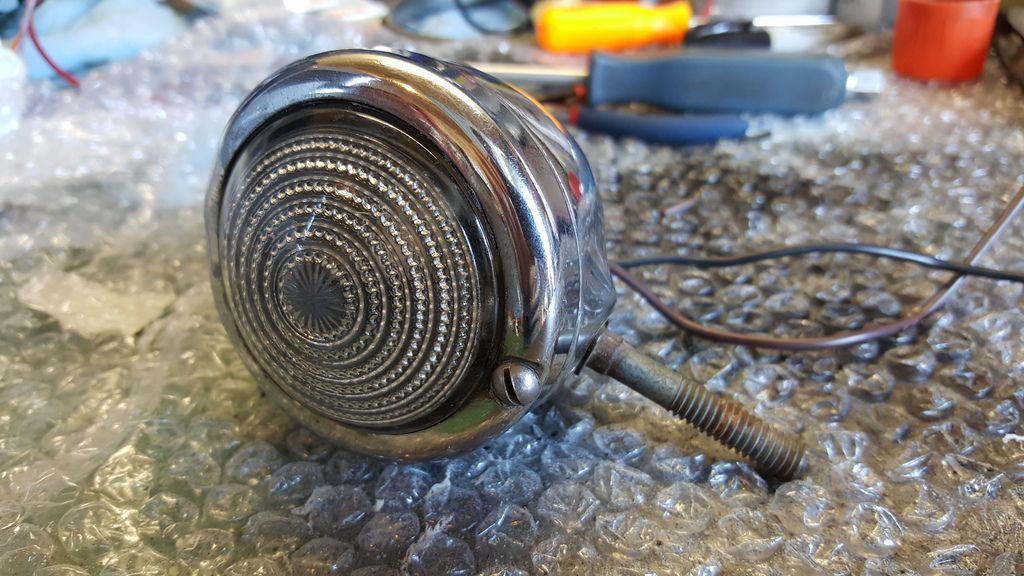
After all of that, it was time to put the lens and cover back onto the light.  When reassembled, it looked like this:


You can see that there is some minor corrosion on the original carriage bolt.  I'll deal with that later. I did do a test of the light to make sure it works, which it did, but I did not take a pic.  Kinda looks like the first one, although you can see the difference in the glass lens.  This one has the "beehive" lens and the BLC light has the "bomber" lens.  Both look good and unless you are right up on them, you could never tell the difference.  Personally, I like the difference.

Stay tuned for the next update.  I hope to work on the 3rd brake light next.  It is not an ordinary light and I'm excited to do the minor fixup necessary to make it work and hold up to the weather.

OBTW, Happy Thanksgiving, Everyone!