1953 chevy truck ad

1953 chevy truck ad

Sunday, January 28, 2018

Making Space On The Workbench

Hello Gray Ghost fans!

I had a productive day in the garage yesterday, finishing up a project that I had started a couple of weeks ago.  Initially, I had wanted to drain and remove the radiator from the truck and put it on the engine test stand.  But, it was really cold this weekend and as everyone knows, I'm pretty much a weather wimp.  Meaning, as I was inspecting the old radiator, it was so cold that it was making my hands hurt. So on my day off (Friday) I decided to not even work on the truck and instead put on my outdoor work gloves and tango'ed with the sweet gum tree gum balls....  What an awful tree, but I digress.  Coming back on Saturday, it was 10 degrees warmer, but still not conducive to crawling around on the concrete floor.  What to do?  I know, finish cleaning and then painting the flywheel and clutch cover.

To refresh everyone's memory, there are two pieces to the cover.  One of them attaches to the bottom of the bell housing and is rounded to accommodate the flywheel and the second is a piece attaches to the back of the bell housing to cover the remaining opening.  When I removed them from the old engine that is currently in the truck, they looked like this:

Inside - Before initial Cleaning


Outside - Before Initial Cleaning


Inside - After Initial Cleaning


Outside - After Initial Cleaning

All in all, it was a pretty dramatic improvement.  However, they were still not ready to accept paint.  There was still an oily film on them and clearly, there is some surface rust.  All of that had to go, but I wasn't sure how I would get that last bit of oil off.  The rust would be easy, after the oil was gone.

Then, while cleaning up from working on the water pump installation, I had an epiphany.  Why not use my citrus based hand cleaner?  That stuff is amazingly good at getting the crud off of my hands, why not give it a try.  The hand cleaner that I use is this stuff:


So, I squeezed a little on one of the pieces and used a damp paper towel to work it around a small area.  To my surprise, the paper towel turned a nasty gray/brown.  It was working!  I took it to the hose outside and washed it off then dried it.  I ran my finger over the area and there was no oily feeling!  Hello!  Here we go!  Working a little area at a time, because the cleaner tends to dry out, I cleaned both pieces completely with the hand cleaner.  After cleaning, washing and drying, I then washed them down with brake cleaner.  The thought here is that there could be some citrus oil residue and that would mess up future paint.  After the final cleaning, it was time to deal with the last bit of rust.

Being cold, I really didn't want to deal with cleaning out the garage to get to the blast cabinet and compressor.  So, instead, I used the Dremel and a sanding wheel.  I did a quick comparison and figured time-wise, it would be about the same time and easier on me to just use the Dremel.  In reality, it was quick and easy.  Sorry, but I didn't take any time for pics at this stage.

After using the Dremel, it was a quick wipedown with mineral spirits and when dried, primer.  I've got this process down by now.  Heat the metal up a little with an old hair dryer, apply primer and then help the primer flash over with a little more hair dryer.  This allows you to paint when it is cold out and speeds up the process.  After primer, it was time to spray on some of that beautiful Chevy Blue paint.  Working one piece at a time, they both got done and then moved to the basement so the paint could fully cure overnight.

Here's what they look like now:

Inside - After Cleaning, Priming and Painting


Outside - Outside After Cleaning, Priming and Painting

To give you all a reference point as to where these parts actually fit, here is the larger piece attached to the restored bell housing:

Viewed from bottom of bell housing


Viewed from back of bell housing (side that faces the transmission)


Smaller part attached to side of bell housing that faces the engine block

So there you have it.  A small project finished up on a cold January day.  It needed to be done, so that was good.  These parts were taking up a huge space on the workbench, so having them restored and off the workbench is also good.  Figuring out another way to degrease parts without having a parts washer, also good.  All in all, it was all good.


Before
After

Monday, January 22, 2018

Math Stinks and Other Things

Well Gray Ghost fans, the title says it all.  Math stinks.  Probably because I stink at doing it....  Regardless, today was supposed to be an easy trip to my flaps (friendly local auto parts store) to get a smaller fan belt and then off to the radiator removal from the old truck.  A funny thing happened on the way to the radiator.  It's called three trips to the flaps to finally get the right fan belt.  Clearly my math, my measuring of non-linear distances and my logic were all wrong.  That left me with trial and error, which lead to the three trips to the flaps.  In the end, I got the right belt and was able to install it.  Here's the money shot:


A belt that can be installed onto all three pulleys and allows for the alternator to be positioned away from the block but within the slot of the upper bracket is a very specific length.  So trial and error save the day, just not the gas in my car.

You may have guessed by now, but I never got close to the radiator.  That'll have to wait for my next day in the garage.

And that's the point of this post.  This is one of those things that happens when doing this kind of project.  You can't really factor it into your schedule.  You just have to deal with it.  It's not a sprint, even though I really want to get to the engine swap.  All things in time.  Easier said than done.

Cya next time, Gray Ghost Fans.

Sunday, January 21, 2018

As The Water Pump Turns

Hello Gray Ghost Fans!

Well, it's the next day and time for me to wrap up the water pump installation.  What's left you ask?  Well, plenty.  Starting with the RTV, the instructions tell you to only hand tighten the bolts and let the RTV cure for an hour.  I let it go overnight.  Frankly, I was so tired after yesterday, that I crashed on the couch after I got cleaned up.  So this morning, a couple of quick turns of the wrench and everything was as it should be. 

Next, it was off to the flaps to get supplies.  Of course, the set of hex sockets that I already had did not have the one size that I needed to tighten the plug in the extra hole in the water pump.  I also needed some heater hose.  Although I'm not ready to hook up the heater, I need to get some hose on those outlets.  If I don't, then as soon as the pump starts working, they'll spew coolant.  So, looping a section of hose from one outlet to the other solves the problem for now.  I measured the hose barb and headed off to the store.  Supplies in hand and back home I go.

Flanging down the plug was simple and quick.  On to the hose.  I measured the hose barbs before I left and found out that one of them was larger than the other, but only by 1/8".  No problem.  I bought hose to fit the smaller diameter barb, thinking that I didn't want to use the larger diameter hose and have a leak.  I'd just force it on...it's only 1/8", right?  Well, not so much.  So...back to the auto parts store.

Remember the odd swirly thing from yesterday's post?  It looked like this:


In the thermostat housing


On the workbench, top view


On the workbench, side view

So after a discussion on the truck forum and a little research, turns out that this is a heater core flow restrictor.  Apparently, some of the old heater cores could not handle the extra pressure when the engine was revved.  Meaning higher engine RPM's drove the water pump to higher RPM's.  The added coolant pressure could blow them out.  So, people sometimes added them to prevent the heater core blow outs.  While not necessary for the heater core in my truck, I thought I might make a compromise since I had to address the hose barb that didn't fit my new hose.  What I did was to get a new hose barb that fit the opening in the water pump, but had a smaller inner diameter.  The thought is smaller inner diameter, lower coolant pressure going to the heater.  We'll see.  Here are two shots of the old and new hose barbs that show the differences:


Bottoms


Tops

The difference in inner diameter is 1/8".  The outer diameter is identical and is 3/4".  The hose connection point is the same as the other original barb and fits a 5/8" hose.  So, after all the fuss, it got installed and looked like this:


Now there was nothing left to do except add that hose!  Finally done, it looks like this:


All that fuss so that I could add a simple loop of hose and avoid a flood on the garage floor.  However, it was not all just for that.  Once the engine is in the truck, I'll be able to restore the existing heater.  Once that is done, its a simple matter of running two separate hoses, one from the pump to the heater and one from the heater to the coolant return point on the thermostat housing.

Now, I can drain the coolant from the engine that is in the truck.  Once that is done, I'll move the radiator over to the engine on the test stand and make those connections.  Then I can fire up the engine on the stand and test out that new water pump and the old radiator.  Hopefully, I can reuse the old radiator....  So, that's my game plan for the next time in the garage.

Saturday, January 20, 2018

Water Pump Turns Into A Can Of Worms

Hello Gray Ghost Fans!

A break in the weather made for a good day to be in the garage. I've been wanting to do the water pump replacement for quite a while.  Here is the link to the whole sad story on why I needed to replace the water pump.  However, I decided to wait until I was closer to doing the engine swap.  Now, I'm getting close.  So to the garage I went.

Taking the water pump off was pretty straightforward.  First, you have to drain the coolant.  That's pretty easy to do with the petcock on the radiator.  Due to the danger of animals getting into the old coolant, I always try to be careful and not spill any.  I collected the old coolant and have it in plastic jugs.  Tomorrow I'll take it to the recycling center at the dump.  So far, so good, right.  Right.  Too bad it never ends when it's going so well.

Anyway, all the coolant that would drain out was out and collected.  Time to get to that pump.  First, though, I had to get the alternator out of the way.  The bolt that holds one of the alternator brackets also holds the water pump in place.  So, I loosened the alternator, removed that bolt and swung the alternator out of the way.  Next, the other 3 bolts that hold the water pump in place.

After 66 years, that old water pump was really stuck in place.  A couple of blows with the persuader and it started to come loose.  Then it happened....  The water pump came loose and all of the coolant that hadn't drained out flooded out, right onto the garage floor.  A quick panic later and I'm crawling around mopping up the mess.  Holy cow!  A whole roll of paper towels later...and it's cleaned up.  Time to move onto the work.

Before I took the pump out, I removed the old heater hose that had been looped between the water pump and the thermostat housing.  The hose barbs that were attached to the water pump and the thermostat housing were crusty.  So, I took them both off and gave them as good of a cleaning as possible.  When the barbs were out, I noticed something sticking out of the thermostat housing.  It looked like this:


After disassembling the housing, I removed the part.  It looked like this:


I have no idea what it is or what it is supposed to do.  All I do know is that it isn't a GM part, so out it goes.

With the housing apart, it was time to replace the old thermostat.  The old one looked like this:


Pretty crusty!  Believe it or not, the black area surrounding the old thermostat is the old gasket...or what is left of it.  A little scraping and new thermostat and gasket and we're looking up!  It looked like this:


You can see a tiny bit of RTV under the gasket.  Just a thin layer to make sure it stays leak proof.  I then reinstalled the old hose barb back into the housing and added the upper part of the housing.  Once it was all back together, it looked like this:


I know what you're thinking.  You cleaned what?!?  Trust me, I cleaned the heck out of it.  In this view, you can see exactly where that water pump needs to go.  You can also get an idea of just how much coolant came pouring out when it flooded! 

With the thermostat rebuilt, it was time to put that new water pump in place.  Before installing it onto the engine, I put the other heater hose barb onto the new pump.  The pump had a second opening, which I didn't need, so I installed the plug that came with the pump.  Once it was on the engine, it looked pretty good:


Remember the can of worms in the title?  Yeah, well this project just keeps giving and giving.  Notice the pulley in the pic?  Yeah, so what?  Well, I'll tell you what.  This engine originally came in a car, not a truck.  The original water pump was a "long shaft" water pump.  Those don't fit in the truck without some modification to either the pump or the radiator.  This pump is a modified pump and is a "short shaft" pump.  So far, so good.  The problem is that the diameter of the pulley is smaller than the original.  So... I need a new fan belt.  That one I did not see coming.  So tomorrow I'll be heading to the auto parts store to get some heater hose and a new fan belt.  It seems as though I'll have to do some math to figure out the difference between the large diameter and small diameter pulleys and how much smaller my new fan belt should be.  My old nemesis, math...( (2 x radius of large diameter pulley) - ( 2 x radius of small diameter pulley) ) = number of inches less of fan belt required (I think).

So, a rambling post.  Sometimes it's hard for me to be succinct.  Anyway, one more link in the chain is complete.  That much closer to doing the engine swap, so it's all good.

Friday, January 12, 2018

Scrape, Degrease, Repeat, Repeat and Repeat Some More

Hello Gray Ghost Fans!

I had a day off from work today, so it was off to the garage.  Even though it rained off and on throughout the day, I took the opportunity to paint the door trim that my son gave me for Christmas.  This is the metal that surrounds the door card.  The door card covers the open areas in the door that are needed to install the window regulator and door latch.  No pics of that, since it was new metal, it only needed a quick wipe down with some mineral spirits to remove the protective oil coating and then primer and paint.  Right now, it's in the basement so the paint can fully cure.  Then I'll put it in the truck.

After painting the trim, I decided to go under the truck and try to remove to access panels from the old bellhousing.  They'll be needed on the replacement, so I needed to get them off, cleaned and ultimately painted.  It took a little finagling to get the larger of the two covers out from under the bellhousing.  The second one required a ratchet with a flathead bit in it.  Otherwise, I couldn't get enough torque on the screws to get them out.  Once I did that, out it came...and what a sight they were.  Here is what they looked like right after removal:

Outside of the covers


Inside of covers

To really understand how much baked on, caked on grease, oil and dirt there is, you need to enlarge the pics.  The layers of crud were so firmly attached, I had to scrape every part of each surface with a flat blade screwdriver.  The scraping required a fair amount of force, too.

After scraping the majority of the crud off, I washed each piece in brake cleaner.  Scrubbing and scrubbing each part, then a wipedown with a rag and more brake cleaner.

The parts aren't completely clean, yet, so they can't receive paint yet.  Another round of cleaning will get them there.  After that, they'll need a quick media blast to get off the small amount of rust that is present.  So yes, the oil is a double edged sword.  It protected the metal all those years that the truck was sitting out in a field, but it is a pita now that I have to get every bit of it off.  So here's where we are after the first cleaning:

Outside of covers


Inside of covers
Pretty darned amazing!  They hardly look like the same pieces!  It's very rewarding to be able to bring these old parts back to life.  Each of them is structurally as sound as they were 60 years ago.

In other news, I'm currently gathering all of the parts to do the engine swap!  That is coming as soon as the weather warms up!!  Hopefully, it won't be much longer and the Gray Ghost will be moving under its own power!!!

Here's an example of the bits and pieces that I need to get together:

side facing the transmission

side facing the crankshaft

Of course, it's the clutch pilot bearing (or bushing, to some)!

Here's a short quiz:  how hard is it to find 7/16-14 x 1 3/8 bolts that have a 7/16 unthreaded shoulder?  Answer:  impossible!  Too bad for me, because that is exactly what I needed to mount the rear motor mounts to the bellhousing.  So...after searching and searching, I decided to make my own.  Well, not actually make bolts, but rather to modify store bought ones to match the specs that I need.  So, I got 4 bolts that were 2" long and had an unthreaded shoulder that was about 3/4".  Before cutting the bolts to the correct size, I threaded a nut onto the bolt.  After cutting the bolt down, removing the nut is like chasing the threads.  The nut corrects most of the thread that may have been damaged during the cutting.  After that, it was just a matter of using my tap and die set to cut more threads into the shoulder.  It took a little trial and error for each of the 4 bolts, since not all 4 holes in the bellhousing were cut to the same depth.  Here are the 4 bolts and the factory required lock washers:


I know it doesn't look like much and maybe like I'm too obsessed with having things just right, but there is a reason that GM wanted that last portion of the bolt to be full diameter and not reduced diameter due to the threads.  That part of the bolt bears the entire weight of the rear of the engine, two on each side.  They aren't the prettiest bolts around, but I think that they'll work, which is all I need.

Thanks for reading.  Clicking one of the "like" or other buttons at the bottom would be helpful to me and I promise that I won't know who you are!


Sunday, December 17, 2017

Fall is over, time for some catching up!

Hello, Gray Ghost Fans!  It's been a couple of months since my last update and I've been quite busy, so there's lots to report.  When I started my blog, I wanted to document the process.  Not only from a technical perspective, but also from a practical perspective.  What I mean by that, is that I'm not an expert in any of this.  I'm learning as I go along.  I think that most people are in the same boat as me, although some may have had auto shop class or metal shop class in high school, where I didn't have either of them.  So, my blog would be about the good, the bad and the ugly of my experiences.  To keep with that theme, I have to come clean and report that a large part of my absence during the fall months was due to recovery from an injury sustained during some of the electrical work at the rear of the truck.  Due to my scatterbrained self, I had been up/down/under the bed of the truck so many times that I ended up hurting my knee.  After suffering for a couple of weeks, I went to the orthopedic.  Long story short, my cartilage is wearing thin.  After several PT sessions to build up the muscles around the joint, I can mostly walk without pain...so back to work on the Gray Ghost!  I include this personal information as an illustration of life interfering with working on the truck.  It's all a part of the journey, so it adds to the experience and counts when you start a project like this and try to figure out how long you think it's going to take.

The first project that I spent some time on this fall was refurbishing the horn.  I figured that I should finish that up, since it's been in the basement for almost 10 years and the wiring harness came with the horn feed and relay included.  The bracket had been one of the first things I restored, as it was an easy piece to experiment on with different rust removal techniques.  Sadly, I have to report that there was an accidental dropping of the piece while the paint was still tacky, so a part of it got bollixed up and will have to be redone, but all in all it looks ok.  Here is a shot of it on the workbench:


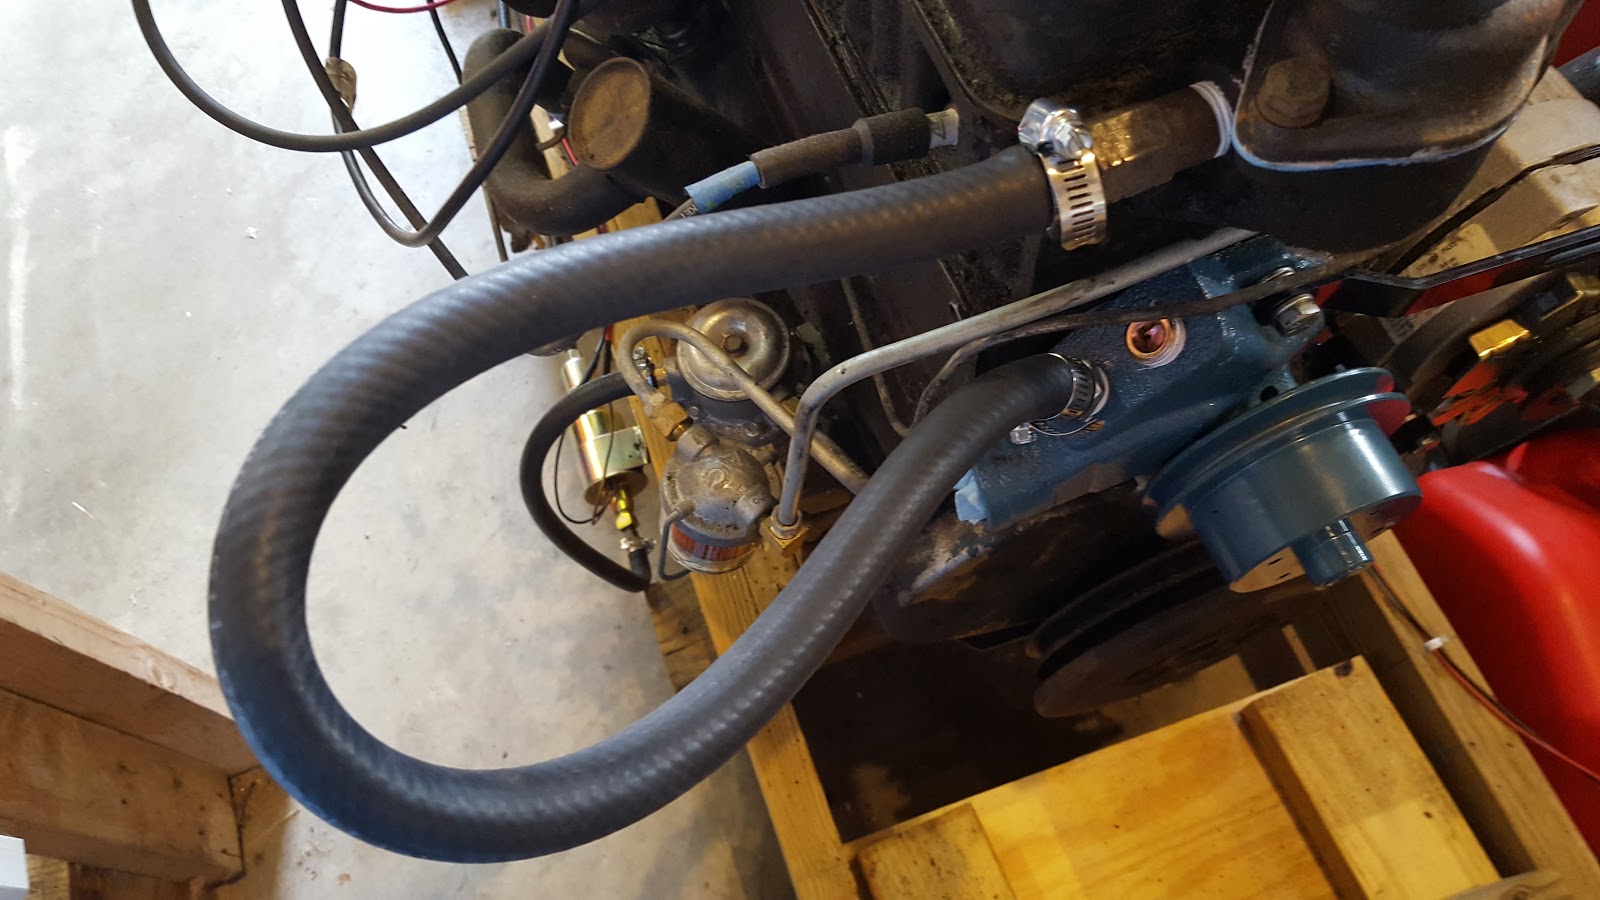
The next project is an experiment.  I've done some reading up on adding an electric fuel pump to the fuel system.  Not in place of the mechanical pump, but in addition to.  I bought the parts back in the summer and finally got around to plumbing it into the engine test stand.  I haven't finished this task, as I had to move the gas tank to fit the pump into place and I have to figure out where the final tank place will be.  For now, the fuel pump looks like this:


You can see the test stand gas tank (from on old Honda lawn mower!) sitting on the garage floor.  You can also see the wiring from the pump.  The brown/red wire running to the fuse block and the black to the momentary on/off switch and ground.


This shot just shows the connection from the electric fuel pump to the mechanical pump.  From what I've read, the pressures are not additive, so it is like having a backup to have them both in line.  Right now, it's just wired up for priming the carburetor.  If I like how it works out, I'll do the extra work to wire it into the truck to make it work both as a carb primer and as a part of normal operation of the engine.

The next project was sandblasting and priming/painting the sheet metal in front of the radiator.  The radiator hold down was first.  It is done, but I did not get a pick of it.  The next piece is the hood latch that connects to the sheet metal filler panel between the radiator and grill.  It cleaned up well and look like this:

Front

Clearly, you can see that one part of it only got primer.  I didn't see this until after I reinstalled the latch return spring.

Back

I like the fact that in the front picture, you an clearly see the GM stampings.  They were not visible on the part before blasting.

Then, I started the hunt for everything necessary to convert my engine from an automatic transmission to a manual transmission.

During the wiring process, I made the decision to use a modern, 4 wire ignition switch instead of the original 3 wire switch.  This lead me down the path of switching from the stomp starter, with only 1 electrical connection to the solenoid based starter with 3 connection points.  The solenoid starter is currently wired up to the test stand and works, so it was an easy decision, even though I really like the stomp starter.  Maybe down the road I'll make the switch to a 12V stomp starter, but for now I just want to get it running.

Once I made the decision to go with the 12V solenoid starter, I had to get a new flywheel.  The ring gear tooth count is different between the 6V and 12V flywheels.  I found one on eBay that looked like it could clean up ok.  It looked like this when I got it:


I found a machinist locally and had him hot tank it and grind the surface.  When it was done, it basically looked like new:

clutch facing side


engine block facing side
(note the timing BB at the 10 o'clock position of flywheel)

Next on the list was a new clutch.  After some research and forum board discussion, I settled on one from O'Reilly Auto Parts.  It looks like this:


Here you can see that it is a complete set, including a new pressure plate, friction disk, throwout bearing, pilot bushing and alignment tool.  Prior to actually buying it, I took the flywheel up to the local store and had them test fit it on the actual flywheel, just to make sure.

Next it was on to the clutch housing (gm term) or the bell housing as most people know it.  Once again, I turned to eBay and scored one that looked like it was in good shape.  Dirty, but restorable.  Here's what it looked like when I got it:


With a quick trip back to my machinist and a hot tanking of the parts, it was off to the sandblaster to deal with the flash rust that formed after degreasing in the hot tank.  Once I had blasted the bellhousing, I primed and painted it with high temp engine paint.  The color that I chose was Old Chevy Blue.  Now, this is not the correct color for a truck bellhousing.  However, it is the correct color for the engine, since it came out of a passenger car.  Truck engines were painted gray, while passenger car engines were painted blue.  Long ago, I had made the decision to celebrate the engine's history, not hide it.  So Old Chevy Blue it was.  It now looks like this:


The clutch fork was dipped in Evap-O-Rust, which really ate the flash rust!  After derusting, it too was primed and painted.  Although this part was painted semi-gloss black and looks like this:

In the Evap-O-Rust


Cleaned, primed and painted
(This view shows the clip that holds it to the stud inside the bellhousing)

Then came the bolts...to hold the flywheel to the crankshaft and to hold the pressure plate to the flywheel.  They look like this:

Flywheel to crankshaft
(Box shows both GM group and part #)


Pressure plate to flywheel

At this point, all I'm missing are the rear motor mounts that attach to either side of the bell housing and the bolts to hold them in place.  Once I get them, I'll have everything necessary to do the engine swap!  I still have some engine work to do to get it ready for the swap.  I hope to do that work over the winter, so that by spring...it'll be time to do the swap and make this truck move under it's own power.  Cross your fingers, toes, eyes and anything else that will cross!