1953 chevy truck ad

1953 chevy truck ad

Saturday, July 17, 2021

The Gray Ghost blog passes 10,000 page views!

Hello Gray Ghost fans!

Our blog has just passed a milestone.  We've now had 10,000 page views!  I'm not sure what expectation I had when I wrote the first post, if I had any expectation.  So this is very gratifying.  I've tried to write all of my posts to be informative and a potential source of help for first time restorers like myself.  I've also taken the writing style or perspective of telling my friend what I did over the weekend, while sitting in his office on Monday morning


I hope everyone has enjoyed reading it as much as I have enjoyed writing it!  Rest assured, there will be plenty more to come in the near future.  In the meantime, you can always enjoy the library of pictures that's attached on the side.  Here's a teaser pic of current, ongoing work that will make it into a future post...enjoy!


Layout of hinge pocket

 Thanks Everyone!

Monday, June 7, 2021

Looking Back At The Rabbit Hole

Hello Gray Ghost Fans!

Well, the title of this post says it all,  I'm finally out of the rabbit hole! That means that I finally wrapped up the cleaning of the engine bay and a complete refurbishment of the front suspension wear points!  But first, a reminder of where we started:


Passenger Side Frame Before Cleaning

Steering Box Bracket and Pitman Arm Before Cleaning

Passenger Side Front Shackle Before Cleaning and Replacement

So, lot's of crud and old, worn out shocks.  That much was obvious.  What I found out was that there was a hidden failure (cue the logistics support analysis of yesteryear,  I think that there is a code for hidden failures).  The hidden failure?  This guy:


Failed Cork Grease Seal

This failure, once discovered, led me into the rabbit hole.  Turns out, it lead me to find even more hidden failures.  These hidden failures:


Worn Front Shackle Pins

Worn Leaf Spring Rear Pin


Worn Leaf Spring Rear Pin and Bushing

In other words, all of the wear points were in fact worn and in need of replacement.  New Old Stock for the front shackles looked like this:

NOS Front Shackle Kit

No pics of the new leaf spring rear pins.  I got those from an online parts house.  Those came with minor issues with the threads.  A quick thread chasing and they were serviceable.  Once the front shackles were assembled with the new grease seals and serviced with the grease gun, it looked like this:

Passenger Side Front Shackle


Driver Side Front Shackle

The leaf spring pin looks like a bolt....  Here it is:

Driver Side Leaf Spring Pin

Old vs new shocks:

Old And New Shocks

Once everything was clean, painted and replaced, it all looked like this:

Engine Bay Ready For Business
 
That was the money shot!  Now, on to the elephant in the room...rot removal!  I've got the patch panels and all of the tools to get this job done.  But first, I am going to do some practicing on scrap metal.  I really want to get this done as a one and done project.  That means lots of thought, planning and practice before I start really cutting and welding on the Gray Ghost.

In the meantime, enjoy your summer!  This may take a while....  I'll make some interim posts to keep everyone up to date on my progress.  CYA!


Friday, May 28, 2021

Light At The End Of The Rabbit Hole

 Hello Gray Ghost Fans!


I've been able to get out into the garage this week and do a little work on replacing that worn out front shackle.  As you may remember, I was waiting for delivery of parts.  They came in and looked pretty good:


NOS Parts Box

NOS Front Shackle Parts

Nothing like using NOS (New Old Stock) parts.  You know they'll fit, assuming that you bought the correct version and no one, over the last 70 years, put the wrong parts in the box that services your truck!

Time to get to rebuilding!  First up, pressing in the bushings.  To do that, I'm using the same tool that I used to remove the old ones.  It's a 5/8" piece of all thread with a washer and nut on either end and a piece of 1" ID pipe on the far end.  I'm using the old bushing as a spacer to help drive the new bushing into place.  The tool assembled, both the spring eye and bushing pre-greased and ready to press the new bushing in, it looked like this:


Seating the new bushing 

Both bushings installed looked like this:


Bushings installed

Next up, pre-greasing inside the threaded bushing and the shackle pin, then threading it onto the shackle bushing.  It looked like this when installed:


Shackle pins installed

All of that was the easy part....  Now to add the sides to the shackle.  This will entail aligning all of the openings and pins and getting the shackle bolt installed to hold it all together.  

Try #1 did not line up!  Somehow, the spring had moved about 1 1/2 inches inboard....  Can I move it by hand?  No, I can not!  What to do?

Try #2: get creative!  Down to the basement, back with a C clamp and an extra long bolt.  The thought here is to get the shackle sides in place on one pin each, use the extra long bolt to keep the sides from falling off and them use the C clamp to move the spring outboard and (hopefully) into the other pins.

Did it work?  Yes it did!  It was an incremental process, requiring some gentle taps with the ball peen hammer (hey, the shop manual says to do that!) and further tightening of the nuts on the extra long bolt.  Once the space between the shackle sides had been closed enough for the regular bolt to fit, I switched to that bolt.  At that point both shackle sides had engaged all four points on the shackle pins and it was just a matter of properly tightening the bolts.

Oh yeah, I forgot to mention what started this whole evolution....  Did you remember?  Yup, the darned cork grease seal!  Thankfully, I only forgot to mention it here.  In the assembly process I remembered!  The Factory Assembly Manual requires 8-10 ft lbs of torque on the bolt.  Got out the old torque wrench, did what the FAM requires and when said and done, it looked like this:


Fully Assembled Shackle

Here's a shot looking behind the shackle at the neoprene grease seals:

Neoprene Grease Seals Installed

With the right (passenger) side completed, it's off to the driver's side for the same process.  I already have those parts, so it's just a matter of disassembly and rebuilding.  Sounds simple, right?  What could possibly go wrong....  I guess we'll all have to stay tuned to find out.

While I was waiting for my NOS parts to arrive, I did manage to find some time to test out the process of drilling out spot welds.  All in preparation of the next phase (rot removal and sheet metal repair).  Here's a shot of the first piece of rot removal!

Rotten Piece Over Replacement Piece

As the caption says, I set the rotten piece that I removed on top of the replacement piece to show what had rotted and what was left to be replaced.  This is the inner front cowl on the passenger side.  This view is from the inside of the cab looking at the part.  To put it into perspective, this is what you'd see if you sat in the truck and looked down at your feet and the inside of the cab.

That's all for now.  I'll wrap up the whole engine bay cleanup/front end suspension rebuild when I get done with the process.  Stay tuned!


Sunday, May 23, 2021

The Rabbit Hole Gets Deeper....

Hello Gray Ghost Fans!

A quick update to keep you posted on progress towards the "great welding experience."  As you may recall, I've decided that I'm tired of getting all the old crud on me, every time that I crawl into the engine bay.  To fix this, I'm cleaning off the muck.  In the process, I discovered that the grease seals on the front shackles had to be replaced.  Well, today, I got the passenger side shackle disassembled....

What I found was that the shackle pin and bushing on the bottom were severely worn and in need of replacement.  The pins are shown below, with the upper pin on the left and lower pin on the right:


Passenger Side Shackle Pins

It's pretty obvious that the pin on the right is damaged.  I haven't removed the bushings, yet.  I'll need the replacements to help drive the old ones out of the springs.  At this point, I'm down hard, waiting for parts.  Hopefully, it doesn't take too long to get them in.

I know what you're thinking, what about the cleaning?  Fair enough.  Here's a shot of the before and after on the passenger side of the frame:


Before cleaning

After cleaning and primer

A keen eye will notice that the shocks are removed in the "after" pic.  I have replacements that I'll install after rebuilding the shackle.  The primer is my favorite Rustoleum Rust Converter.  I'll lay down a coat of satin black after all of the other work is done and before the shocks are installed.  Frankly, it's a "10 foot" paint job, but that's ok.  Most of this will be covered up by the inner fenders, so it's just for me and keeping it from rusting too much more.

I'll do a complete write up on the cleaning with lots of pics, once all of the other work is done.  So stay tuned!


Sunday, May 2, 2021

Shackle(d) To A New Project

  Hello Gray Ghost Fans!

As I told you in my last post, I'm retired!  So that means more time to be in the garage!  Making good on that strategy, I did spend some quality time out there this past week.  My goal, get the front end (chassis, steering linkages, etc) degreased so that I can work on removing the floor pans.  Why is this important?  Because everything up there is caked in grease and consequently, I get a good coating of it on me every time that I climb into the engine bay.  It was time.  So off I went, putty knife and dental picks in hand.  What awaited me?  Here's a pic to show you what i was up against:


Steering gear assembly and pitman arm


Passenger side front shackle

Even for Gray Ghost standards, these are pretty gnarly!  If you look closely at the picture of the shackle, you can make out the bottom grease zerk.  What other hidden treasures could there be?  The factory assembly manual has a clue for us:

FAM Sect. 3 Sheet 4.00

In addition to the zerk on the bottom, there is also one on the top...time to get cleaning!  After about 15 minutes of digging with the pick and putty knife the top zerk comes into view:

Top zerk starting to show

This pic really gives you an idea of how much grease and crud was really built up.  There definitely was old grease and mud in this lump, but I don't think it was all old grease.  Just like other areas of the truck, it had tons of old oil mixed in.  It further reinforces my thought that this truck was used on dirt roads that were oiled to keep dust down.  That would explain the layers of oil/mud with pockets of grease...but back to the main attraction, stabbing at that lump of crud.

After another half hour or more here's where I got:

Front shackle freed from the lump

What's really interesting to me, is that there are traces of green paint on the shackle!  I assumed that the factory painted them black, like the other suspension parts.  But you can clearly see the same green paint that the cab and fenders were painted.  Not important, but still interesting.  Here's the other side:

Passenger side front shackle inside frame view


Now, I know what you're thinking.  Good job, now you can move on to the cab floor project!  Not so fast....  Why not so fast?  This guy:

Cork washer bits

Referring back to the FAM, you may note that the diagram clearly shows a cork washer that acts as a grease seal.  As you can see in the above pic, mine are shot.  Ugg.  That means I'm in for either a shackle rebuild or replacement.  That also explains the pockets of old grease.  Those seals weren't working during one (or more) of the times that someone greased the truck.  Follow where the pick is pointing to see where the the cork washer should be:

Pick pointer to missing cork washer location

This is on the wrong side of the shackle, given what the FAM shows, but where I actually removed the chunks of washer shown in the pic above.  Maybe there is a washer on both sides?  The FAM is unclear, so I'll have to ask the truck forum or look at replacement shackles to see how many washers they come with.

Oh well, I'm retired, I've got the time.  So that's the next step in the process, after finishing up the degreasing.  You see, I've only shown you the front shackle and steering gear assembly.  Of course, there are rear shackles that are just as gross as the front ones.  They'll need to be done before I move on to the rebuild or replacement.  As for that steering gear assembly, it now looks like this:

Steering gear assembly first pass for cleaning

You can see that at a macro level, the crud is gone.  However, at a lower level (I won't call it micro) it still has a ton of gunk on it.  The little picks can only get so much of the crud off, given the texture of the cast iron part.  That's ok, the chemical degreaser will work just fine, when I get around to using it.

That's all for now, fans.  Plenty more of this kind of work left to do, so I'll get on it.  Once I know whether to rebuild or replace and get that done, I'll make another post.  Thanks for reading!

bp


Sunday, April 25, 2021

Time To Get Serious

 Hello Gray Ghost fans!

It has been too long!  Ten months to be exact.  Keeping things honest and real, it's been a tough 10 months, between the worldwide pandemic and my own health issues.  But now it's time to get back to work...oh wait a minute...I'm now retired!  So no excuses.  Time to get back into the garage.

Major accomplishment this weekend!  I finally got the front clip (sheet metal) off of the truck!  I had actually removed all of the fasteners last fall, but never got around to separating it from the truck.  Last weekend, I was able to break it free from the cab and chassis.  This weekend, we rolled the truck out of the garage, removed the front clip and rolled the truck back into the garage.  The front clip is now resting comfortably in that beautiful shed I built last summer....  Now, the master plan comes into focus!  The truck, minus the front clip, now looks like this:


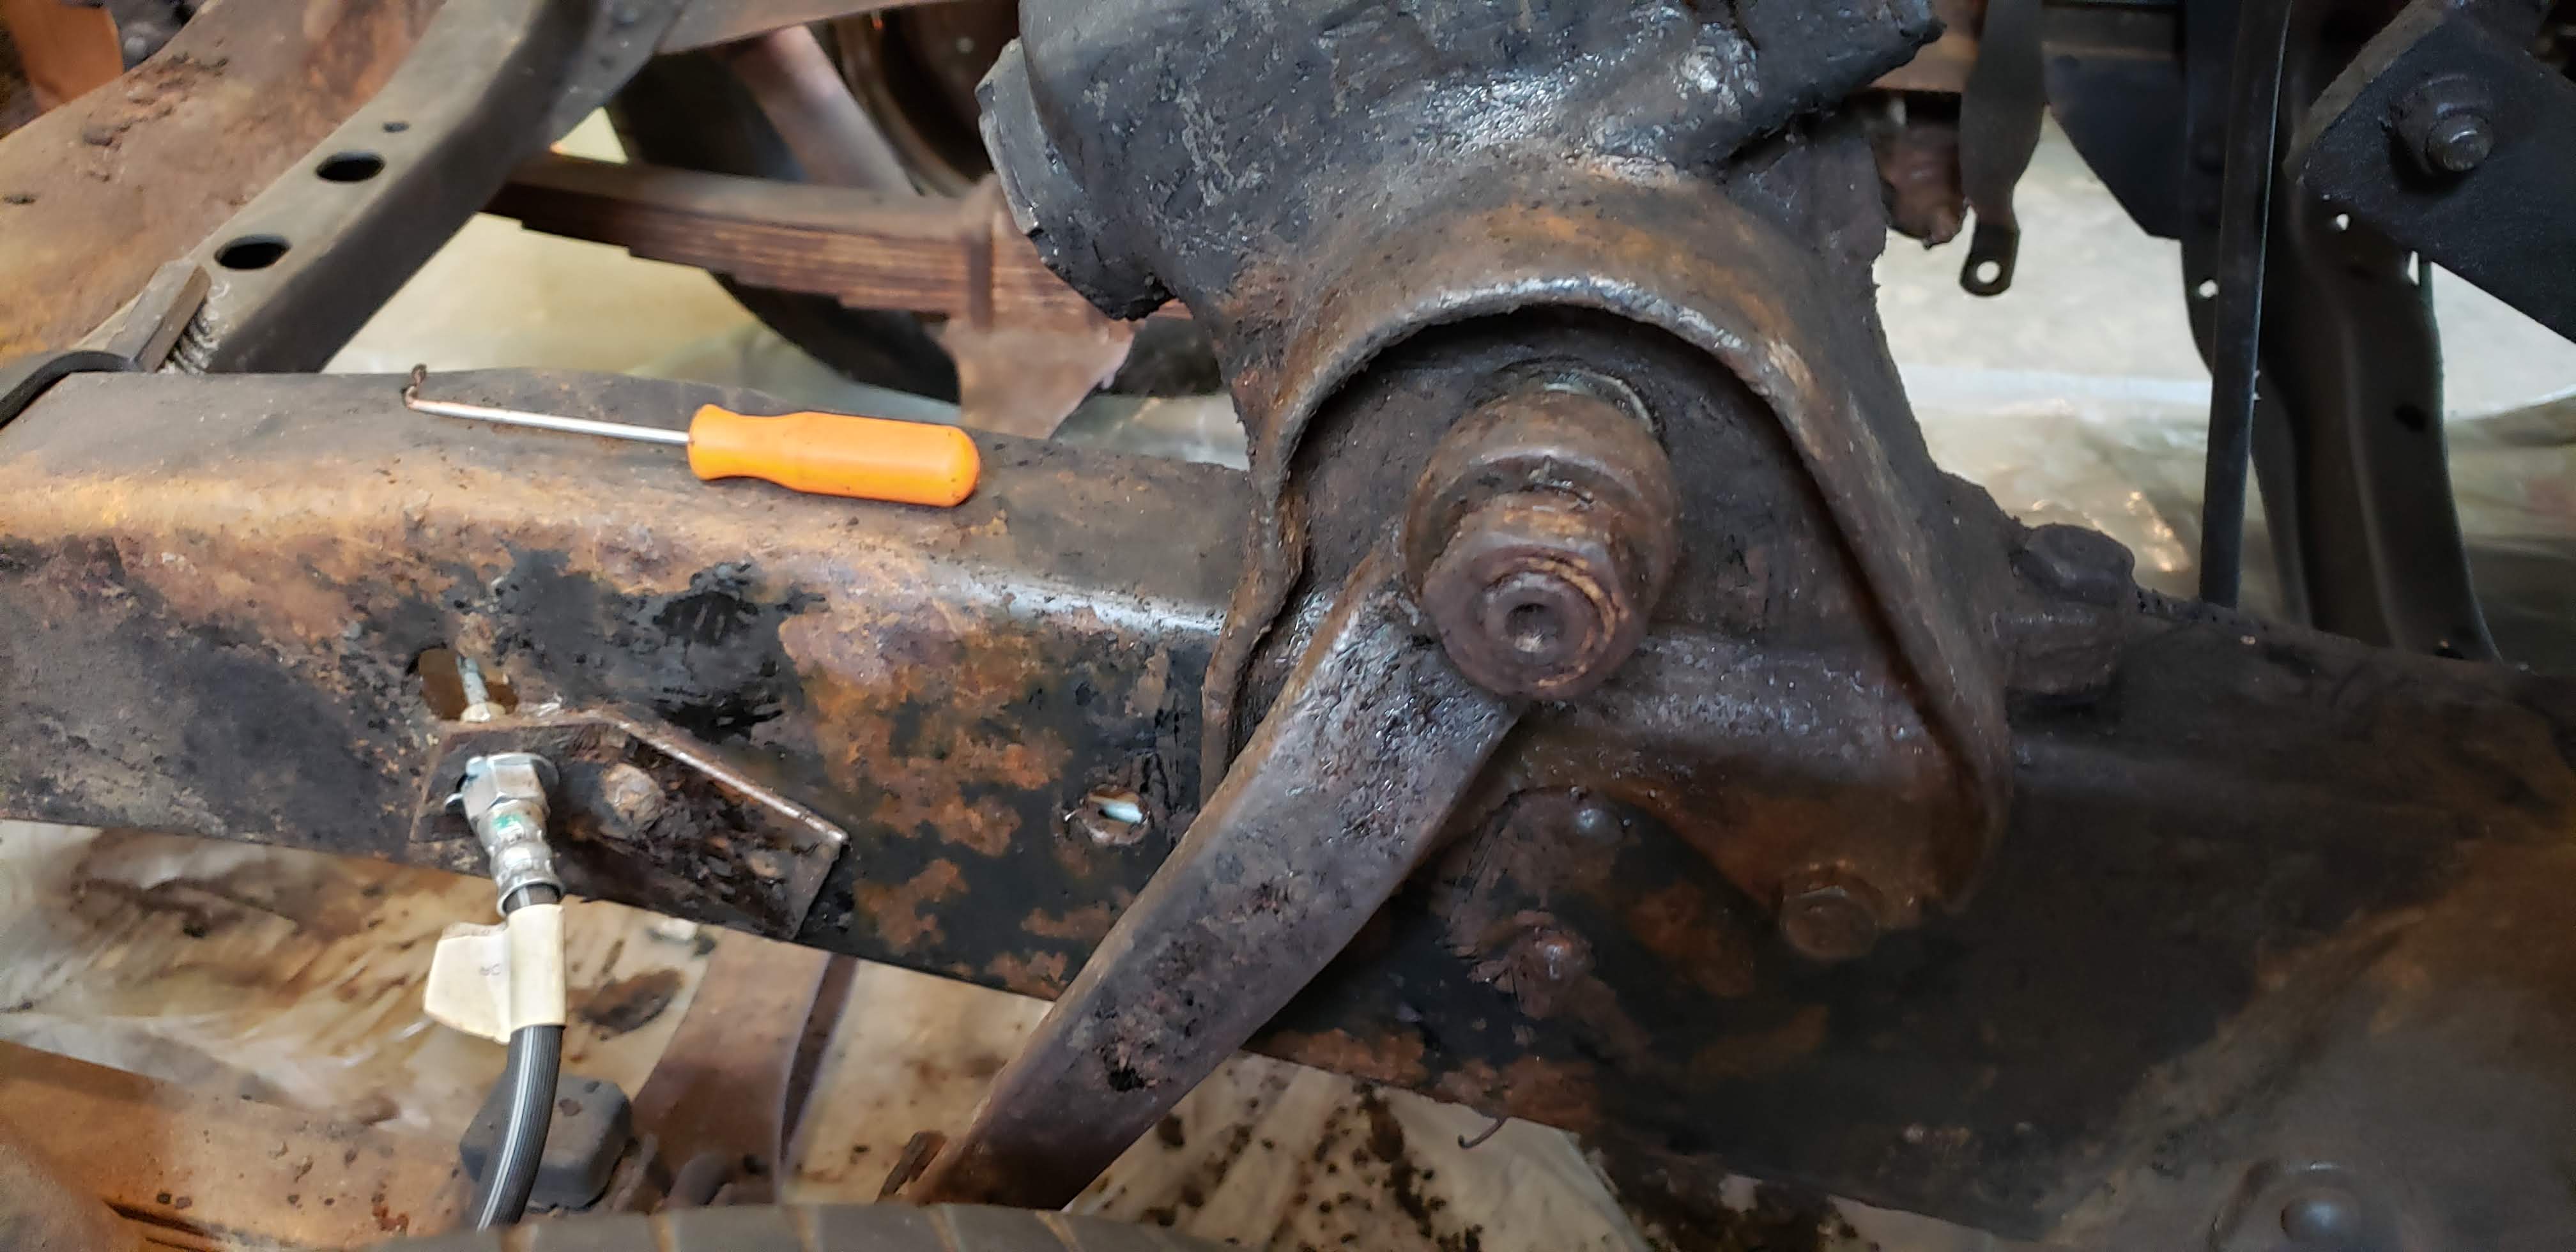
Unfettered access is now mine.  With unfettered access comes a few chores....  It is finally time to degrease everything.  I've mentioned before that I think this truck was driven on dirt roads where oil was applied to keep dust down.  The majority of the caked on crud is a combo of red clay and oil.  On the bright side, all of that oil kept the metal from rusting out.  There is rust on the top of the frame rails and the cross member where the radiator mounts.  I'll deal with that rust by scraping away loose rust and then hitting it with my favorite Rustoleum rust converter primer.  Here is a shot detailing the level of crud that must be removed:


This is a closeup of a part of the steering assembly and frame.  Just a little crud...!

Once I've dealt with the cleanup, I can move on to the real task at hand...removing the floor pans and installing the replacements.  As you may remember from an earlier post I discovered serious rot when I initially went to remove the front clip.  The rot was so bad, that fixing that became the priority while the engine was still out of the truck.  Here's a view looking at the firewall:


Yes, that's a basketball under my truck....  One of my grands must've let it roll under the truck.  Oh well.  Looking down at the firewall, you can see where there is a flange that runs across the length of the firewall.  That flange is where the spot welds are the I'll have to drill out.  Once those are all drilled out (18 of them), I can move inside the cab and cut the floor out.  The replacement floorboards will have to be trimmed to fit and I'll make a bend that mates up to the upper part of the flange and then plug weld the new parts in place.

The gameplan after that is to install the engine and reconnect the enclosed drive line.  Then I'll work on replacing the sheetmetal associated with the inner and outer cowl.

Here's that lonely front clip, waiting to go into the shed:


Really looks like a face.  One day, hopefully not too far into the future, we'll be putting her back in place.

So with that, I'm back in the game.  Hopefully to get it moving under it's own power before the cold weather shuts down the wrenching season.  Wish me luck and I'll keep you all posted.


Sunday, June 28, 2020

You Have To Break A Few Eggs To Make An Omelette

Hello Gray Ghost Fans!

As you remember, the restoration of the Gray Ghost was on hold, due to severe space limitations in the garage.  My solution?  Build a garden shed to free up some space.  In a departure from my normal blog entries, I'm going to let the photos do most of the talking.  Keeping it real, as I do for the restoration itself, I simply couldn't figure out how to make a slideshow for blogger, so I've just piled up a bunch of the construction pics.  I'll add a short caption to set the stage.  Enjoy!


The building site and a pallet of solid concrete blocks for the foundation.


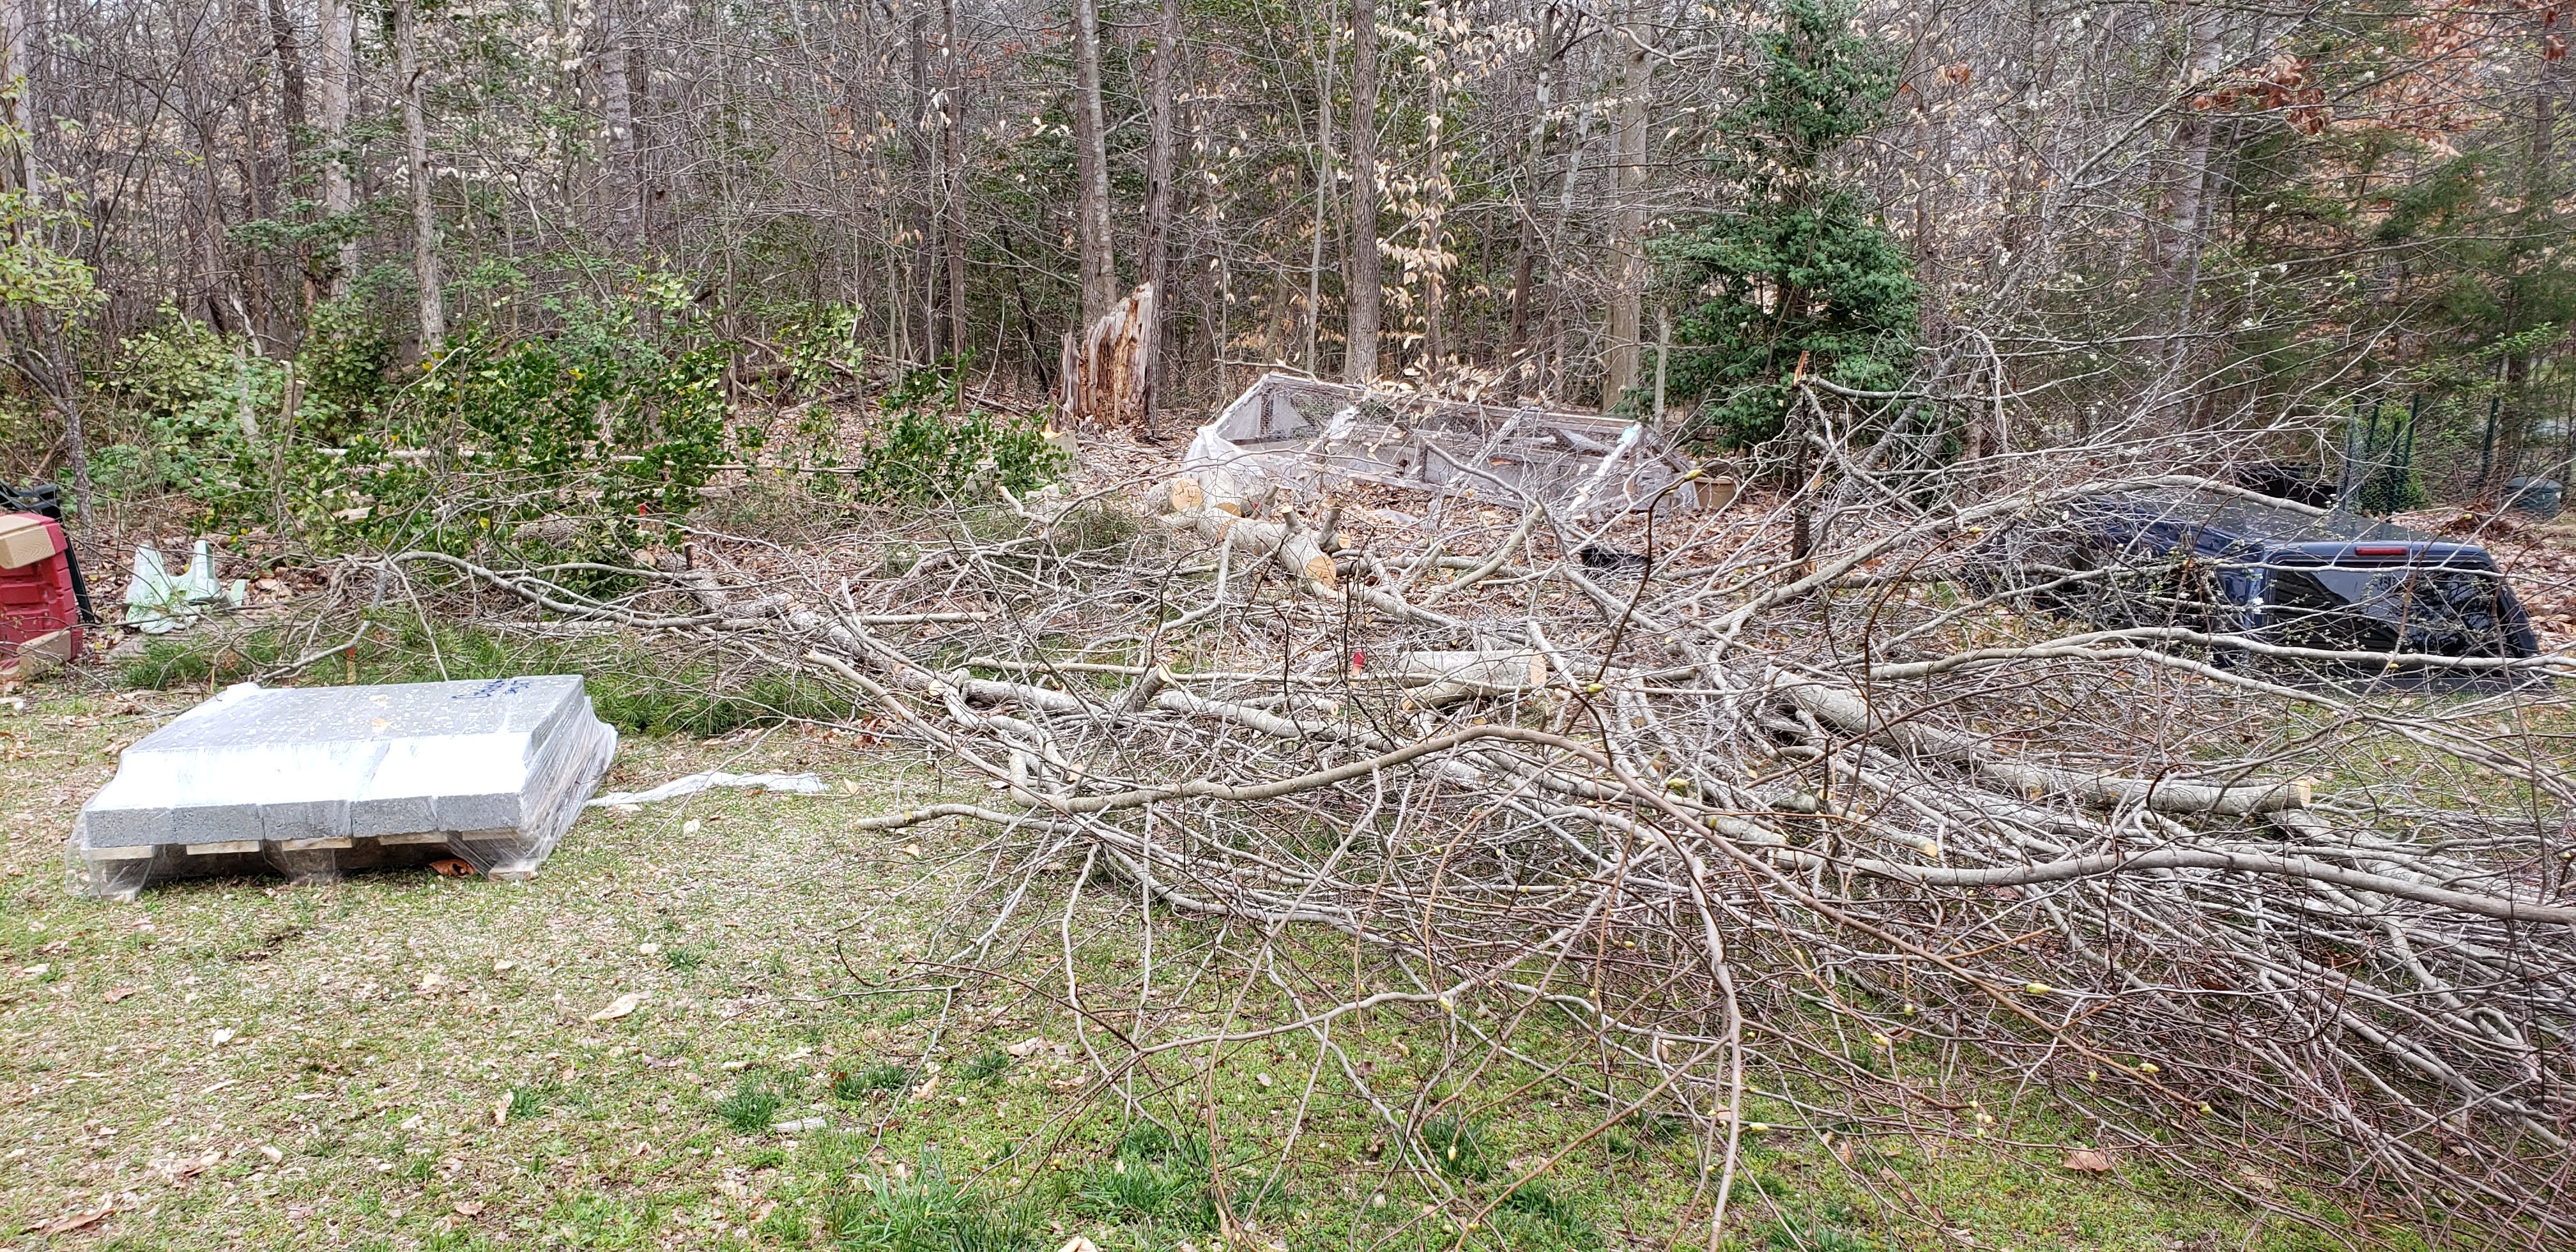
Clearing the site to prep for the concrete blocks.  Mostly the debris is beech, but my cherry tree took a beating, too.

 
Another view of the "broken eggs"....

 
The rough layout of the concrete blocks.  They will need to be leveled by digging them in.

 
Another view of the blocks showing the need for leveling.


First cut at leveling.

 
Another view, shows that the site slopes from left to right and from back to front.

 
Just laying 2x4's on the blocks to check for actual level.


Close up.


Using a straight edge to bridge the gap so I can check for level from one row to another.

Level close up...I'll take it!

Off by a little, spread over 12'.  Getting it close to level front to back and then side to side proved very challenging and took several lengthy attempts.

One shed kit w/floor kit, some assembly required.

The instructions required putting a shingle on each block, prior to building the floor supports.

4"x6"x12' beams

Floor kit built per included instructions.....  Why the discrepancy between my layout of 4x6 beams and the floor kit?  Because what's included on the website is different from what they ship in the kit.  The instructions tell you this after you unwrap the kit contents!

Shed floor added to the floor kit per instructions....

Checking for level.

Off just a little left to right at front of shed...I'll take that.

Floor decking removed!  I thought about it for a week and hated the design that came with the shed.  In this pic you can see that I've clamped two of the boards together to deal with warping.  Then I was able to completely bond these together.  Better, but not good enough....

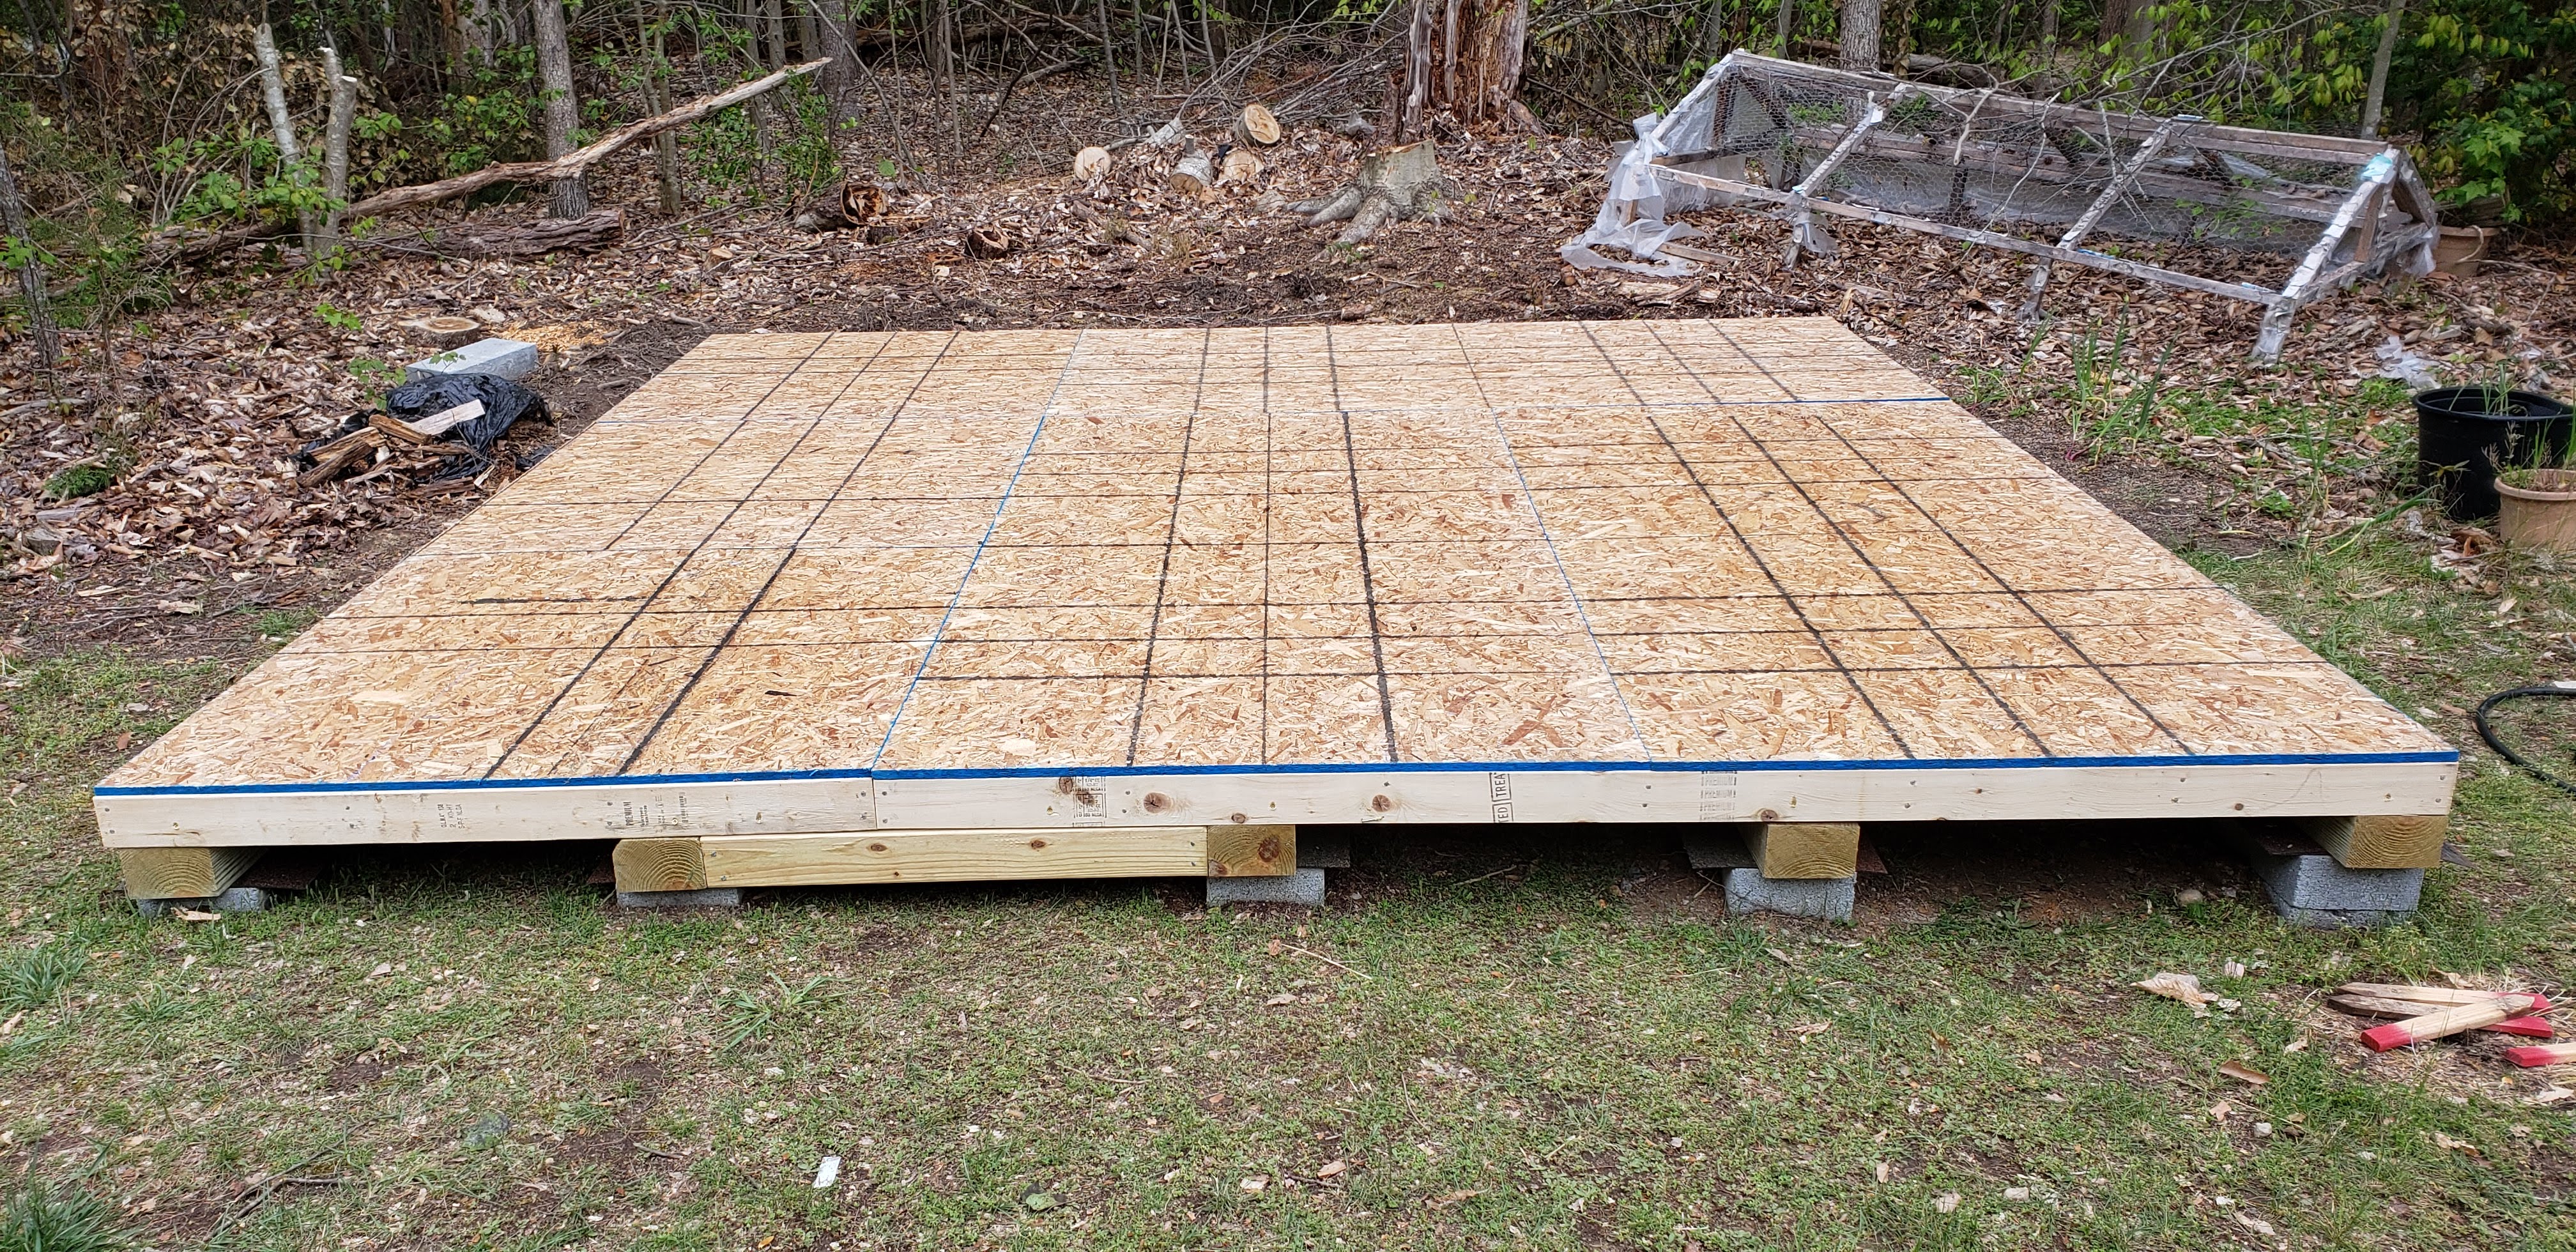
In an attempt to marry up my blocks and beams with the floor kit that came with the shed, I added 2x4's under the frame.  This bridges the gaps between the beams and floor kit frame.  In retrospect, I should have simply scrapped the floor frame, despite paying for it and just built my own.  Hindsight is always 20-20.  The floor decking was then reapplied over the frame.

Walls framed, awaiting exterior sheathing.

Framing and sheathing the front wall.  My framing nailer is visible in the pic.  It was a life saver!  Make no mistake, it is heavy and takes a toll on the user, but it did make things go faster.

The old man getting some help from my youngest.  I wouldn't have finished without his help.

Teamwork!

That day started off cool, but boy did it end hot.  It was a long day, but we got all of the walls framed and sheathed.

Here, you can see our construction process.  We built the frames first, then we took the frame that would be erected last and added the sheathing to that.  That frame was the front wall.  Next, we did the frame that would go up third (the right wall) and built it on top of the front wall frame, adding the sheathing to it.  Next was the frame that would go up second (the left wall), placing it on top of the pile and sheathing it.  Finally, we added the wall that would be erected first (the back wall) to the pile and sheathed it.
That's a pile of pre-constructed walls!  Time for a break.


Here you can see more of the process.  The back wall and left wall have been erected.  The pile now has the right wall and front wall.

A peek inside the front door opening after erecting all four walls and added the rafters, which I had built the day before, according to the included instructions...mostly.

A view of the shed after erecting the walls and installing the rafters.

Roof sheathing added and a large tarp stapled down...took an entire day to do the roof sheathing and they were calling for rain.  Came in handy as the weather guessers guessed right.

Starting the roofing process.  Tar paper down, drip edge installed first course of shingles on the way.

We did what we could from the ground, taking our time to make sure that we were properly aligned.

A quick break for a sandwich and cold drink.  It was so hot that day!

Neither of us wanted to get on the roof.... Time to call in a handyman to finish the high work.  Hey, been keeping it real the whole time.  I hate heights!

Some of the tar paper was torn off in some wind, before the handyman could get us into his schedule...not a hard fix.

Handyman has been there and gone.  We now have a roof!  I also took the opportunity to add the front window.  It is officially dried in!

A side view showing the shingles.

I don't plan to build a permanent ramp into the shed.  I'm going to use my old trailer ramps.  They should do the trick.


Moving stuff in!  That riding lawn mower was the main target in all of this.  Getting that out of the garage is epic

Well Gray Ghost fans, that's the story in pictures.  Hoped you liked the change in format for this episode!  Even though I started the project in the cold weather, it is screaming hot now!  We are a week away from July 4th.  When we started, we were all locked down due to the corona virus.  It definitely lengthened the build time, as the kit itself was delayed several weeks.  On top of that, I tried to limit my trips to the home store to limit my exposure to the virus.  Still, we were able to get it done.  Well, almost.  I still need to paint the shed and then add the trim.  That won't stop me, however, from putting it to use!

If you've read my other posts, you know that I'm a fair weather worker.  Being that it is so hot now, I'm not sure how much work I'll get done this summer.  But fall is right around the corner and it'll be pedal to the metal time.  Time to start welding...!  Here's to not burning down the house!