
Anyway, I started last summer and made decent progress on the frame and body. I went on Craig's List and found 2 donor bicycles for matching wheels, the drive sprocket and chains. The thought here is that I would use the tires, but install them on my home made axles. I would use 1 of the sprockets to drive the chain for the car and I would meld the 2 chains into 1 chain that was long enough for my purposes. So far so good. Then fall came around and the lawn and garden chores took precedence and then winter and it was too cold for woodworking outside. Then spring came and the lawn and garden took over again and then summer came along and my grandson asked me to work on it again. So I did.
This weekend, I did the work on the seat. I made the seat supports, seat bottom and back and the rails that hold it in place. I also made the small gussets that support the rear frame sides and car body back. Also, I made the steering wheel and the front cowling. Doesn't sound like a whole lot, but it took me a while and wore me out!
Here is the steering wheel layout on 3/4" plywood:
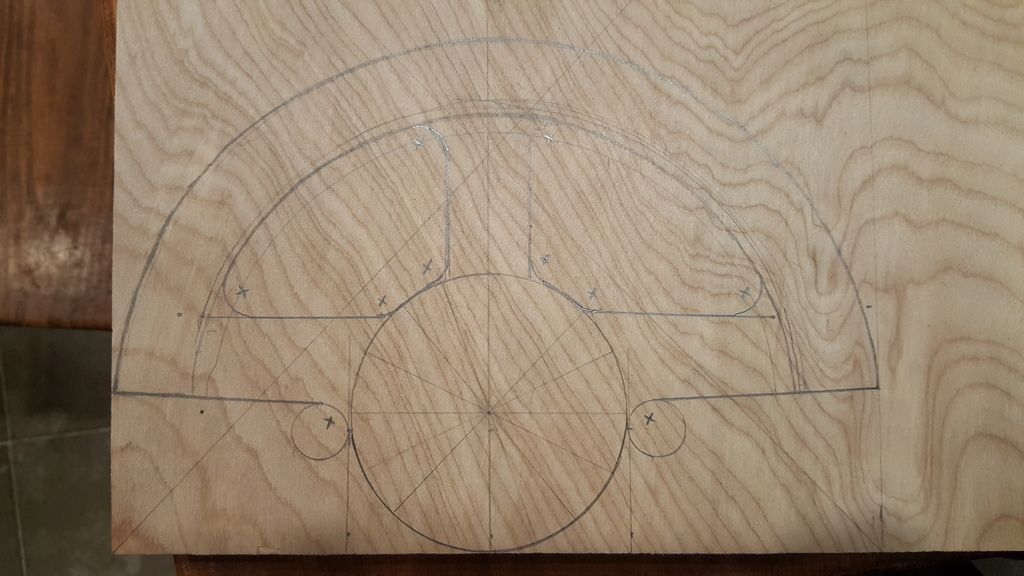
I decided to just do the layout myself, instead of using the templates provided, since my first try using the template resulted in an uneven car body front. I'll show that in a moment. All I did was take measurements off of one side of the steering wheel template, and them transpose them onto the plywood. I'm trying to use as much leftover stock as possible on this project, to keep my costs to a minimum. Here, the steering wheel is being made out of leftover oak plywood. Here it is after cutting, sanding and painting:
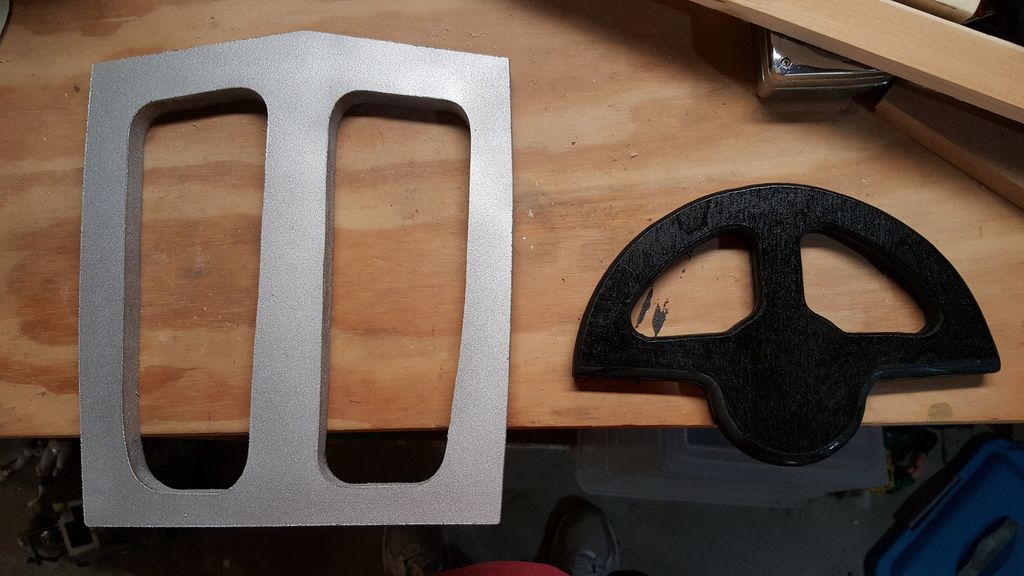
Next to it is the front cowling. That will attach to the front of the car body. I went ahead and painted the section to be revealed. Here is a shot of the front of the car with the painted sections:
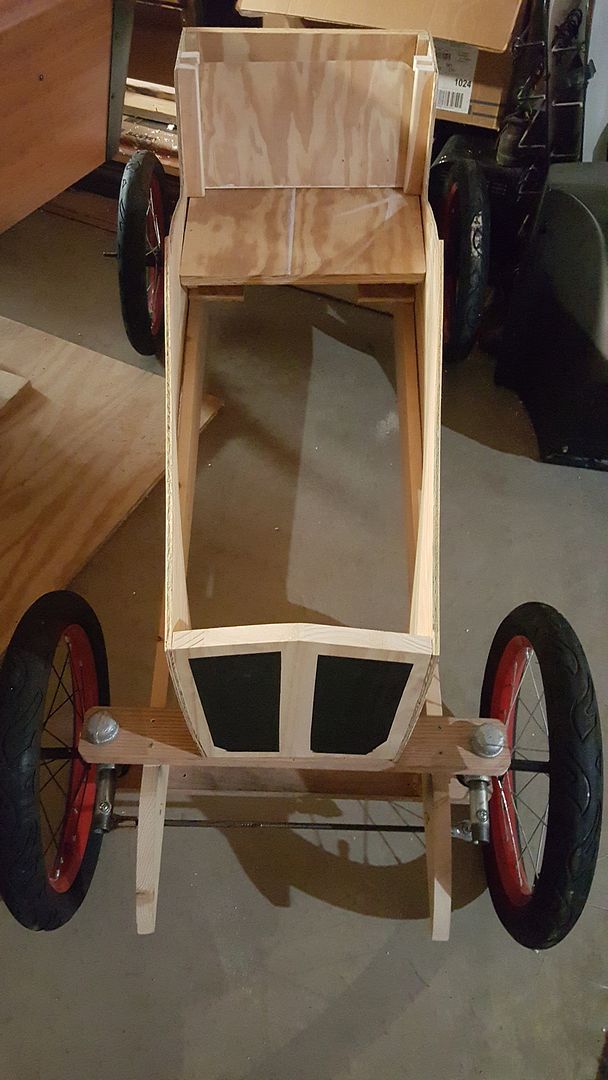
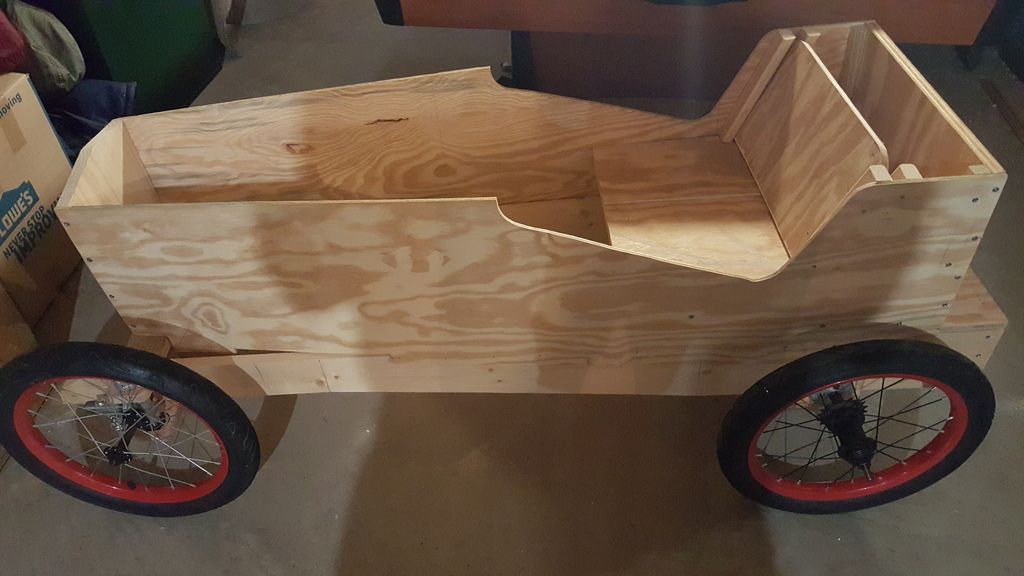
You can also see how the plans address the steering linkage. I'll need to add the steering column, after I figure out what I'm going to do. All I know at this point is that I'm not going with the plans that I bought. Other people have also come to that conclusion and I'll try to mine their blogs for ideas. You can also see the frame and body and how they come together, as well as the seat arrangement. Somehow, when I was installing the seat platform, it got out of alignment. Not sure how it happened, but it is glued and screwed into place, so its not coming out. But it's not a big deal. I have material to make a seat cushion and back, so they will make up for it being uneven. I'm not sure if you can tell from this pic, but the part that is painted was made from an original template. It is uneven, but usable. This is the part that clued me into how bad the drawings were if I wanted to use them as templates. It's also a reason that I decided to keep the fenders off of the car (also because I like the hotrods without fenders (the FTF club)). Here's a sideview of the car:
The car is planned to be red like my Chevy pickup truck. I'll paint the frame rails black, as they should be. On the other side, I'll have the sprocket and chain exposed. I'm planning to have a small pipe attached to that side. I'll use it to simulate an exhaust pipe that runs down the side of the car. The real purpose, though, is an attaching point to the coaster brake from the donor bicycle. If you remember, coaster brakes work by pedalling backwards until you get resistance. This works by way of that small metal piece that is connected to the wheel hub and bolted to the bicycle frame. Since there is no bicycle frame here, I need that pipe to bolt the brakes to. I'm just hiding it by making it look like the exhaust pipe.
That's all for now. It had been a while since I posted anything, so while it's not Chevy truck related, it did take my weekend. I'll update progress here, too.