1953 chevy truck ad

1953 chevy truck ad

Friday, September 22, 2017

DASH(ing) To The End Of This Phase

Hello Gray Ghost Fans!

I had another productive couple of hours in the garage today, reassembling parts of the dash! For anyone that's watched a construction crew build a road, you'll understand when I say that this process seems a lot like that.  Meaning, it seems like all they do is move dirt around for months on end and then VOILA!, a road appears out of thin air, usually overnight.  This process that I've gone through is a lot like that.  Seemed like I wasn't really doing much of anything and then BAM!, I'm bolting on a bunch of really cool looking stuff, seemingly overnight.

To that end, I do think a quick reminder of where we started is in order.  So here is the Gray Ghost dash area the day that I brought her home:


This, of course, is the somewhat infamous and definitely hysterical photo of the dash area showing how the seller of the truck spray painted everything gray primer.  I think it was an attempt to hide some of the rust.  I really liked how he didn't even take the time to empty the ashtray of pencils and butts before spraying!  I'm guessing it might have scared off most people, but this was pushing my financial limit at the time, so I went for it.  There have been quite few man hours cleaning all that up. But frankly, I loved every minute of it, minus the stinky mouse pee minutes (see:  Rusty Mouse Pee and a Stinky Cab for more details).

So where am I now?  Here's a shot looking at the restored steering wheel and horn button installed:


Oh this shot gives away quite a bit!  Look at what's hiding to the right of the quad gauge.  Yup, the restored speaker grill and top and bottom trim pieces!  Of course, the black backing piece is now done and is also installed behind the grill.  Here are a couple of shots of those pieces before I installed them:

Speaker Grill (Front)

Speaker Grill (Back)

Trim Pieces Dry Fit

Ashtray

Installed

So, as things typically go for me, when I got to installing the glove box door, the screws that mount the hinges to the dash were no where to be found.  Now, I've tried really hard to make sure to bag and tag everything!  Somehow, these were misplaced.  So, I looked at them closely and figured them to be #10 size.  I had some #10 machine screws in my collection so I tried them out. They were the right size, but the wrong thread count.  Mine were #10-24 and I needed #10-32. So, off to Lowe's, again. Once I got home it was 10 minutes work to disassemble the hinges from the door, install the hinges in the dash and then reconnect the glove box door to the hinges.

And now for that money shot.  You've seen the before, now here's the after:


I simply couldn't be happier!  A clean, whole, semi-restored dash.  So I'm sure some of you are wondering why semi-restored.  Kinda a lot of work for only semi.  That's true, but there was method to my madness.  The goal was to make the interior pleasant for while I'm driving it.  Even though the exterior will be ratty until I get around to the frame off restoration, I didn't want to be in a ratty vehicle.  Old yes, but ratty interior, no.  I know, the rusty heater is clearly visible in the last shot.  It too will get restored.  Sooner rather than later, I assure you, but it wasn't necessary to do that right now.  Everything is accessible from under the dash or the other side of the firewall, so the dash could be buttoned up.  Plus, I'll let you all in on a little secret...there is no actual glove box installed yet.  If you open the glove box door, it is still a gaping hole.  So, now harm, no foul.

What does this all mean?  It means that it's time to get that battery tray and ground strap finished up so I can test those circuits and start work on the tranny removal.  Oh dear!  Sounds like it's rapidly becoming time for the hardcore mechanical stuff....

Now, Gray Ghost fans, if you have gotten this far in the post, you may notice that there are some buttons just below here where you can register whether or not you liked what I've posted.  It is completely anonymous.  All that I see is that someone checked a box.  I really would like to get some feedback from those that have read the post (or any of my posts).  It only takes a second and won't give you away.  I promise!

That's all for now.  Until next time:  "Let's be careful out there."

Sunday, September 17, 2017

MAJOR MILESTONE: Wiring in the Cab is Complete!

Hello Gray Ghost Fans!  How exciting!  All of the wiring in the cab is done!  That means that the gauges, lights and switches are installed too!  It's been a long, difficult road for sure, and getting those gauges installed was no easy job.  But they are in and let me tell you, they look fabulous! So, without further adieu, here they are:


Speedometer


Quad Gauge
(Gas , Water Temp, Oil Pressure and Volts)

Holy Cow, do they look good!  These gauges are by New Vintage and are their "Woodward" series. They have the look and feel of the gauges from the series prior to mine (the art deco series). Nevertheless, I think that they look right at home in my dash.  Here's a shot of them together:


Here's a shot of my modified radio delete plate installed in it's permanent location:


Now you can really see what I was talking about in the post about creating it.  The bolts that permanently hold it in place are where the radio knobs would have been.  They have the special tab that fits into the slot in both the dash and the radio delete plate and keeps them from spinning when you tighten them up.  I really like the layout with the bolts, indicator lights and 3100 emblem.  It's not the way that Chevrolet did it, but I like it.  Here is the layout of the whole dash:


So, a couple of things...no the dash isn't completed yet.  The gaping holes are where the speaker grill goes, as well as the ash tray.  Both are long since restored and waiting in the basement. However, before I can install them, I need to get some kind of black paper (or paint some thin cardboard black) to sit behind the speaker grill.  Since I'm not installing a radio, you would be able to see through the grill without a speaker in place.  The heavy gauge black paper is how Chevrolet dealt with the issue, so that's how I'll do it too.  Once I get the paper, I'll finish installing the speaker grill, ashtray and finally the glove box door and lock.  After that, I'll put the steering wheel back onto the steering column.

In addition to the gauges and lights, I also installed the turn signal switch and the tachometer. Hopefully everyone remembers when the Starfire joined the 3100 team.  If not, you'll have to go back to 4/5/2015 to read that post!  As I noted back then, this tach is set up for an 8 cylinder engine, so it will show fewer RPM's than the engine is really turning, but I don't care.  It's more for show than for go.  I always shift based on engine sound, not what a tachometer is showing me. I've been doing that since I started driving and doubt I'll be changing anytime soon.  Here is the famous, 1961 Starfire tachometer installed in it's new location and all wired up.


To mount the tachometer, I used an Autometer universal gauge mount.  I was able to use an existing hole in the dash as a mounting hole, so no new holes were needed.  I put a slight angle on it so that it is easier to see from the driver's seat.  The keys are far enough away so that they won't hit it when we are driving!  Now how cool is that?!?  Automotive styling today sucks in comparison to the past!

Pay no attention to the wires to the left.  It does look a bit like a rat's nest under the dash, but I did say in an earlier post that I wasn't cutting any wires down with this installation.  It is still my intent to one day do a frame off restoration.  If I do that, it is also my plan to re-use this wire harness.  At that time, I would do a proper installation and cut each wire to the correct length.  If I had done that now, I would likely come up short on some of the wires then, as I'll have to make a few cuts to remove the wire harness for the frame off effort.  So for now, it's a bit ratty and I'm good with it.

Here is the final shot of this post and it shows everything, including the tach and the turn signal switch:


I have to say that I'm very pleased with how it all turned out.  It at least looks pretty good.

None of the "front of the truck" connections have been made yet and that is on purpose.  I don't want them in the way during the engine swap, so I'll just gather them up and tape them out of the way. Next time out, I'll go around the truck and make sure that there are no loose (as in still unconnected) wires that could cause a short.  Then I have to add the battery ground cable.  After that, I'll temporarily bolt on the tail lights and then, it's time to actually put a battery into the truck and start testing each of those circuits!  Of course, I'll have the fire extinguisher handy, just in case.  To be safe, I'll only add one fuse at a time and see how it goes.

That's all for now.  Quite a bit of progress in a short bit of time.  I hope you all like it as much as I do. Leave a comment to let me know what you think!

Sunday, September 10, 2017

Odds and Ends As The Push Is On

Hello Gray Ghost  Fans!

As the title suggests, this post is about the odds and ends that I've been working on as I make the final push to finish the electrical phase of the restoration.  So here goes:

First off, I mentioned in the last post that I had finally settled on a location for the multiple ground wires.  All of the wires were terminated with a ring connection.  Once stacked and installed on the firewall, it looked like this:


In the pic, you can notice a couple of things.  To the left is the shift linkage from the 3 on the tree shifter.  On the ground stud you'll notice all of the ground wires have shrink tubing on them except for one of them.  That one came pre-terminated, so I could't get the shrink tube onto it.  It's really no big deal, I've just been uber cautious since everything in the truck is metal.  I'm desperately trying to avoid any potential for a short, even going so far as to shrink tube the ground wires.  The purple wire is from the starter and goes to the ignition switch.  I'll have to tuck that up better and secure it....  The brown wire is for the heater.  I think it is the power feed.  If so, I think it'll go to the heater switch, once I buy one.  For now, it too will get tucked up under the dash and out of the way.  I'll have to restore the heater core before I buy the switch and wire it all up.

Second, I needed to restore the battery tray.  This will be one of those things that if you don't see it, you really won't believe what I tell you.  So hear it goes.  The battery tray is located under the floor of the cab on the passenger side of the truck.  It has 2 side pieces that are riveted to the truck frame and a center piece that the battery actually sits on and is riveted to each side piece. For whatever reason (battery acid, sitting in a field for years or both) the bottom of the battery tray was essentially gone when I got the truck.  So, I needed to get the remnants of the bottom piece out so that I could put the replacement in.  If I'm going to put a battery in the truck and fire up the electrical system, I do need a place to put it!  Grinding off the rivet heads allowed me to remove the remnants.  Once remove, it looked like this:


The rods sticking up are supposed to be threaded.  They allow you to securely flange down the battery hold down, so that the battery doesn't move around when you are driving.  Mine were pretty rusted, so I had to chase the threads.  Once  I did that, they looked quite functional.

When you look down into the opening, you can see where the rivet heads have been ground off. You'll also note that the rivets themselves are still in the side pieces.  That is not for lack of trying! When the hot rivets are bucked into place, they expand to fill the entire space of the hole.  So grinding of the heads and just using a punch and hammer doesn't always get them out.  In this case, that is what happened.  It looks like I'll have to drill out the rivet centers and  hopefully relieve some of the pressure and then punch them out.

To give you an idea of just how little of the tray bottom remained, here is a pic that shows the bottom remnants with the replacement bottom.


Literally, there is a side part on the left and only where the rivet was on the right.  Everything else was gone!  But that's ok.  The replacement part is very heavy duty, fits the space and the holes line up with the rivets.  So, once the rivets are gone, it's just a matter of bolting in the replacement piece.  I'm not going to try to rivet it right now.  If I ever get to do a frame off restoration, I might rivet it. Maybe.

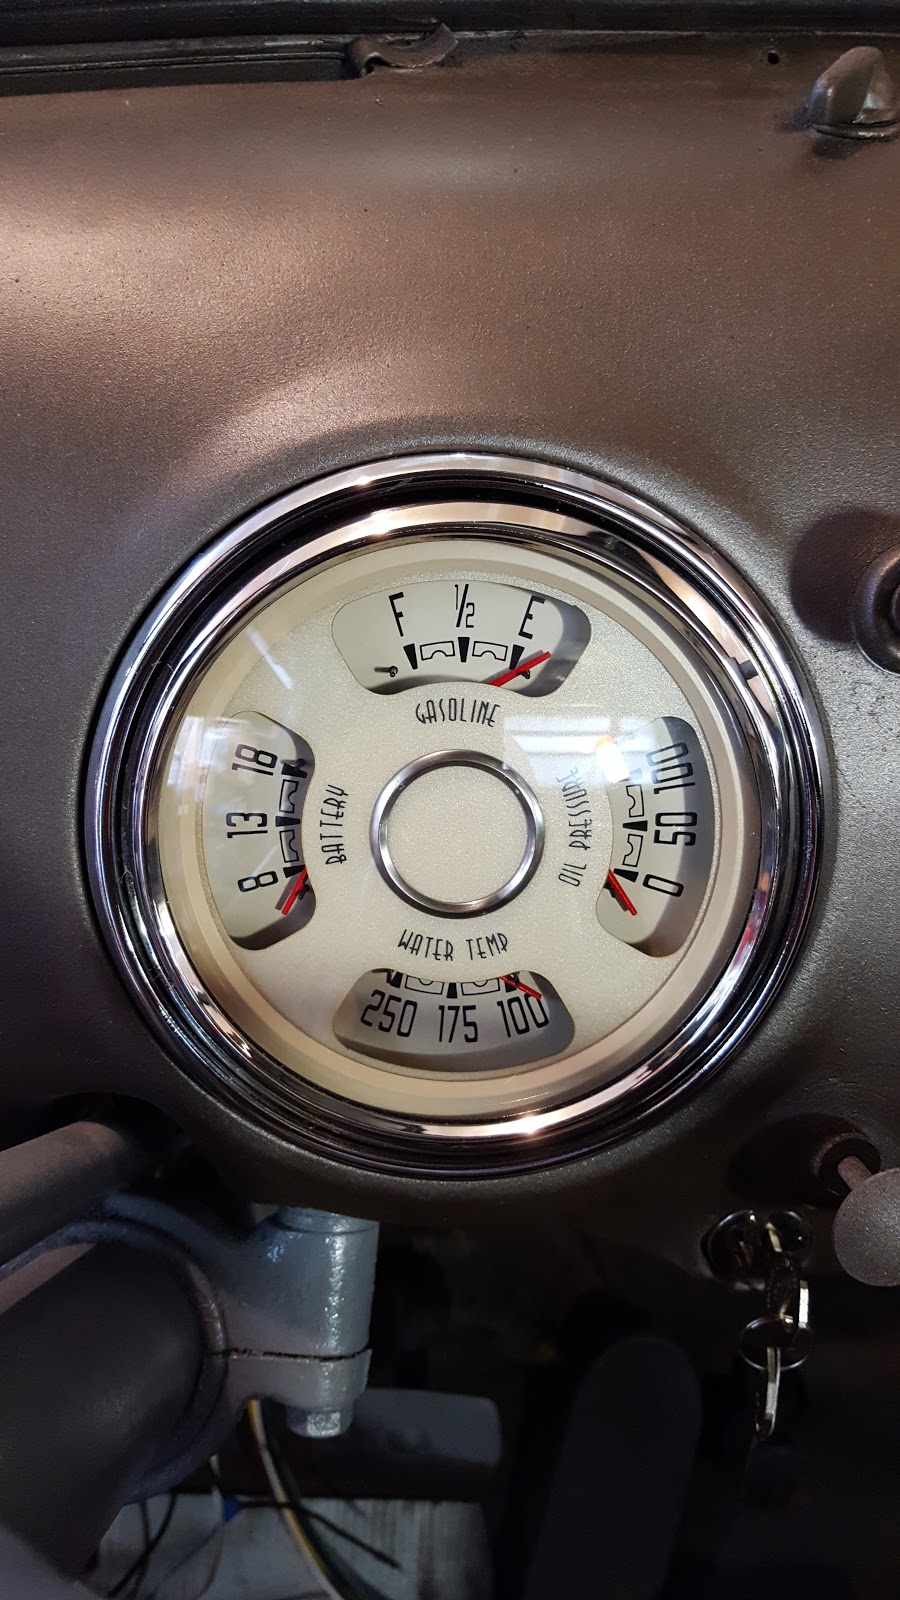
The other big project that I finished up has to do with the dash.  My truck did not originally have a radio, which was common back in the day.  It was meant for working, not listening to the radio. So Chevrolet filled in the hole in the dash with what's called a "radio delete plate".  I have the original radio delete plate and have already restored it some time ago.  I was just waiting on enough progress with the wiring before buttoning up the holes in the dash, as they are quite handy to have while the wiring is ongoing.

In the meantime, I had an issue with the wire harness:  where to put the turn signal dash indicator lights.  The gauges that I bought do not have them.  The truck did not originally have any, as turn signals were an aftermarket add on.  Then I got the idea, put them in the radio delete plate!  That space gives me enough area to add both turn signal indicator lights PLUS the high beam indicator light PLUS some kind of small emblem!  Awesome!  Now the search was on for just what emblem I would want.  To give you an idea of space, the entire area of the radio delete plate that is visible through the dash is 5"L x 3"T.  So it's not that much space, but enough.  Some of the emblems that I considered included:  1. Chevrolet in script, 2.  Pontiac Star Chief fender skirt star (I really liked this one but couldn't accept the pint of the star affixed to my dash...seemed kinda hazardous), 3.  The Chevrolet chevron, 4.  Early 60's Nova 6 Cylinder badge, 5.  Early 60's Impala quarter panel badge (the one with the red, white and blue emblem, not anything that actually said "Impala") and 6.  The 1950 - 1952 Chevrolet truck "3100" emblem.  Let me just say that all of these were in true contention, but only one of them won out.  Which will it be? Patience, Gray Ghost Fans!  First to the process.  Since my original radio delete plate was already restored, I didn't want to drill any holes in it.  This meant that I would have to buy another one. No big deal.  I won one on eBay and it looked like this:

Front

Back

Interesting side story:  I looked up the company on the sticker and they still exist!  If you go to their website, it has the company story which states that the founder of the company used to drive an old red pickup truck.  Makes you think it might have been in that old truck?!!?

Of particular note, notice the notches in the plate.  They align with similar holes and notches in the dash.  This is important, because if you notice the back side of the bolts, they have a tab that locks into that slot.  This keeps the bolt from spinning in the hole when you are trying to tighten it.

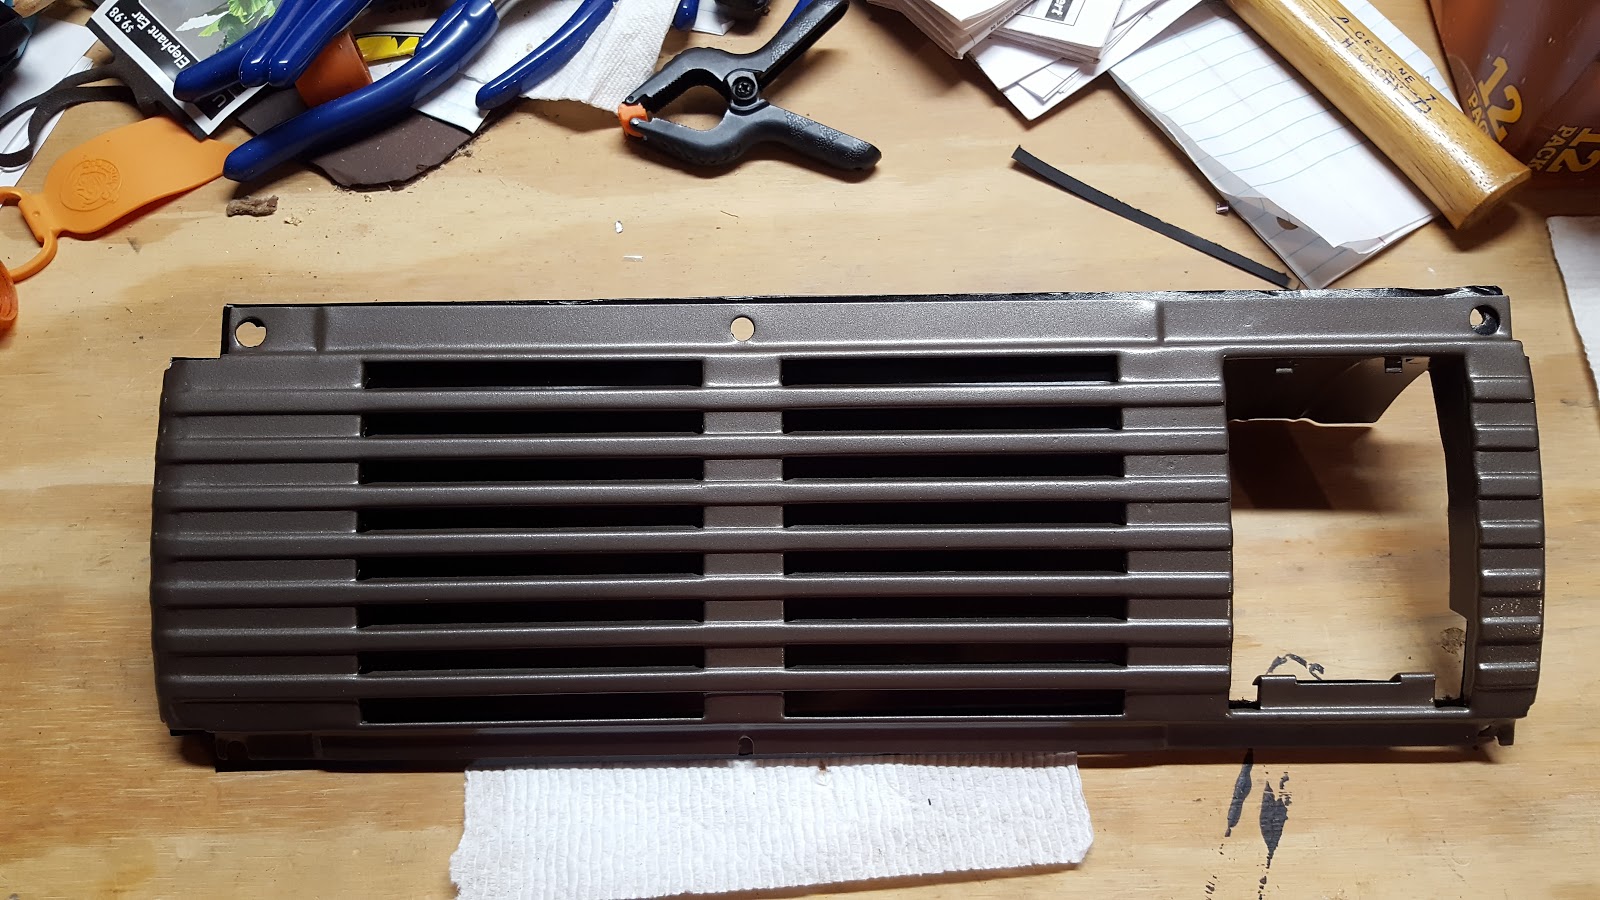
Clearly, this piece needed some sand blasting...so that's what I did.  Afterward, it was time to lay out where I wanted the lights and emblem to go.  I put down some painter's tape and did the layout on that.  It looked like this:


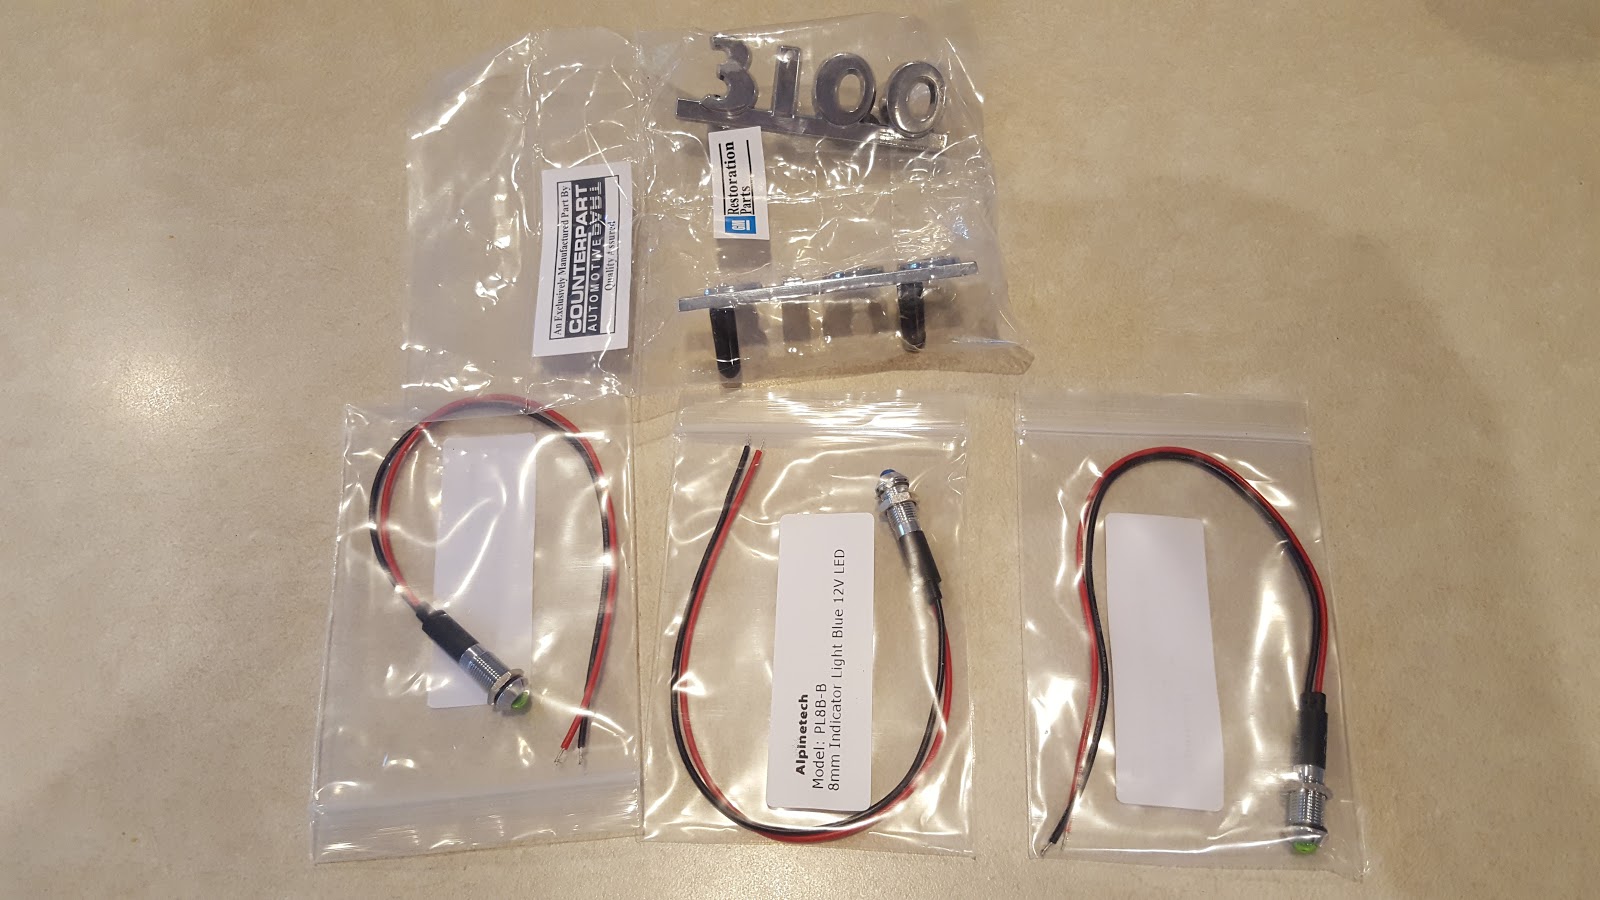
And there's your clue, Gray Ghost Fans!  Which emblem did I choose?  Not yet!  First here's a pic of the really cool LED lights that I'll use for the turn signal indicators:


I bought 2 of the green (one for left and one for right) and one blue (for the high beam indicator). They are 8mm wide (about 5/16").  Instead of searching for an 8mm drill bit, I went with the 5/16" bit and then reamed out the hole with a rat tail file.  Worked perfectly.  I guess it's time to let the cat out of the bag:  the emblem that I chose is:


This is the 1950 - 1952 Chevrolet 3100 emblem.  My truck is a 1953 model, so Chevrolet changed it up starting in my year.  However, the style of number is consistent with my truck, so it fits right in. Here is a pic of the lights and emblem before installation:


All in all, only a couple of bucks and I think it'll work out pretty good.

After doing the layout, I drilled and reamed all the holes and did a test fit to see how it would work. The test fit looked like this:


I've got to say, not too shabby!  Ok, test fit over.  Time for paint!  I painted the plate to match the dash, which means Rustoleum #7713 Dark Bronze.  Once that was dry, I permanently installed the lights and emblem.  It now looks like this:


I think it turned out pretty darned good!  I offset the high beam indicator light just a bit so it sits just higher than the turn signal indicators.  The 3100 emblem sits dead nuts in the middle (left to right) and the lights are equidistant from the edges of the emblem.  I can't wait for the paint to cure completely so that I can install the plate in the truck.  (If I do it now, the paint will scrape off the edges as I wedge it back into the dash.)  Once I get it wedged into the dash, I will use those special bolts to bolt it into the dash and then make the electrical connections for the turn signals.

I'd love to know what you think about it!

That's all for now.  I'm in the process of collecting parts necessary for the engine swap.  In the meantime, I'll keep plugging along with smaller projects to try and keep it moving forward.