
It's still cold outside, but things are heating up in the garage! And by heating up, I mean getting serious! It was time to overcome my fear of the torque tube crushing my skull and get to work on splitting the universal joint. This has to be done in order to get the transmission out, which is the next major step in the engine swap process. Friday was a regular day off, so out to the garage I went!
Now, in the spirit of full disclosure, I had already loosened the bolts that held the universal joint cover collar in place and unscrewed the u joint cover end cap and slid it to the rearmost position on the torque tube that it can go. However, on this first attempt, the u joint cover would not budge. I could not rotate it, slide it or wiggle it out from it's position. I made a request of my forum buddies and the awesome suggestion of using a strap wrench came back. A quick trip to the big box store and I was the proud new owner of a strap wrench.
After clearing out the garage, I got under the truck and attached the strap wrench. At this point, it was just silly how easy it was to rotate the u joint cover. Once again, the lesson of leverage was taught. With the u joint cover now moveable, it easily slid down the torque tube and out of the way. Here is the assembly prior to moving the collar rearward:

In this shot you can see a block of wood. This is a good time to let everyone know that the torque tube is under pressure from the rear axle, so using a floor jack is required to ensure safety. The whole thing looked like this:

I know, even to me it looks a little dodgy. But the truck was on jack stands and pretty high off of the ground. So the floor jack wouldn't reach without the wood block. Thankfully it held. Time for that u joint.
With the torque tube supported, there was no pressure on the u joint, so it was just a matter of finding the right wrenches and unbolting some unnervingly small bolts. I noticed as I was working on the bolts that they really weren't torqued down very much, although they did still have the safety tabs in place that prevent them from spinning loose. Only one of the four bolts had a washer and one of the four bolts was a different size bolt head, but same size shaft and threads. It was odd.
Now I was able to slide the torque tube side of the u joint backward, too. Using the floor jack, I raised the torque tube as high as it would go and installed a 2x4 cut to fit between the frame rails. Once that was in place, I lowered the torque tube until it rested on the 2x4. It was now safely out of the way. That means it was time to start on that transmission.
First on the agenda was to undo the shift rod linkages on the side of the transmission. That was easy as the rods are held to the transmission with a washer, spring and cotter pin. With the exception that one of the cotter pins was really hard to get to, this part of the job wasn't bad.
Next, it was time to make a tool. This required cutting the head off of 2 bolts that will act as guide pins for removing the transmission. This is what it looked like:

Before
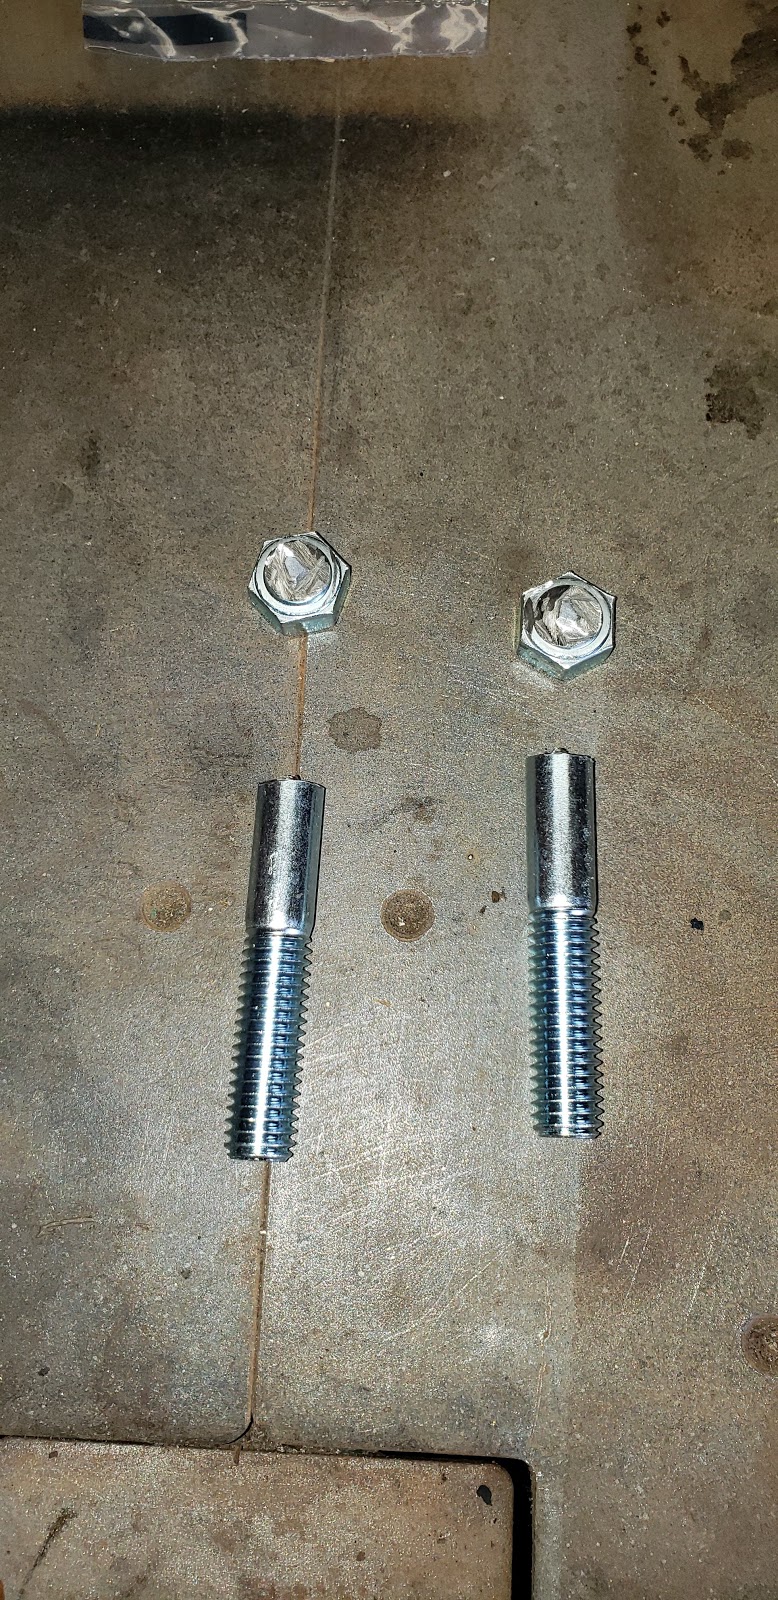
After
Once again, not too mentally taxing. The shop manual for the truck tells you to remove the two top bolts and insert Chevrolet guide pins J-1116. Those are antiques and not readily available, so making your own out of these bolts is the next best thing.
With the guide pins made and installed, it's time to get the bottom two bolts out. The top bolts attach the transmission to the clutch cover (bellhousing). The bottom two bolts attach the clutch cover to the transmission. They go from inside the clutch cover into the threads cut into the transmission. On the top, the transmission only has holes and the clutch cover has threaded holes. Not sure why they did it that way, but ok. You creep a little farther under the assembly reach into the clutch cover and a 3/4" wrench makes quick work of them. Once again, not much torque on those bolts....
With the bolts out and the guide pins in place, it's time to slide the transmission out. The guide pins keep the input shaft of the transmission from damaging the clutch while it slides out. At least that's what the manual says that they do. I wouldn't know, because having the torque tube raised all the way up blocks the space that the rear of the transmission needs in order for the input shaft to clear the clutch cover! OY! I knew that this was going to smoothly!
So...I reached out to my forum buddies again and learned a couple of things. Most important, having the jack stands on the rear axle (like I did) puts all the weight of the truck onto the axle and consequently onto the torque tube. If the 2x4 were to fail to hold the tube, it would crash down with considerable force and could actually be lethal. Time to take a step back and rearrange the jack stands. Saturday was a washout, which meant that I couldn't clean out the garage to get access to the underside of the truck. It would have to wait. Sunday started with rain, but cleared by mid-morning. Time to get back to work!
It was a total PITA to move the jack stands! Let's just say that it is done. In the process, I lost several inches of clearance, which means that working under there will be that much more difficult. By the time that I got done with the jack stands I was pretty tired (it's a really long story). After that ordeal, I spent some time cleaning grunge off of the replacement engine. Not fun nor pretty work, but useful. Next weekend I'll go after the transmission one more time. This time, I plan to lower the torque tube out of the way, making the room I need to get the transmission out. Once the transmission is out, I'll raise the torque tube again and block it with the 2x4. Assuming that I can do that, the only things left to do are to remove the 2nd and 3rd gear shift rods from the clutch cover, drain the oil and remove the hood. It will then be time for removal of the dead engine! Like I said, things are heating up! Stay tuned for more Gray Ghost action!


