1953 chevy truck ad

1953 chevy truck ad

Saturday, July 25, 2015

Solder Practice

Doctor's orders keep me from physical labor this weekend, so I decided to try something light, while still moving forward on the truck.  I knew that I needed to practice soldering before I start in on my new wire harness, so this was the perfect weekend to start practicing.  After a little online research and talking to my friend who is an experienced solderer, I set out to practice.  I took 2 equal lengths of 16G wire, stripped the ends and physically twisted them together to start an inline splice.  It looked like this:


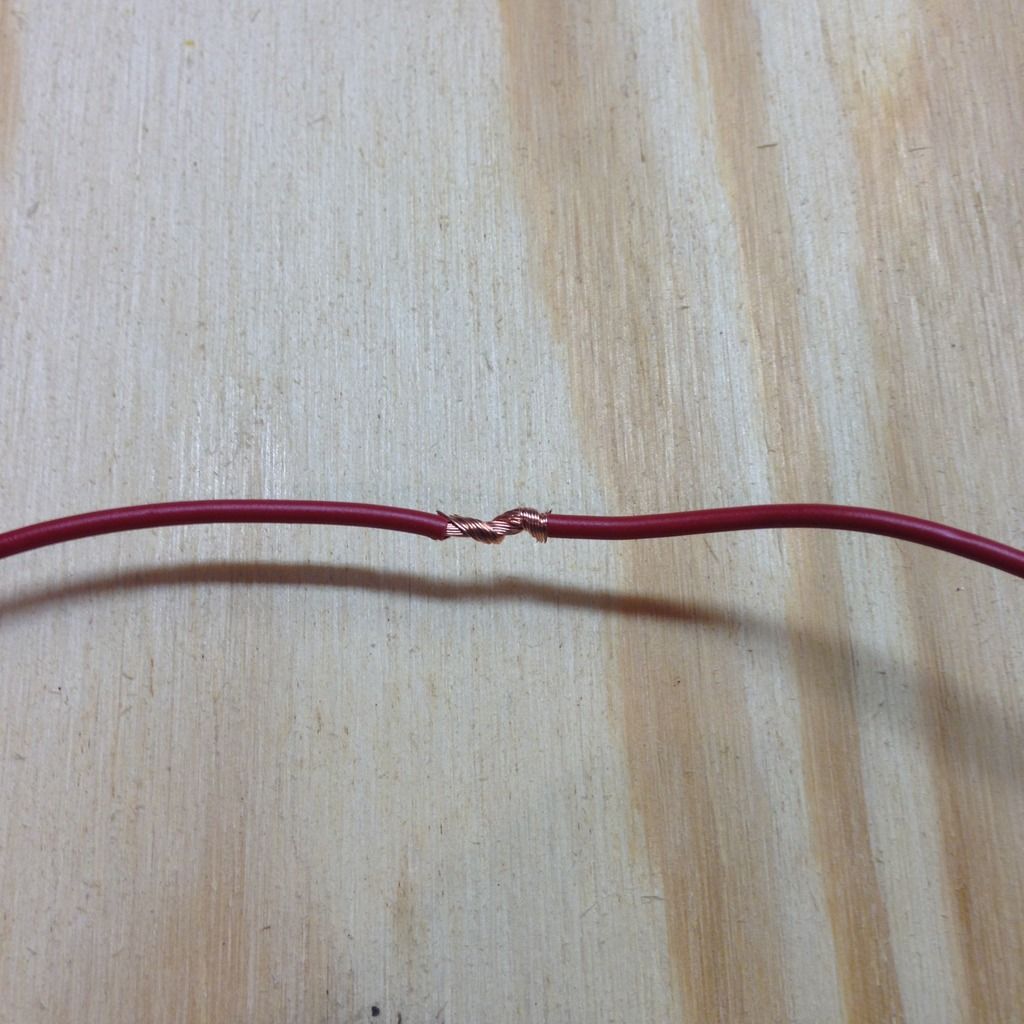
Two things I learned from this part of the practice: 1.  I needed a little more stripped wire than I stripped for my practice, 2. It's harder than it looks to get a nice, neat wire twist.  However, I decided to just keep going with it instead of trying to make it perfect.  The next step was to coat the bare wire with flux.  It looked like this:


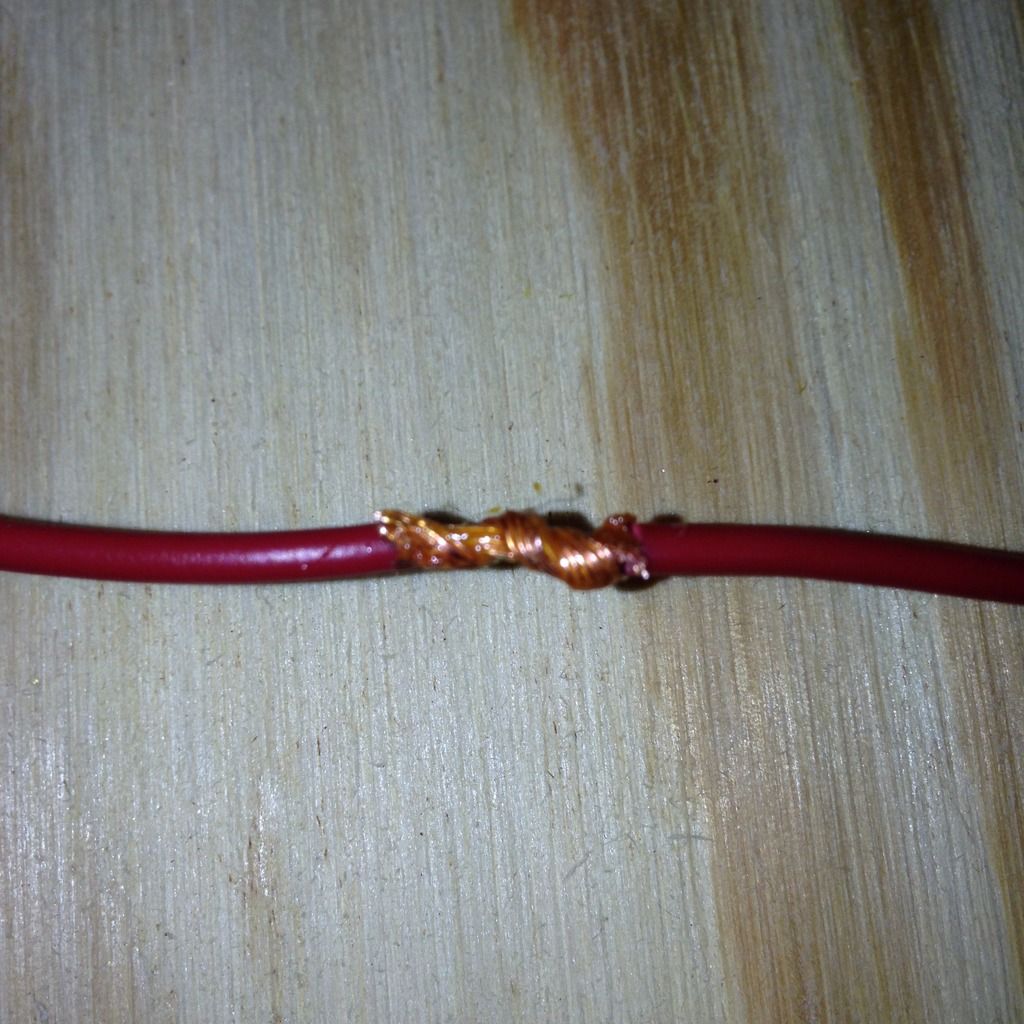
The pic is a little blurry, but you can see the flux is pretty well coating the exposed wires.  Next was to actually solder the wires.  It looked like this when I was done:


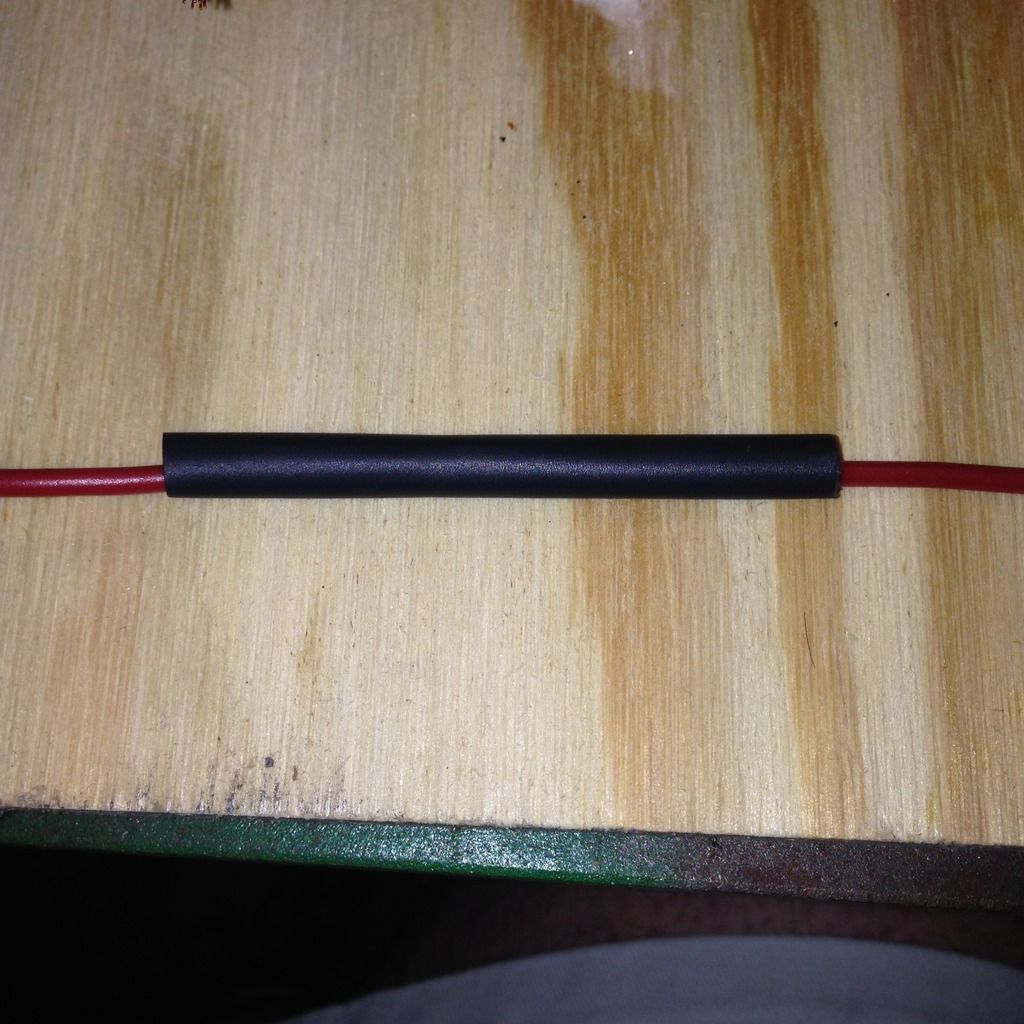
It's not pretty, but the wires are completely soldered.  I am a little worried, though.  I am trying to do the soldering without overheating the wire insulation.  Clearly, I'm not an expert, but the insulation on the wires next to the solder joint look a little overheated to me.  Plus there is some extra flux on the wire on the left side.  I don't know if any of this is a problem or not.  It was my first try and time will tell, which is ok, since I'm not going to be soldering on the wire harness for several months.  That gives me more time to practice and get it right.  Anyway, still in the spirit of keep moving forward, I got out the shrink wrap tubing.  I cut a piece that covered the solder joint and the adjacent wire insulation.  It looked like this before heating:
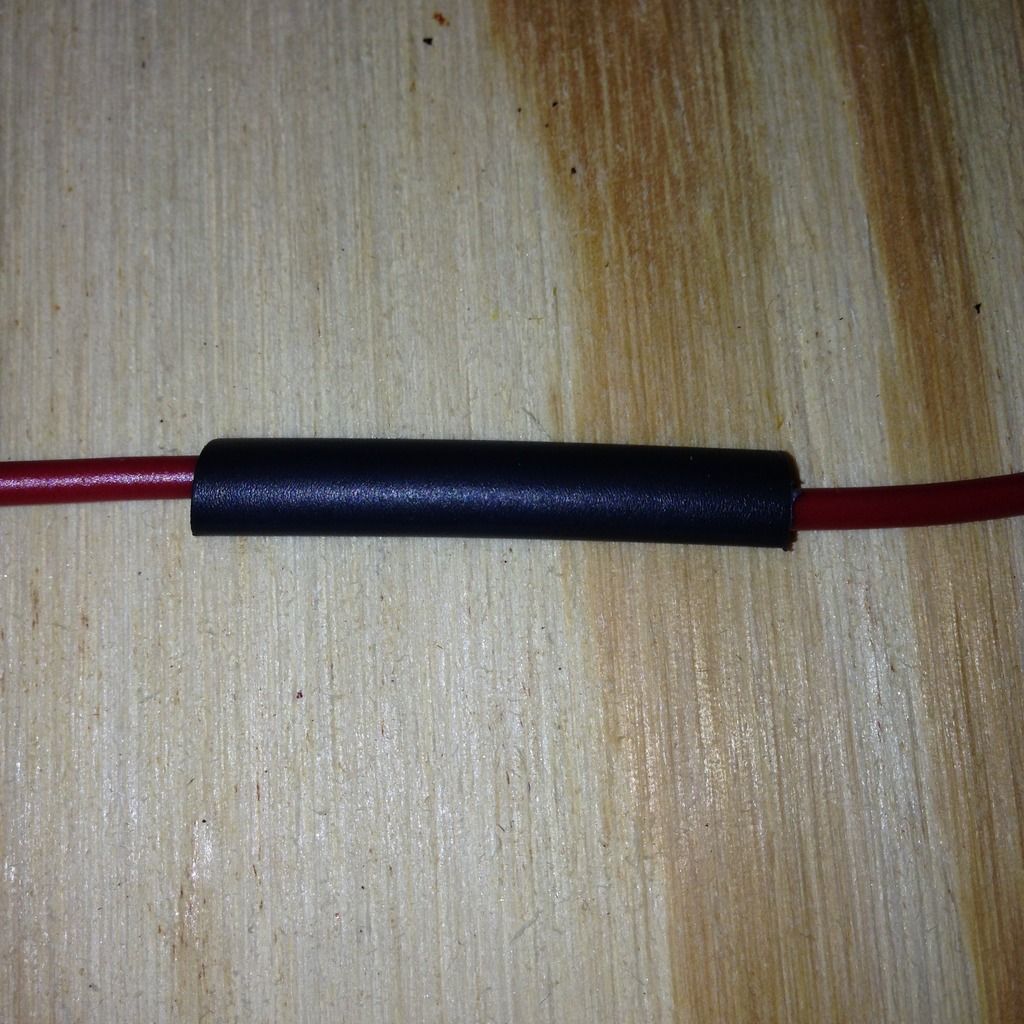

After heating:


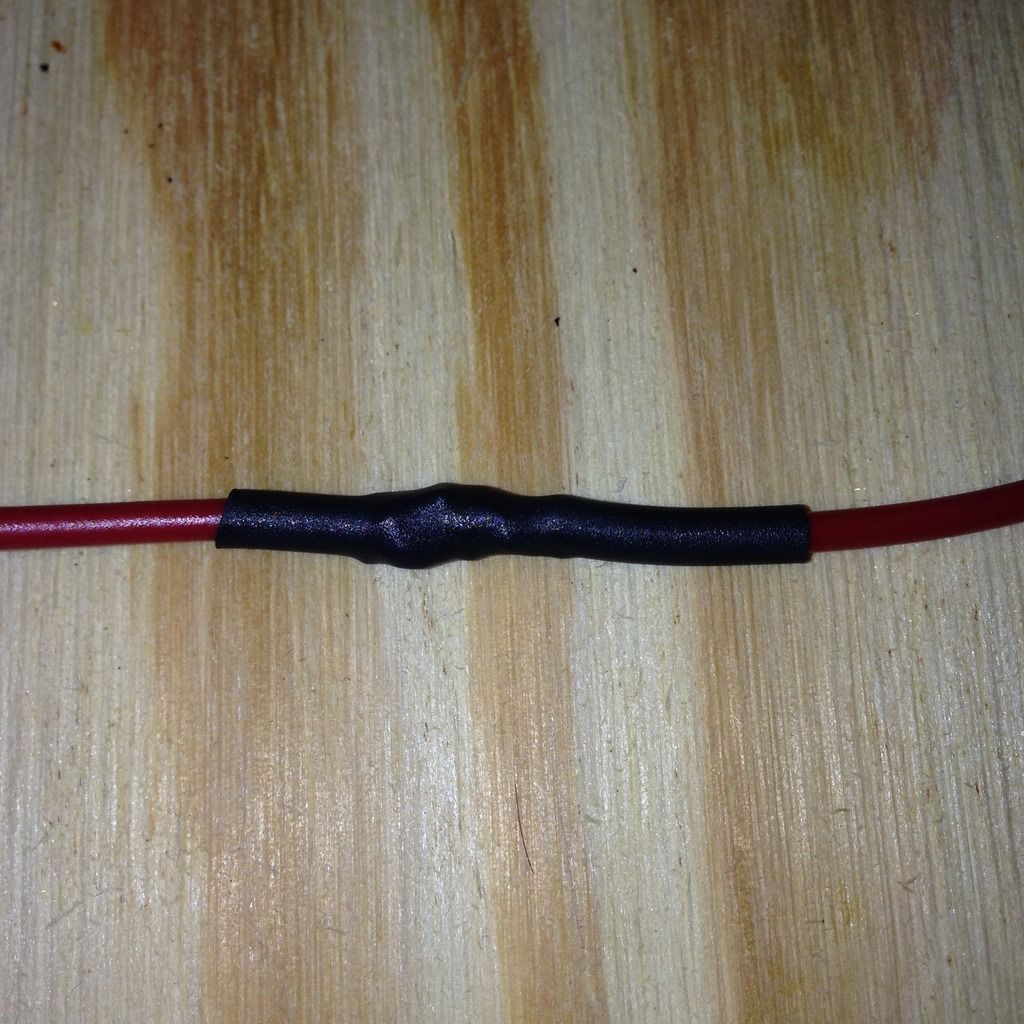
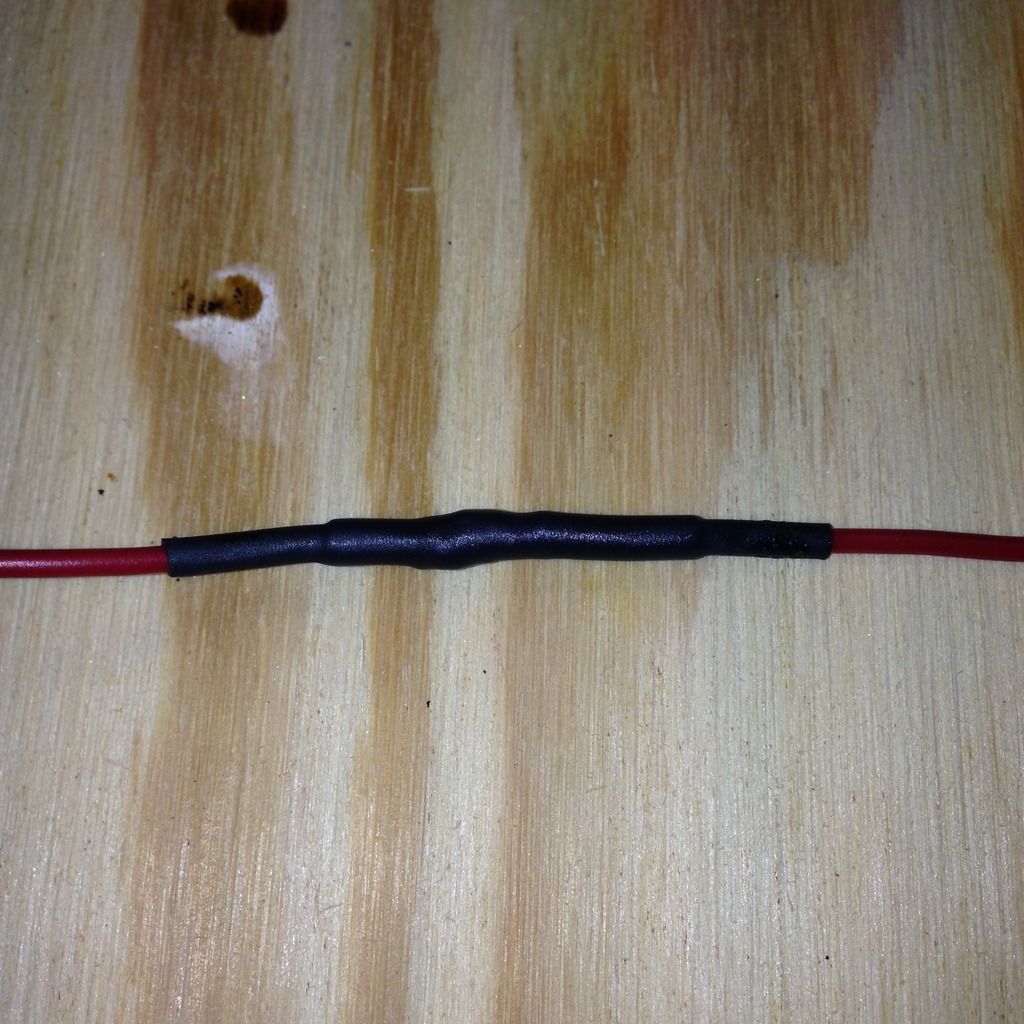
Once again, it looks a little "sweaty" to me, like it's been overheated.  However, it did conform, revealing my lumpy solder joint.  But it did conform!  In an effort to make a water resistant splice, I put a second, longer piece of shrink wrap tubing over the first.  It looked like this:


After heating, you can clearly see the underlying shrink wrap tube.  It looked like this:


Not a bad first attempt, but clearly it could use some improvement.  Just to round things out, I got out a butt splicing crimp connector to see what the difference would look like.  I used these connectors:


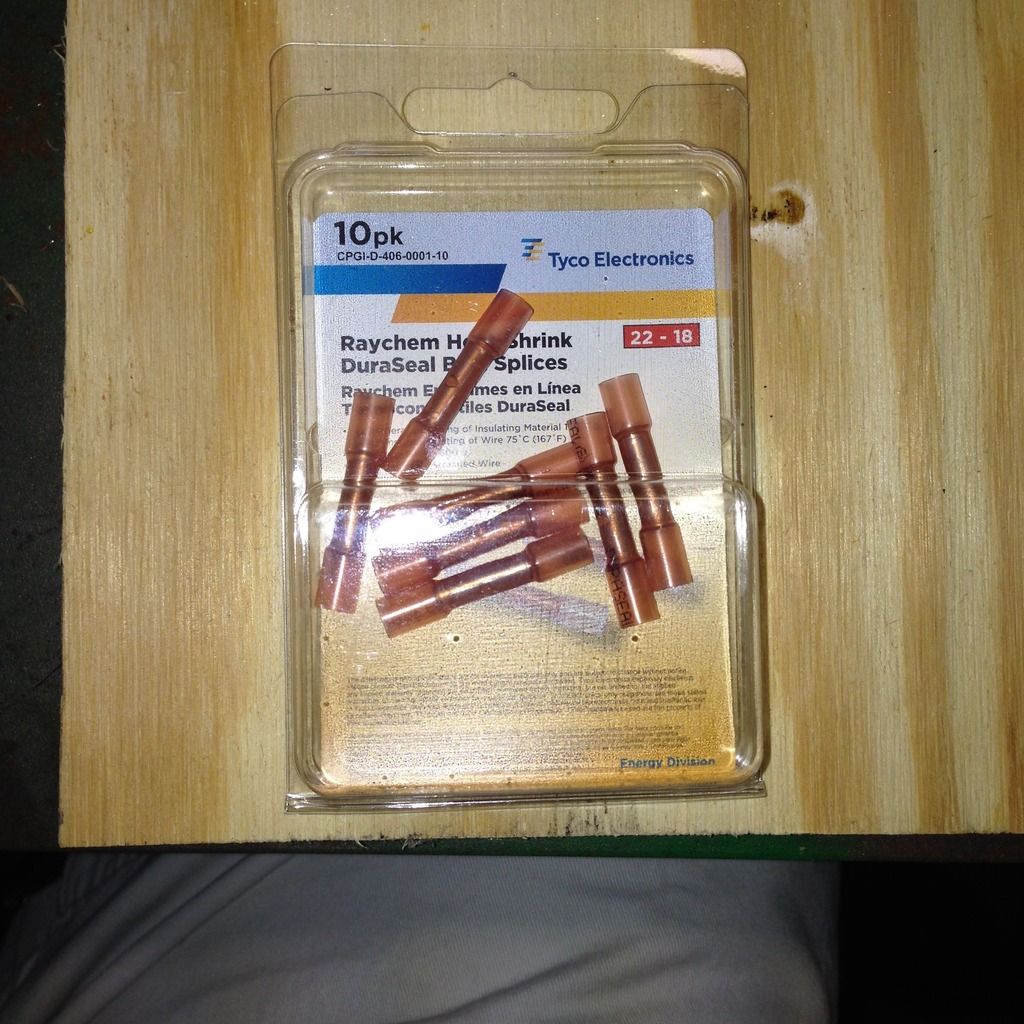
When crimped onto the wire, it looked like this:


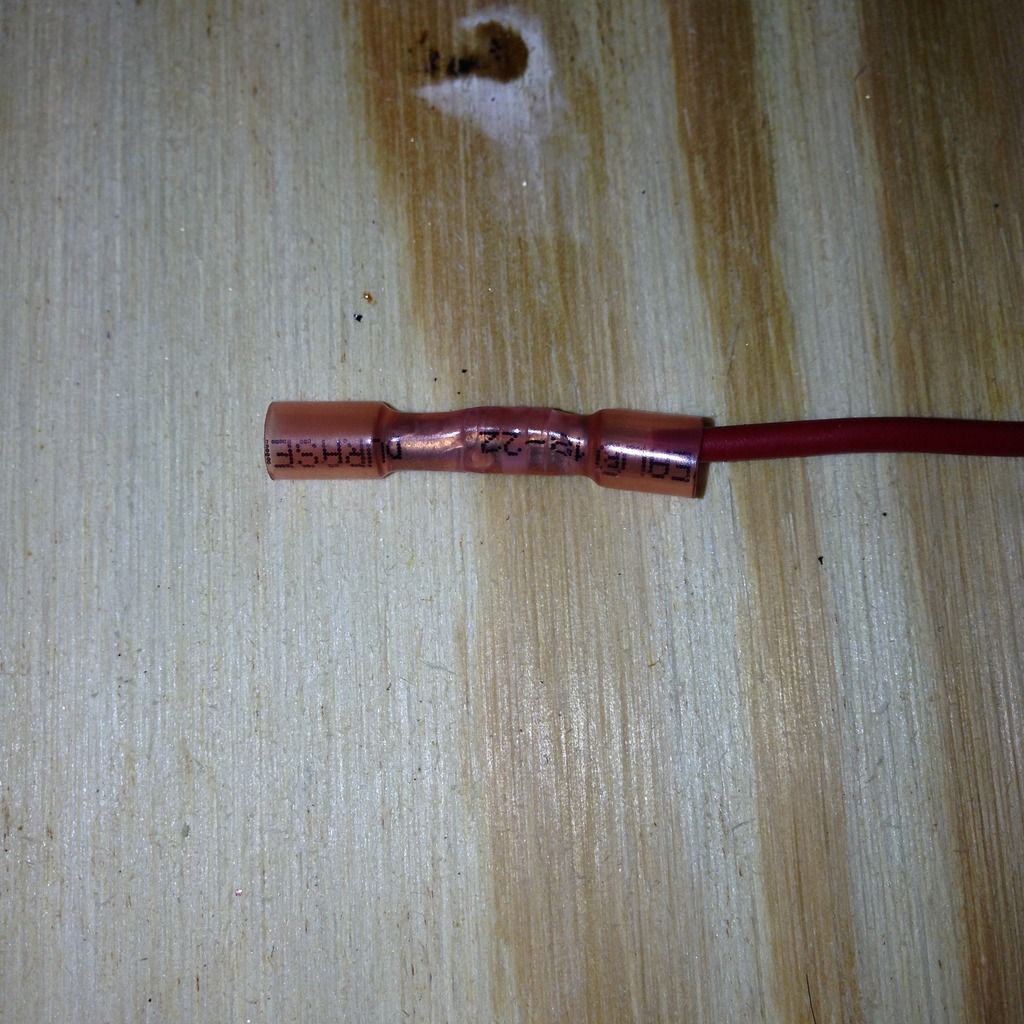
The package says that the cover is heat shrink material, so I gave that a try too.  It looked like this:


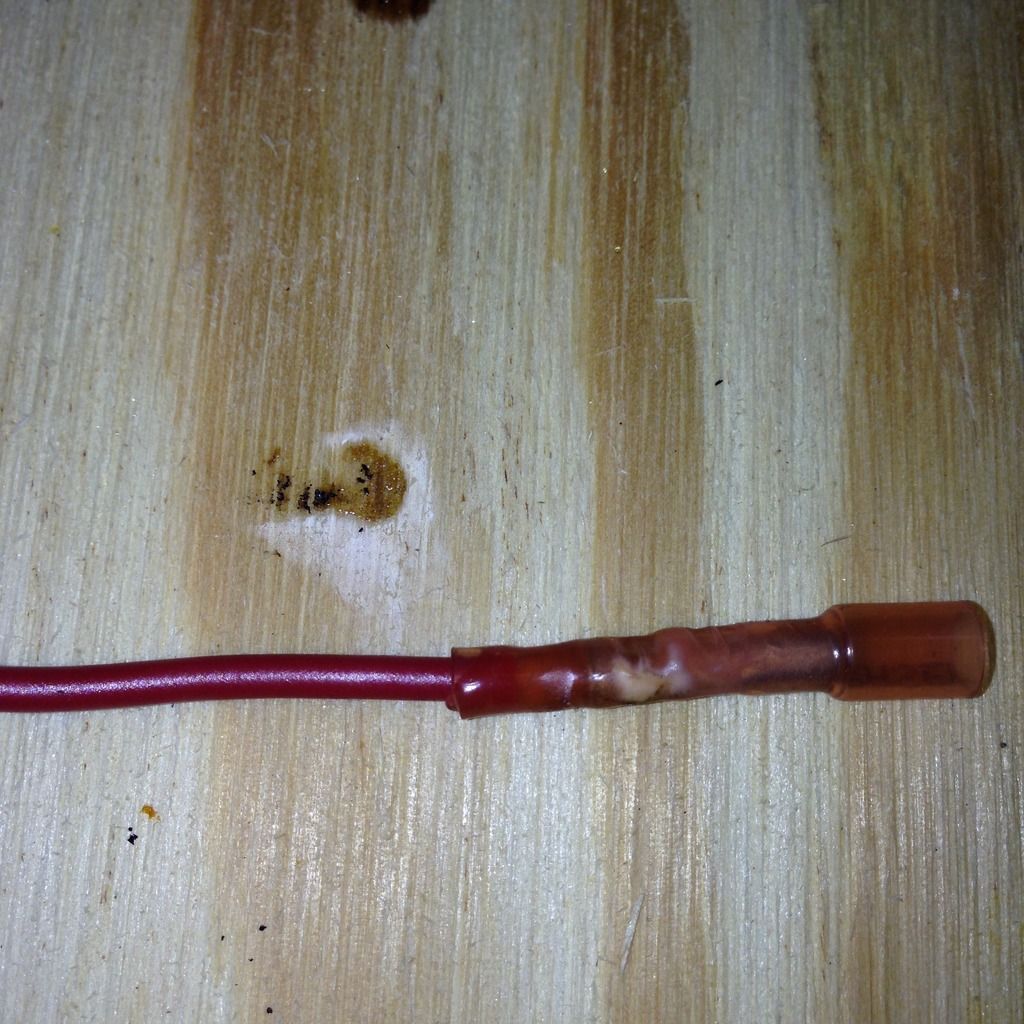
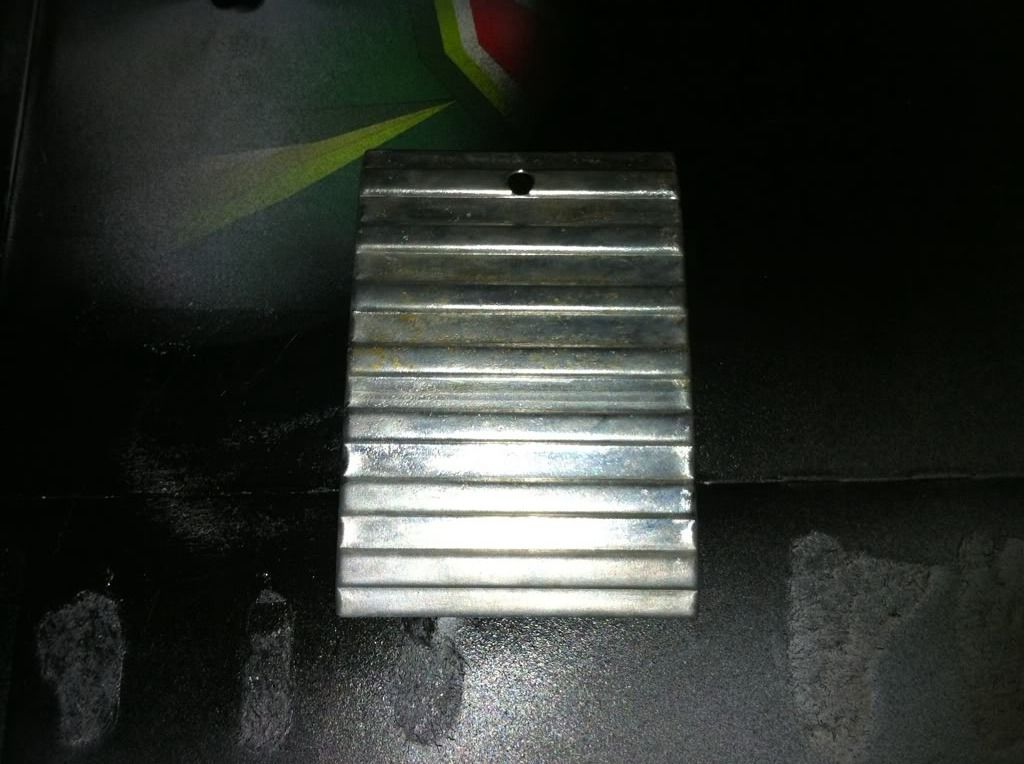
It did shrink, but looks a little "melty" to me.  Also, in the first crimp pic, you can see that it was made for 18-22g wire and I jammed a 16g wire in there, so it was a tight fit, and likely not a good connection.  But it's just a test....  In case you were wondering how I got that massive crimp, I used the crimping tool that I got from Speedway Motors when I ordered my wire harness.  It looks like this:


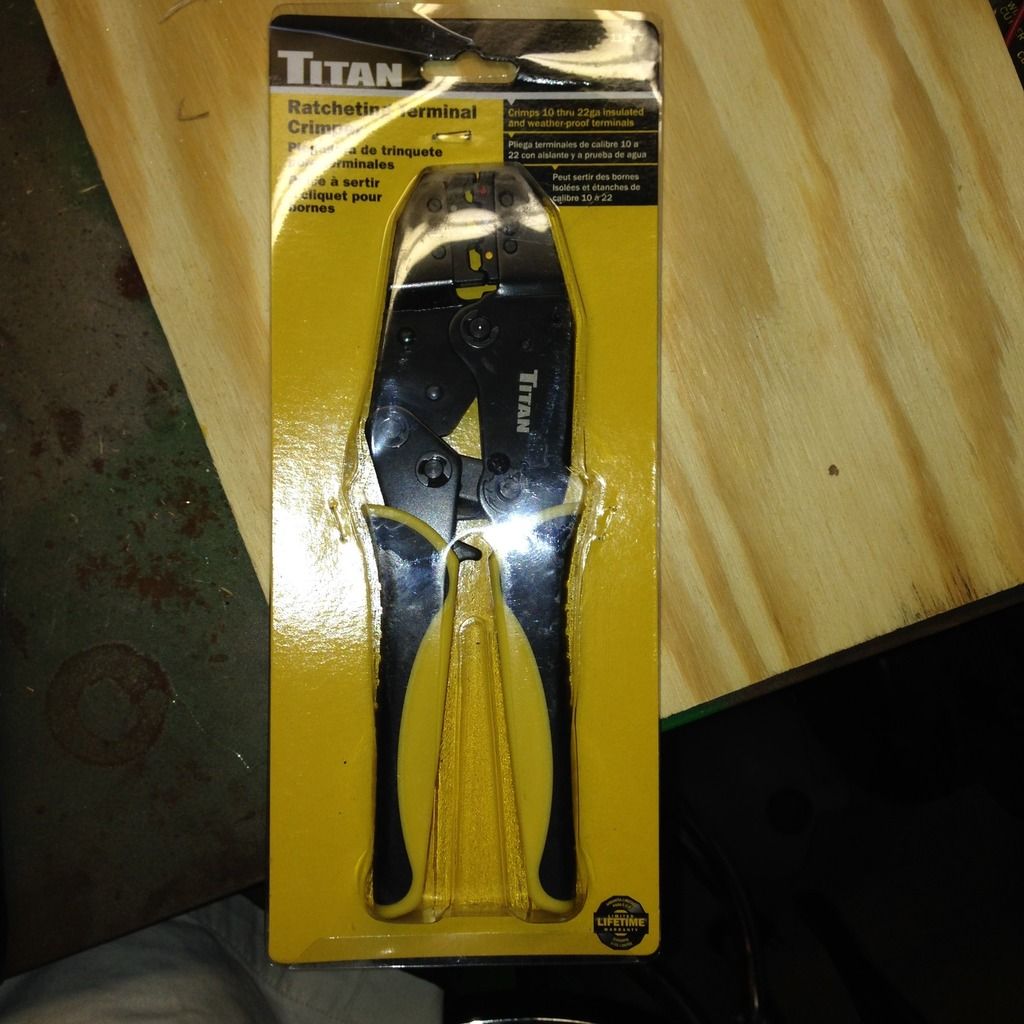
Once again, I have to apologize for the rotated pics.  Apparently, Photobucket is not impressed with iPhone pics.  It randomly rotates pics (like the crimping tool pic) and when I manually rotate them in photobucket, they look right, but post wrong.  This is also obvious in the crimp pics as they are rotated 180 degrees from each other, which is something that I did not do when I took the pics.  Oh well, it's free....

That's all for now, got to rest.  Yeah, right!

Sunday, July 19, 2015

Hazy, Hot and Humid... Not Truck Wrenching Weather.

The three H's ruled the day today, but it is summer.  Got the grass cut, but simply too hot to be in the garage doing anything!  No pics either, just trying to stay cool.  Will pick things up again, when the summer temps cool off a bit.

OK, maybe one pic, a little mind over matter to help with the heat...


A little reminder from a couple of winters ago.  No matter how hot it is now, the cold weather will get here eventually.

Sunday, July 12, 2015

A Dash of Dash (Panel Trim)

Here's the last of the quick hitting projects, some dash panel trim and the radio delete panel and attaching bolts.  Once again, here's what it looked like installed in the truck when I got it home:


It's kinda hard to tell from the pic, but there is an upper piece of trim, a lower piece of trim and the slotted piece is actually the radio speaker grill.  The 2 pieces of trim hold the grill in place and the ashtray mounts into the grill.  Here are the pieces after disassembly and sanding:


These were sanded and primed 5 years ago.  Also, because these pieces are actually made up of several pieces of metal, they are hollow.  To get the rust out of the inside, I used Evapo-Rust.  I soaked the parts in the Evapo-Rust until all of the rust was gone.  After it was gone, I rinsed the parts off, dried them with a hair dryer until I was sure that the insides were completely dry.  When I was sure that they were completely dry, I poured paint down the inside to coat the entire inside. It was an attempt to seal the inside surface and prevent rusting again.  After that, I was able to prime and paint the underside.  It looked like this:


(Sorry, I don't know why the pic is rotated, but I can't get it to go the right way....)

I did not do anything to the underside of the radio delete plate, as it wasn't rusted.  Fast forward 5 years and I taped off the backs of the pieces and painted the fronts.  It now looks like this:


Here are the undersides after painting:


That's all for now.  Apparently Photobucket has gone insane.  Pics that look fine there are now rotated here.  Not sure what is going on, but hope it gets resolved quickly!

I'm going to order the vinyl letters for the upper piece of trim.  For 1953 they were white.  When I order those, I'll also order the dome light gasket and some other odds and ends that I need. Trying to make the shipping costs more economical.  Also, I still have the radio speaker grill and the glove box door to work on.  Those still have some rust on them, so they are not yet ready for primer or paint.

Saturday, July 11, 2015

The Smoking Lamp is Lit

Another quick turnaround project....  Like the horn button, I had removed the ashtray early on after getting the truck.  Like the rest of the interior, it was in pretty rough shape.  Here's how it looked when I got the truck:


It was actually kind of comical.  The guy that found and bought the truck to resell it had spray painted primer everywhere.  I guess he was trying to hide the rust and tidy up things a bit. However, he didn't go to much trouble in prepping before spraying.  Here you can see a bunch of pencils sticking out of the ashtray.  When I pulled it, it was full of old cigarette butts, too!  When I got it out, I noticed that the actual ashtray body was a real mess, with rust through and pin holes everywhere.  So I cleaned it up and then decided that it was too far gone to salvage and ended up buying a replacement body on eBay.  I was able to clean up the face and handle of the ashtray. The partially cleaned face looked like this:


I say partially cleaned because you can clearly see discoloration on the face of it.  This pic was taken 5 years ago and frankly, I can't remember how clean the face was when I coated it in primer.  However, I don't usually leave any discoloration when I'm cleaning, so I'm assuming it was all gone.  Also, when I looked at it today, there was no indication of any further rusting.  So I feel good that I got it all when I cleaned it 5 years ago.

Then it was simply a matter of unscrewing a small screw on the inside of the ashtray that holds the handle on.  (The handle then squeezes the face to the ashtray body.)  Once the handle is removed, the face comes right off the ashtray body.  Then, like the horn button, it was off for paint.

Here it is after painting and reassembled onto the ashtray body:


I bet it's been a long time since you've seen an ashtray that was actually meant for cigarettes and ashes.  Here is a top shot, looking down:


Here is a side view:


The original ashtray was not painted on the body.  I went ahead and primed/painted the replacement body to prevent any further rusting.  In the next shot, you can see the small screw that holds the handle to the ashtray body and squeezes the face plate to the body.


So that's it for this quick edition.  I've got some dash trim pieces that are masked off and the first coat of paint is drying.  I'll try to get the final coat on them tomorrow and have another post for those.  It's been very gratifying to be able to finally finish these small projects that I started so long ago.  Once the paint on them is fully cured, I'll package them up and store them out of the way.  That will free up some much needed shelf space, which is a good thing.

Beep Beep, Beep Beep, Yeah!

Here's another quick post on a quick project that I started about 5 years ago and finished yesterday. The horn button!  Pretty simple, huh?  Here it is as it sat in the truck when I got it:


Here it is after I took it out of the truck 5 years ago:


A quick sanding and some primer got it to this stage:


Then time passes....  It sits on a shelf in the basement....  Now that I found a close match to the interior paint in a rattle can, it's time to finish what I started.  Here's the result:


The underside is painted, too, except for the center of the button, which is necessary for contact with the switch.

I'll let the paint cure for a couple of days.  Then it's back to the shelf, although packed away this time. I had toyed with the idea of highlighting the letters and decorative bars in an ivory color, but am now leaning against the idea.  I had a mild incident while painting the button.  A small piece of debris somehow found its way onto the button and dinked up the paint.  I had to wait for it to dry, lightly sand off the debris (used 220 grit with a very light touch) and then respray it.  Turned out well and I don't think that you can see where I sanded and resprayed it.  So all's well that ends well, but I don't want to mess it up again trying to make the letters stand out.  That wouldn't be a quick fix....

Sunday, July 5, 2015

Taking a break from the brakes and making some light

Being a holiday weekend, I knew that I wouldn't get much time to work on the truck, even with extra time off.  So I decided to work on a small project.  I need to clear out everything from the cab, so that I can pressure wash the inside.  This includes the seats, instruments in the dash, gas tank and dome/courtesy light.  Everyone knows it today as the dome light, but chevy called it a courtesy light back then.  This is how it looked when I got the truck home:


You can see the light is covered in some kind of rose colored something.  When I took the light apart, the rose colored something looked like a glob of dried latex paint.  It covered most of the glass lens and parts of the light housing.

When I got the light out of the truck and apart, it looked like this:


The light housing is on top.  You can clearly see the rose colored material.  Next are the switch, 6v bulb and socket wiring.  Below that is the cover, which holds the lens.  Below the cover is the glass lens.  The underside of each piece looked like this:


In these photos, the glass lens had already been cleaned of the rose colored material.  It was in thick globs inside of the lens.  It dissolved easily in Formula 409 cleaner.  It sort of dissolved in plain water.

Here is a close up of the  light housing:


Here is a close up of the light housing switch:


Here is a close up of the switch underside:


The switch is a single pole single throw (SPST) type of switch.  The truck wiring brought one power lead to the switch (the terminal that is now empty).  The other terminal connected to the positive side of the light bulb through the socket wire harness.  Grounding was accomplished through the light housing frame and into the truck body/frame.  The switch would simply connect/disconnect the power to the light bulb.

Cleaning consisted of light application of the dremel and abrasive wheel.  Here are the light housing and cover after cleaning.


A couple of things to note that are now visible:  The screw holes used for mounting the lens cover to the light housing have brass eyelets through them.  I did not clean or remove the cream colored paint inside the bulb area.  I'm guessing it is for reflective purposes and it was in good enough condition to just leave it alone.

Here is the underside of each after cleaning:


Some swirl marks are visible on the light housing, but no one will ever see them, so I just left them.

Here is a close up of the light housing.  You'll notice the new socket wire harness is already installed and the bulb is inserted into the socket.  The bulb is the Sylvania 1156 LED version. The original bulb was a #87, which is a 6 Volt bulb.  I could have gotten a 12 Volt version (#93), but wanted to stay away from the incandescent bulbs whenever possible.  The 1156 uses the same size socket (S8), but the incandescent version would have been too hot for the housing.  So I found the LED version and got it at my flaps.

Here are the three restored assemblies:


You'll note that the switch was left out of the restored light housing.  I originally looked for a replacement or NOS.  No NOS was found and none of the mini or sub-mini SPST switches were a good fit.  Then I realized that the replacement wire harness I already had bought (Speedway Motors 20 circuit harness) used the headlight switch to operate the dome light.  This means that the harness sends both positive and negative leads from the headlight switch to the dome light, obviating the need for the switch at the light.  I decided to leave the hole as it was and not weld it closed, in case someone down the road wanted the switch at the light.  The wiring, then, is positive (black) to the light socket wire and ground (white) to the light socket housing.  The cover was painted with Rustoleum Dark Bronze Hammered paint over Rustoleum Automotive Primer.  I still need the internal gasket and will order it when I'm ordering other stuff.  Several of the companies sell them.

Here is how it looks assembled:


Here is how it looks attached to the battery and lit up:


So that's it, a quick little project to take a break from doing the brakes.  Next weekend it will be back to the brakes.  For now, the light is put away waiting for me to need it again....