1953 chevy truck ad

1953 chevy truck ad

Sunday, December 17, 2017

Fall is over, time for some catching up!

Hello, Gray Ghost Fans!  It's been a couple of months since my last update and I've been quite busy, so there's lots to report.  When I started my blog, I wanted to document the process.  Not only from a technical perspective, but also from a practical perspective.  What I mean by that, is that I'm not an expert in any of this.  I'm learning as I go along.  I think that most people are in the same boat as me, although some may have had auto shop class or metal shop class in high school, where I didn't have either of them.  So, my blog would be about the good, the bad and the ugly of my experiences.  To keep with that theme, I have to come clean and report that a large part of my absence during the fall months was due to recovery from an injury sustained during some of the electrical work at the rear of the truck.  Due to my scatterbrained self, I had been up/down/under the bed of the truck so many times that I ended up hurting my knee.  After suffering for a couple of weeks, I went to the orthopedic.  Long story short, my cartilage is wearing thin.  After several PT sessions to build up the muscles around the joint, I can mostly walk without pain...so back to work on the Gray Ghost!  I include this personal information as an illustration of life interfering with working on the truck.  It's all a part of the journey, so it adds to the experience and counts when you start a project like this and try to figure out how long you think it's going to take.

The first project that I spent some time on this fall was refurbishing the horn.  I figured that I should finish that up, since it's been in the basement for almost 10 years and the wiring harness came with the horn feed and relay included.  The bracket had been one of the first things I restored, as it was an easy piece to experiment on with different rust removal techniques.  Sadly, I have to report that there was an accidental dropping of the piece while the paint was still tacky, so a part of it got bollixed up and will have to be redone, but all in all it looks ok.  Here is a shot of it on the workbench:


The next project is an experiment.  I've done some reading up on adding an electric fuel pump to the fuel system.  Not in place of the mechanical pump, but in addition to.  I bought the parts back in the summer and finally got around to plumbing it into the engine test stand.  I haven't finished this task, as I had to move the gas tank to fit the pump into place and I have to figure out where the final tank place will be.  For now, the fuel pump looks like this:


You can see the test stand gas tank (from on old Honda lawn mower!) sitting on the garage floor.  You can also see the wiring from the pump.  The brown/red wire running to the fuse block and the black to the momentary on/off switch and ground.


This shot just shows the connection from the electric fuel pump to the mechanical pump.  From what I've read, the pressures are not additive, so it is like having a backup to have them both in line.  Right now, it's just wired up for priming the carburetor.  If I like how it works out, I'll do the extra work to wire it into the truck to make it work both as a carb primer and as a part of normal operation of the engine.

The next project was sandblasting and priming/painting the sheet metal in front of the radiator.  The radiator hold down was first.  It is done, but I did not get a pick of it.  The next piece is the hood latch that connects to the sheet metal filler panel between the radiator and grill.  It cleaned up well and look like this:

Front

Clearly, you can see that one part of it only got primer.  I didn't see this until after I reinstalled the latch return spring.

Back

I like the fact that in the front picture, you an clearly see the GM stampings.  They were not visible on the part before blasting.

Then, I started the hunt for everything necessary to convert my engine from an automatic transmission to a manual transmission.

During the wiring process, I made the decision to use a modern, 4 wire ignition switch instead of the original 3 wire switch.  This lead me down the path of switching from the stomp starter, with only 1 electrical connection to the solenoid based starter with 3 connection points.  The solenoid starter is currently wired up to the test stand and works, so it was an easy decision, even though I really like the stomp starter.  Maybe down the road I'll make the switch to a 12V stomp starter, but for now I just want to get it running.

Once I made the decision to go with the 12V solenoid starter, I had to get a new flywheel.  The ring gear tooth count is different between the 6V and 12V flywheels.  I found one on eBay that looked like it could clean up ok.  It looked like this when I got it:


I found a machinist locally and had him hot tank it and grind the surface.  When it was done, it basically looked like new:

clutch facing side


engine block facing side
(note the timing BB at the 10 o'clock position of flywheel)

Next on the list was a new clutch.  After some research and forum board discussion, I settled on one from O'Reilly Auto Parts.  It looks like this:


Here you can see that it is a complete set, including a new pressure plate, friction disk, throwout bearing, pilot bushing and alignment tool.  Prior to actually buying it, I took the flywheel up to the local store and had them test fit it on the actual flywheel, just to make sure.

Next it was on to the clutch housing (gm term) or the bell housing as most people know it.  Once again, I turned to eBay and scored one that looked like it was in good shape.  Dirty, but restorable.  Here's what it looked like when I got it:


With a quick trip back to my machinist and a hot tanking of the parts, it was off to the sandblaster to deal with the flash rust that formed after degreasing in the hot tank.  Once I had blasted the bellhousing, I primed and painted it with high temp engine paint.  The color that I chose was Old Chevy Blue.  Now, this is not the correct color for a truck bellhousing.  However, it is the correct color for the engine, since it came out of a passenger car.  Truck engines were painted gray, while passenger car engines were painted blue.  Long ago, I had made the decision to celebrate the engine's history, not hide it.  So Old Chevy Blue it was.  It now looks like this:


The clutch fork was dipped in Evap-O-Rust, which really ate the flash rust!  After derusting, it too was primed and painted.  Although this part was painted semi-gloss black and looks like this:

In the Evap-O-Rust


Cleaned, primed and painted
(This view shows the clip that holds it to the stud inside the bellhousing)

Then came the bolts...to hold the flywheel to the crankshaft and to hold the pressure plate to the flywheel.  They look like this:

Flywheel to crankshaft
(Box shows both GM group and part #)


Pressure plate to flywheel

At this point, all I'm missing are the rear motor mounts that attach to either side of the bell housing and the bolts to hold them in place.  Once I get them, I'll have everything necessary to do the engine swap!  I still have some engine work to do to get it ready for the swap.  I hope to do that work over the winter, so that by spring...it'll be time to do the swap and make this truck move under it's own power.  Cross your fingers, toes, eyes and anything else that will cross!

Friday, September 22, 2017

DASH(ing) To The End Of This Phase

Hello Gray Ghost Fans!

I had another productive couple of hours in the garage today, reassembling parts of the dash! For anyone that's watched a construction crew build a road, you'll understand when I say that this process seems a lot like that.  Meaning, it seems like all they do is move dirt around for months on end and then VOILA!, a road appears out of thin air, usually overnight.  This process that I've gone through is a lot like that.  Seemed like I wasn't really doing much of anything and then BAM!, I'm bolting on a bunch of really cool looking stuff, seemingly overnight.

To that end, I do think a quick reminder of where we started is in order.  So here is the Gray Ghost dash area the day that I brought her home:


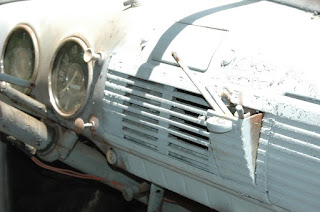
This, of course, is the somewhat infamous and definitely hysterical photo of the dash area showing how the seller of the truck spray painted everything gray primer.  I think it was an attempt to hide some of the rust.  I really liked how he didn't even take the time to empty the ashtray of pencils and butts before spraying!  I'm guessing it might have scared off most people, but this was pushing my financial limit at the time, so I went for it.  There have been quite few man hours cleaning all that up. But frankly, I loved every minute of it, minus the stinky mouse pee minutes (see:  Rusty Mouse Pee and a Stinky Cab for more details).

So where am I now?  Here's a shot looking at the restored steering wheel and horn button installed:


Oh this shot gives away quite a bit!  Look at what's hiding to the right of the quad gauge.  Yup, the restored speaker grill and top and bottom trim pieces!  Of course, the black backing piece is now done and is also installed behind the grill.  Here are a couple of shots of those pieces before I installed them:

Speaker Grill (Front)

Speaker Grill (Back)

Trim Pieces Dry Fit

Ashtray

Installed

So, as things typically go for me, when I got to installing the glove box door, the screws that mount the hinges to the dash were no where to be found.  Now, I've tried really hard to make sure to bag and tag everything!  Somehow, these were misplaced.  So, I looked at them closely and figured them to be #10 size.  I had some #10 machine screws in my collection so I tried them out. They were the right size, but the wrong thread count.  Mine were #10-24 and I needed #10-32. So, off to Lowe's, again. Once I got home it was 10 minutes work to disassemble the hinges from the door, install the hinges in the dash and then reconnect the glove box door to the hinges.

And now for that money shot.  You've seen the before, now here's the after:


I simply couldn't be happier!  A clean, whole, semi-restored dash.  So I'm sure some of you are wondering why semi-restored.  Kinda a lot of work for only semi.  That's true, but there was method to my madness.  The goal was to make the interior pleasant for while I'm driving it.  Even though the exterior will be ratty until I get around to the frame off restoration, I didn't want to be in a ratty vehicle.  Old yes, but ratty interior, no.  I know, the rusty heater is clearly visible in the last shot.  It too will get restored.  Sooner rather than later, I assure you, but it wasn't necessary to do that right now.  Everything is accessible from under the dash or the other side of the firewall, so the dash could be buttoned up.  Plus, I'll let you all in on a little secret...there is no actual glove box installed yet.  If you open the glove box door, it is still a gaping hole.  So, now harm, no foul.

What does this all mean?  It means that it's time to get that battery tray and ground strap finished up so I can test those circuits and start work on the tranny removal.  Oh dear!  Sounds like it's rapidly becoming time for the hardcore mechanical stuff....

Now, Gray Ghost fans, if you have gotten this far in the post, you may notice that there are some buttons just below here where you can register whether or not you liked what I've posted.  It is completely anonymous.  All that I see is that someone checked a box.  I really would like to get some feedback from those that have read the post (or any of my posts).  It only takes a second and won't give you away.  I promise!

That's all for now.  Until next time:  "Let's be careful out there."

Sunday, September 17, 2017

MAJOR MILESTONE: Wiring in the Cab is Complete!

Hello Gray Ghost Fans!  How exciting!  All of the wiring in the cab is done!  That means that the gauges, lights and switches are installed too!  It's been a long, difficult road for sure, and getting those gauges installed was no easy job.  But they are in and let me tell you, they look fabulous! So, without further adieu, here they are:


Speedometer


Quad Gauge
(Gas , Water Temp, Oil Pressure and Volts)

Holy Cow, do they look good!  These gauges are by New Vintage and are their "Woodward" series. They have the look and feel of the gauges from the series prior to mine (the art deco series). Nevertheless, I think that they look right at home in my dash.  Here's a shot of them together:


Here's a shot of my modified radio delete plate installed in it's permanent location:


Now you can really see what I was talking about in the post about creating it.  The bolts that permanently hold it in place are where the radio knobs would have been.  They have the special tab that fits into the slot in both the dash and the radio delete plate and keeps them from spinning when you tighten them up.  I really like the layout with the bolts, indicator lights and 3100 emblem.  It's not the way that Chevrolet did it, but I like it.  Here is the layout of the whole dash:


So, a couple of things...no the dash isn't completed yet.  The gaping holes are where the speaker grill goes, as well as the ash tray.  Both are long since restored and waiting in the basement. However, before I can install them, I need to get some kind of black paper (or paint some thin cardboard black) to sit behind the speaker grill.  Since I'm not installing a radio, you would be able to see through the grill without a speaker in place.  The heavy gauge black paper is how Chevrolet dealt with the issue, so that's how I'll do it too.  Once I get the paper, I'll finish installing the speaker grill, ashtray and finally the glove box door and lock.  After that, I'll put the steering wheel back onto the steering column.

In addition to the gauges and lights, I also installed the turn signal switch and the tachometer. Hopefully everyone remembers when the Starfire joined the 3100 team.  If not, you'll have to go back to 4/5/2015 to read that post!  As I noted back then, this tach is set up for an 8 cylinder engine, so it will show fewer RPM's than the engine is really turning, but I don't care.  It's more for show than for go.  I always shift based on engine sound, not what a tachometer is showing me. I've been doing that since I started driving and doubt I'll be changing anytime soon.  Here is the famous, 1961 Starfire tachometer installed in it's new location and all wired up.


To mount the tachometer, I used an Autometer universal gauge mount.  I was able to use an existing hole in the dash as a mounting hole, so no new holes were needed.  I put a slight angle on it so that it is easier to see from the driver's seat.  The keys are far enough away so that they won't hit it when we are driving!  Now how cool is that?!?  Automotive styling today sucks in comparison to the past!

Pay no attention to the wires to the left.  It does look a bit like a rat's nest under the dash, but I did say in an earlier post that I wasn't cutting any wires down with this installation.  It is still my intent to one day do a frame off restoration.  If I do that, it is also my plan to re-use this wire harness.  At that time, I would do a proper installation and cut each wire to the correct length.  If I had done that now, I would likely come up short on some of the wires then, as I'll have to make a few cuts to remove the wire harness for the frame off effort.  So for now, it's a bit ratty and I'm good with it.

Here is the final shot of this post and it shows everything, including the tach and the turn signal switch:


I have to say that I'm very pleased with how it all turned out.  It at least looks pretty good.

None of the "front of the truck" connections have been made yet and that is on purpose.  I don't want them in the way during the engine swap, so I'll just gather them up and tape them out of the way. Next time out, I'll go around the truck and make sure that there are no loose (as in still unconnected) wires that could cause a short.  Then I have to add the battery ground cable.  After that, I'll temporarily bolt on the tail lights and then, it's time to actually put a battery into the truck and start testing each of those circuits!  Of course, I'll have the fire extinguisher handy, just in case.  To be safe, I'll only add one fuse at a time and see how it goes.

That's all for now.  Quite a bit of progress in a short bit of time.  I hope you all like it as much as I do. Leave a comment to let me know what you think!

Sunday, September 10, 2017

Odds and Ends As The Push Is On

Hello Gray Ghost  Fans!

As the title suggests, this post is about the odds and ends that I've been working on as I make the final push to finish the electrical phase of the restoration.  So here goes:

First off, I mentioned in the last post that I had finally settled on a location for the multiple ground wires.  All of the wires were terminated with a ring connection.  Once stacked and installed on the firewall, it looked like this:


In the pic, you can notice a couple of things.  To the left is the shift linkage from the 3 on the tree shifter.  On the ground stud you'll notice all of the ground wires have shrink tubing on them except for one of them.  That one came pre-terminated, so I could't get the shrink tube onto it.  It's really no big deal, I've just been uber cautious since everything in the truck is metal.  I'm desperately trying to avoid any potential for a short, even going so far as to shrink tube the ground wires.  The purple wire is from the starter and goes to the ignition switch.  I'll have to tuck that up better and secure it....  The brown wire is for the heater.  I think it is the power feed.  If so, I think it'll go to the heater switch, once I buy one.  For now, it too will get tucked up under the dash and out of the way.  I'll have to restore the heater core before I buy the switch and wire it all up.

Second, I needed to restore the battery tray.  This will be one of those things that if you don't see it, you really won't believe what I tell you.  So hear it goes.  The battery tray is located under the floor of the cab on the passenger side of the truck.  It has 2 side pieces that are riveted to the truck frame and a center piece that the battery actually sits on and is riveted to each side piece. For whatever reason (battery acid, sitting in a field for years or both) the bottom of the battery tray was essentially gone when I got the truck.  So, I needed to get the remnants of the bottom piece out so that I could put the replacement in.  If I'm going to put a battery in the truck and fire up the electrical system, I do need a place to put it!  Grinding off the rivet heads allowed me to remove the remnants.  Once remove, it looked like this:


The rods sticking up are supposed to be threaded.  They allow you to securely flange down the battery hold down, so that the battery doesn't move around when you are driving.  Mine were pretty rusted, so I had to chase the threads.  Once  I did that, they looked quite functional.

When you look down into the opening, you can see where the rivet heads have been ground off. You'll also note that the rivets themselves are still in the side pieces.  That is not for lack of trying! When the hot rivets are bucked into place, they expand to fill the entire space of the hole.  So grinding of the heads and just using a punch and hammer doesn't always get them out.  In this case, that is what happened.  It looks like I'll have to drill out the rivet centers and  hopefully relieve some of the pressure and then punch them out.

To give you an idea of just how little of the tray bottom remained, here is a pic that shows the bottom remnants with the replacement bottom.


Literally, there is a side part on the left and only where the rivet was on the right.  Everything else was gone!  But that's ok.  The replacement part is very heavy duty, fits the space and the holes line up with the rivets.  So, once the rivets are gone, it's just a matter of bolting in the replacement piece.  I'm not going to try to rivet it right now.  If I ever get to do a frame off restoration, I might rivet it. Maybe.

The other big project that I finished up has to do with the dash.  My truck did not originally have a radio, which was common back in the day.  It was meant for working, not listening to the radio. So Chevrolet filled in the hole in the dash with what's called a "radio delete plate".  I have the original radio delete plate and have already restored it some time ago.  I was just waiting on enough progress with the wiring before buttoning up the holes in the dash, as they are quite handy to have while the wiring is ongoing.

In the meantime, I had an issue with the wire harness:  where to put the turn signal dash indicator lights.  The gauges that I bought do not have them.  The truck did not originally have any, as turn signals were an aftermarket add on.  Then I got the idea, put them in the radio delete plate!  That space gives me enough area to add both turn signal indicator lights PLUS the high beam indicator light PLUS some kind of small emblem!  Awesome!  Now the search was on for just what emblem I would want.  To give you an idea of space, the entire area of the radio delete plate that is visible through the dash is 5"L x 3"T.  So it's not that much space, but enough.  Some of the emblems that I considered included:  1. Chevrolet in script, 2.  Pontiac Star Chief fender skirt star (I really liked this one but couldn't accept the pint of the star affixed to my dash...seemed kinda hazardous), 3.  The Chevrolet chevron, 4.  Early 60's Nova 6 Cylinder badge, 5.  Early 60's Impala quarter panel badge (the one with the red, white and blue emblem, not anything that actually said "Impala") and 6.  The 1950 - 1952 Chevrolet truck "3100" emblem.  Let me just say that all of these were in true contention, but only one of them won out.  Which will it be? Patience, Gray Ghost Fans!  First to the process.  Since my original radio delete plate was already restored, I didn't want to drill any holes in it.  This meant that I would have to buy another one. No big deal.  I won one on eBay and it looked like this:

Front

Back

Interesting side story:  I looked up the company on the sticker and they still exist!  If you go to their website, it has the company story which states that the founder of the company used to drive an old red pickup truck.  Makes you think it might have been in that old truck?!!?

Of particular note, notice the notches in the plate.  They align with similar holes and notches in the dash.  This is important, because if you notice the back side of the bolts, they have a tab that locks into that slot.  This keeps the bolt from spinning in the hole when you are trying to tighten it.

Clearly, this piece needed some sand blasting...so that's what I did.  Afterward, it was time to lay out where I wanted the lights and emblem to go.  I put down some painter's tape and did the layout on that.  It looked like this:


And there's your clue, Gray Ghost Fans!  Which emblem did I choose?  Not yet!  First here's a pic of the really cool LED lights that I'll use for the turn signal indicators:


I bought 2 of the green (one for left and one for right) and one blue (for the high beam indicator). They are 8mm wide (about 5/16").  Instead of searching for an 8mm drill bit, I went with the 5/16" bit and then reamed out the hole with a rat tail file.  Worked perfectly.  I guess it's time to let the cat out of the bag:  the emblem that I chose is:


This is the 1950 - 1952 Chevrolet 3100 emblem.  My truck is a 1953 model, so Chevrolet changed it up starting in my year.  However, the style of number is consistent with my truck, so it fits right in. Here is a pic of the lights and emblem before installation:


All in all, only a couple of bucks and I think it'll work out pretty good.

After doing the layout, I drilled and reamed all the holes and did a test fit to see how it would work. The test fit looked like this:


I've got to say, not too shabby!  Ok, test fit over.  Time for paint!  I painted the plate to match the dash, which means Rustoleum #7713 Dark Bronze.  Once that was dry, I permanently installed the lights and emblem.  It now looks like this:


I think it turned out pretty darned good!  I offset the high beam indicator light just a bit so it sits just higher than the turn signal indicators.  The 3100 emblem sits dead nuts in the middle (left to right) and the lights are equidistant from the edges of the emblem.  I can't wait for the paint to cure completely so that I can install the plate in the truck.  (If I do it now, the paint will scrape off the edges as I wedge it back into the dash.)  Once I get it wedged into the dash, I will use those special bolts to bolt it into the dash and then make the electrical connections for the turn signals.

I'd love to know what you think about it!

That's all for now.  I'm in the process of collecting parts necessary for the engine swap.  In the meantime, I'll keep plugging along with smaller projects to try and keep it moving forward.


Friday, August 11, 2017

Sometimes It's Not Glamorous, Sometimes It's Just Mundane

Gray Ghost Fans!  Today was one of those days out in the garage.  I got a couple of items off of the punch list, but none of it was glamorous.  Not even a little.

So what did I do today?  Well, let me tell you!  I got ground wires installed for each tail light.  I got the foot operated dimmer switch installed.  I got the location figured out and prepped for the under-dash ground wires (I still need a long enough bolt, so that isn't really finished).  I got the 3rd brake light wire enclosed in the split wire loom from the frame rail, through a frame section and up between the cab and bed of the truck.  I got the negative battery cable removed from the truck.  I got the defroster ducts removed, the metal vents scrubbed and new hoses installed.  And, I got the absolute last of the old wires untangled and out of the truck.  All in all, a lot of work, just none of it exciting enough to make people go:  WOW!  However, all of it necessary.  No fluff.

Now, what's the implication of all of this?  I am closing in on the end of the wiring harness installation.  So, while I was under the truck fiddling around with the 3rd brake wire, I had to take some time and figure out a few things.  First, I figured out the routing for the electronic speedometer wires.  Essentially, they will follow the same path as the "rear of the truck" wires down the firewall, past the gear shift levers for the 3 on the tree shifter and down to the transmission.  It's actually a pretty straight path.

Second, I spent a minute looking at how the transmission and bellhousing are bolted to the truck. The next task after installation of the wire harness is removal of the old engine and transmission! So it really is time to start thinking about how this is going to work.

Now, there is no way that I can have a post without a photo of something Gray Ghost related.  So here's a shot of the defroster vents and the old hoses and new hoses for comparison.


So there you have it.  Often times its the grunt work that makes or breaks your project.  Today was one of those days.  Glad I got it done and time to move onto something else.  Enjoy!


Saturday, August 5, 2017

Wiring Punch List Gets Smaller

Hello Gray Ghost fans!  It' been a couple of weeks since my last progress update.  I've managed to get more of the wiring routed into its' proper place and some of the connections made.  For example, I've made all of the connections between the wiring harness and the 4 plugs that connect to the speedometer and quad gauge.  The speedometer has 2 plugs, one of which is a 6 wire plug and the other is a 4 wire plug.  Additionally, the speedometer requires a positive and negative connection for the 2 gauge lights.  The quad gauge (voltmeter, gas gauge, oil pressure and water temperature) has 2 plugs with 6 wires each.  The lighting for the quad gauge is built in LED lighting, so no extra wiring was required.  While it kinda looks like a wiring nightmare, it isn't and I'll explain that in a moment. Meanwhile, this is what the dash and gauge plugs look like now:


Definite progress, but there are still a bunch of items on my dash area punch list.  They include:


  1. Mounting the foot operated dimmer switch
  2. Mounting the turn signal plug to the column
  3. Finding a suitable location for all of those black ground wires
  4. Installation of the actual gauges
  5. Installation of the turn signal switch
You can also see in this picture that I've connected and mounted the ignition switch and installed the new lock in the switch.  Now, the excess wires....  Since this isn't currently a restoration, but rather a "just get it running and finally drive it" exercise, I know that someday I will take it all apart and do the restoration.  My thought is that whatever I'm doing to the truck now, I want it to be salvageable and reusable later in the restoration.  Knowing that I'll have to cut some of those wiring connections, I know that I'll lose some amount of wire.  So, I decided that I wouldn't cut any length off of the wires. Instead, I'm just coiling up the excess, where possible, and zip stripping them out of the way.  It looks ratty if you look under the dash, but who's going to do that?

Inside the cab, I had to extend the dome (courtesy) light wires.  They came in the harness just a bit short of what I needed.  I think the issue was that I routed the wires up the A pillar and then around the door and to the back of the cab.  I needed an extra foot or wire for both power and ground.  Once I made the extension, it was time to reinstall the dome light!  This was one of the first items that I removed from the truck and restored.  Installed in the its' original location, the courtesy light looks like this:


I don't know about you, but my eye is immediately drawn to the square hole in the courtesy light housing.  Originally, this light was controlled by a switch that fit in that opening.  When I was restoring the light, I looked all over for a switch that would fit and work.  Then, when I bought the new wiring harness I found out that it came with a headlight switch that also controlled the courtesy light.  Problem solved...except for that hole.  Meh, I'm not going to worry about it.

On to the engine compartment.  Most of the wiring is either routed or laying where it needs to go. I still need to add the wiring that connects the alternator.  The engine compartment wiring currently looks like this:

Here you can see the wire loom carrying the headlight wires to the passenger side of the bay.  In the foreground, you can see the wire bundle that has the driver side lights and engine gauges. The fat, red wire is the main power wire from the starter to the fuse block.  The purple wire is from the ignition switch to the starter solenoid and is the neutral safety switch wire.  The truck does not use a neutral safety, but the wire will be installed per the instructions for vehicles without the neutral safety switch.

On to the rear.  The split wire loom and the rear end wires are now routed and attached to the frame. Here, I had to make a split for the running lights.  The running lights are when your tail lights come on when you turn on your headlights.  Then they get brighter when you hit the brakes. The kit only has 1 wire for the running lights and instructs you to make a split and run 1 to each side.  Also, I needed to add a separate ground wire for each tail light.  Going with the same mentality of functioning, but being removable in the future, I'm using bullet connectors for the tail lights.  I'm not actually installing the tail lights right now, because I'm guessing they'll get damaged while just sitting in the garage.  When it's closer to running, I'll install them. Right now, the wires are run and the female ends of the bullet connectors are on the wires.  It looks like this:


So that's where I'm at.  Definite progress, but still a few things left to do.  The end of this phase is within sight.  Kinda exciting!

Friday, July 14, 2017

Photobucket EPH's the GrayGhost Blog

Gray Ghost fans, I have very bad news....  The greedy people at photobucket have eliminated viewing of all free account photos that are linked in 3rd party sites.  Like this one.  Recently, I had been hosting new Gray Ghost photos on Google photos, but I have over 600 photos on photobucket with most used in earlier posts.  All of the videos in the sidebar are on photobucket. So, if you try to view an old post and get the error image about me updating my account to a pay account, I apologize.  I will eventually migrate all of the photos to Google and reestablish the links, but that will be a big undertaking and will take months.

To say that I am upset by this is an understatement, but just like any other setback when working on the Gray Ghost, I'll persevere.  It'll just take a while.

Monday, July 3, 2017

HOT : Wiring Progress Update

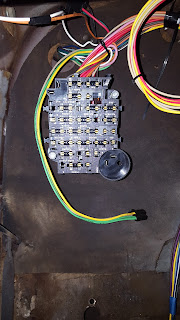
It's July 3rd, which means its hot and humid out there today.  I spent the morning out in the garage working as best as I could.  Currently, it is 92 degrees with a feels like temp of 100.  The sun was shining into the garage this morning, so there wasn't any break from the heat.  I managed about 3 hours out there before I just had to take a brake.  In that time, I did make some progress.  For example, I permanently mounted the fuse block onto the interior of the firewall. The before and after looks like this:

Before


After

It's a bit of apples to oranges comparison with the wide shot vs close up shot, but you can tell that the clutter from the first shot is gone.  So what happened?  First off, as I mentioned in my last post, I rotated the fuse block 180 degrees.  This put the wires exiting the block toward the openings in the firewall and up under the dash, so that the remaining interior wires could be directly routed towards the gauges, ignition switch and heater.  That, all by itself, cleaned things up.  Getting the additional wire for the bundles that go through the firewall actually through it also helped clean things up.  To actually mount the fuse block to the firewall, it was recommended to me that I build standoffs to elevate the fuse block off of the old firewall padding.  I did this by buying a 4 1/2" x 1/4" hex head bolt, some fender washers, nuts and lock nuts.  What I did was insert the hex head bolt through the firewall from the engine compartment into the cab and attached 7 nuts to the bolt.  This gave the fuse block just over an inch in clearance between the back of the block and the firewall padding.  It was capped off with a lock nut so it won't vibrate loose.  The above pic is a nice shot of the fuse block without any fuses installed yet.  The yellow and green wires hanging down are for the dimmer switch. It will be mounted over the hole that is visible in the bottom of the above pic.  The old dimmer switch mounted through the firewall, but the new one sits on top of it.  So, I'll have to cover that hole up somehow.

Inside the engine compartment, I separated the wire bundle into groups.  One group goes across the compartment to the passenger side, while another group stays on the driver side and a third group goes directly to the engine.  The third group is made up of engine sensor connections like water temp, oil pressure and tach.  They'll be tucked out of the way until after the engine swap is completed.  The wires that were routed to the passenger side include the headlight wires (both high and low beam), right turn signal, ignition switch to starter and wipers.  They were all encased in the split wire loom and routed across the firewall using factory clips.  At this point, I've run out of the split wire loom and will have to buy some more.  This time,though, I'll get 1 size smaller as I have fewer wires to encase on the driver's side.  All in all it's starting to get organized and looks like this:

Before


After


The wires splitting off of the center bundle are brake light wires and go to the brake light switch which is mounted to the engine side of the firewall.  These include the third brake light, which I'm going to use.  I have a special plan for the third brake light assembly, but that is a surprise for a later post!  The rest of that bundle includes all of the "rear of the truck" wires.  The blue and brown wires splitting off from the rightmost bundle include the left turn signal and park light.  All of the other wires on the right are for the engine sensors and tach.  I will likely route those under the other wires that cross over the firewall in a separate loom and take them straight to the engine. Another thing that is visible here are the hex bolts and fender washers.  I was able to reuse one of the existing holes in the firewall to mount the fuse block.  However, I did have to drill a second one to match the mounting hole pattern.

It's a truism that nothing just bolts right up, even if its supposed to!  The most recent case in point is the headlight switch.  The new switch is designed to work exactly and even had the anti-rotation tab in the right spot.  Held up to the inside of the dash it looked like this:


You can notice the square tab to the side of the hole.  The switch has a tab that fits in that square part and keeps the whole thing from rotating when you turn the knob to activate the dome light. The problem was that the decorative nut that goes through the hole and screws onto the switch had a gap when fully seated.  This meant that the switch flopped around in the opening.  The gap looked like this:


To solve the problem, I got a large washer to fill the space.  But since it would be on the outside of the dash, it would be visible.  That would look kinda tacky having a nice painted dash and a grade 8 washer for all to see. The solution was to paint the washer. You know I love my pics so here goes:


Nice transformation from the normal look of a grade 8 item to a nice Gray Ghost painted dark bronze! I'm still waiting for the paint to fully cure and harden.  It's so hot out there in the garage that I'll probably be able to put it on tomorrow without scratching any of it.

Also today, the mailman brought a couple of special deliveries!  I had ruined the original cylinder lock trying to get it out of the original ignition switch.  So a new one was in order.  It came today and with a little figuring, I was able to get it into the new ignition switch.  So that part is now ready to be connected to the new wire harness and installed into the dash.  Those wires already have been terminated and have the female end for spade connectors which fit onto the new switch.

Another item that came in that package were the Chevrolet letter decals for the dash trim.  I figured that since I was already placing an order, why not get them.  I've been wanting to finish off that piece of the trim for months, but had no reason to place an order.  So I just waited.  Once they got here, it was short work to get them on.  Before and after looked like this:

Before


After


Other than the flash washing out the center, they aren't too shabby.  Although, to be honest, they are 10 foot decals, not 10x magnification decals as they don't exactly fit into the stock spaces. But for my purposes I was pretty happy.  Now back down to the basement for that piece until I'm finally ready for it!

That's all for now.  Happy 4th of July, Everyone!  Happy Birthday, America!