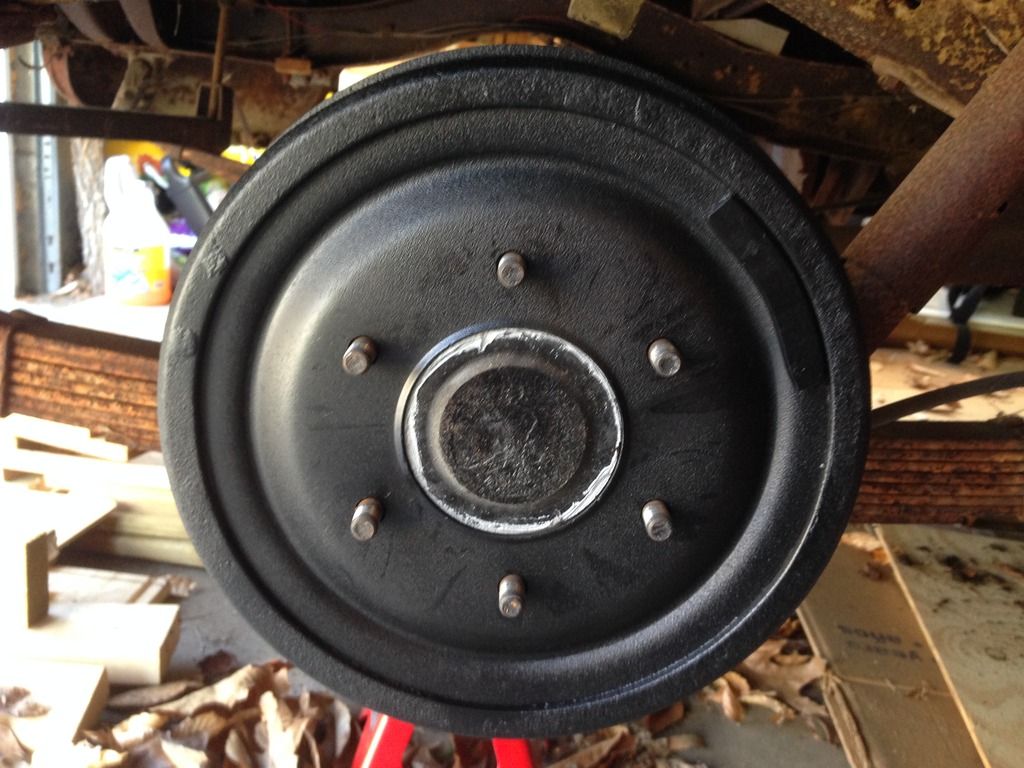
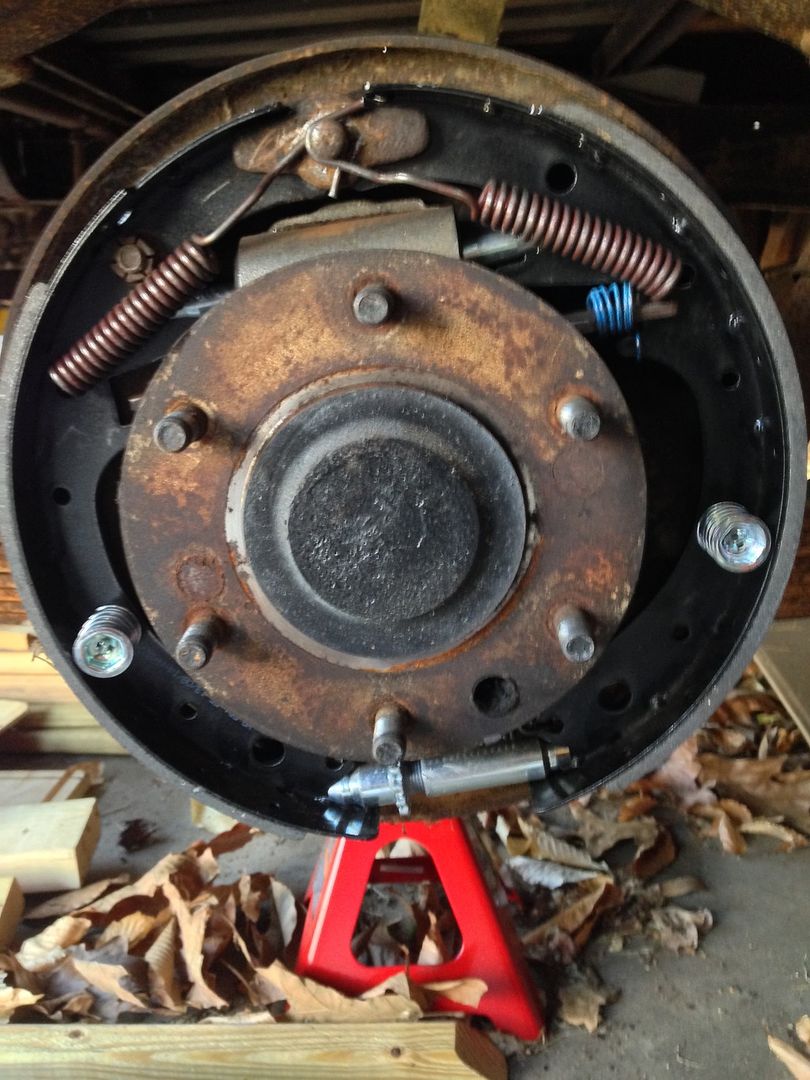
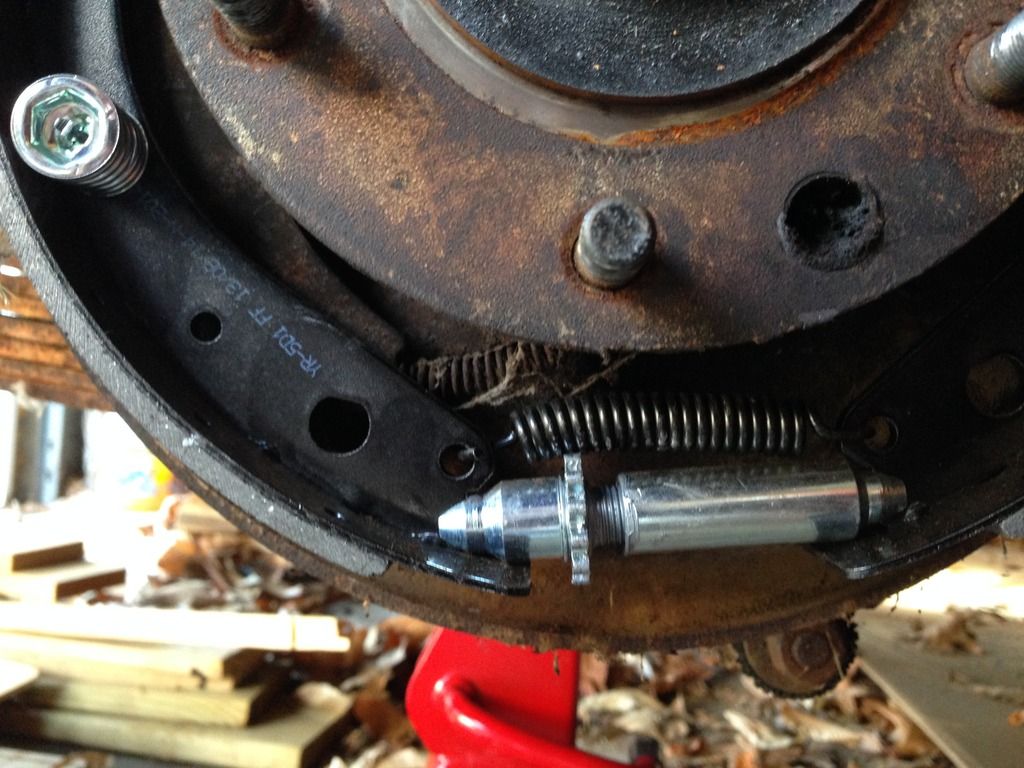
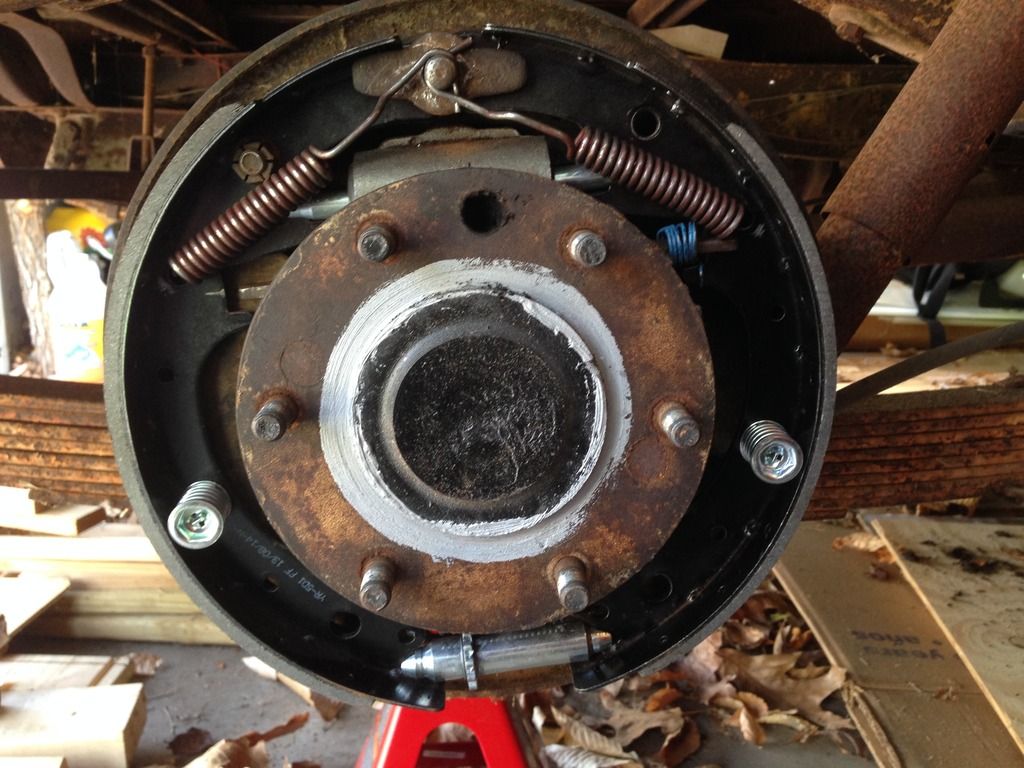
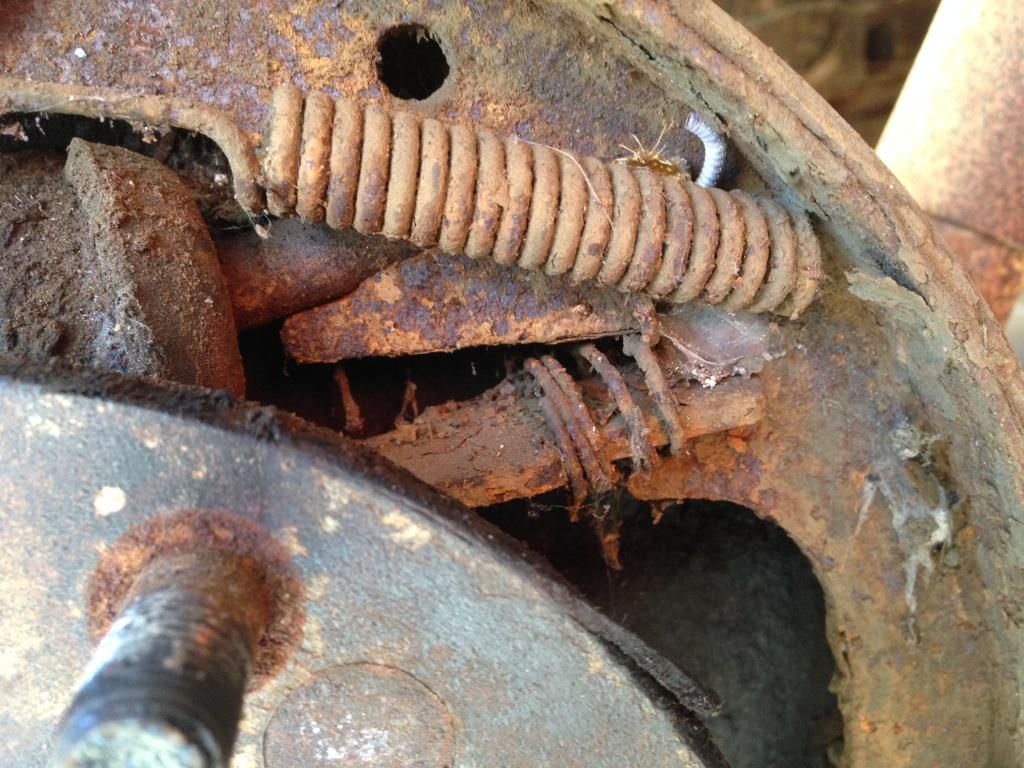
1953 chevy truck ad

1953 chevy truck ad

Saturday, April 25, 2015

Brake Spring Seating Corrected

The spring seating on the rear brakes was questioned by the members of my truck forum.  They looked like this:

Right Rear:


Left Rear:


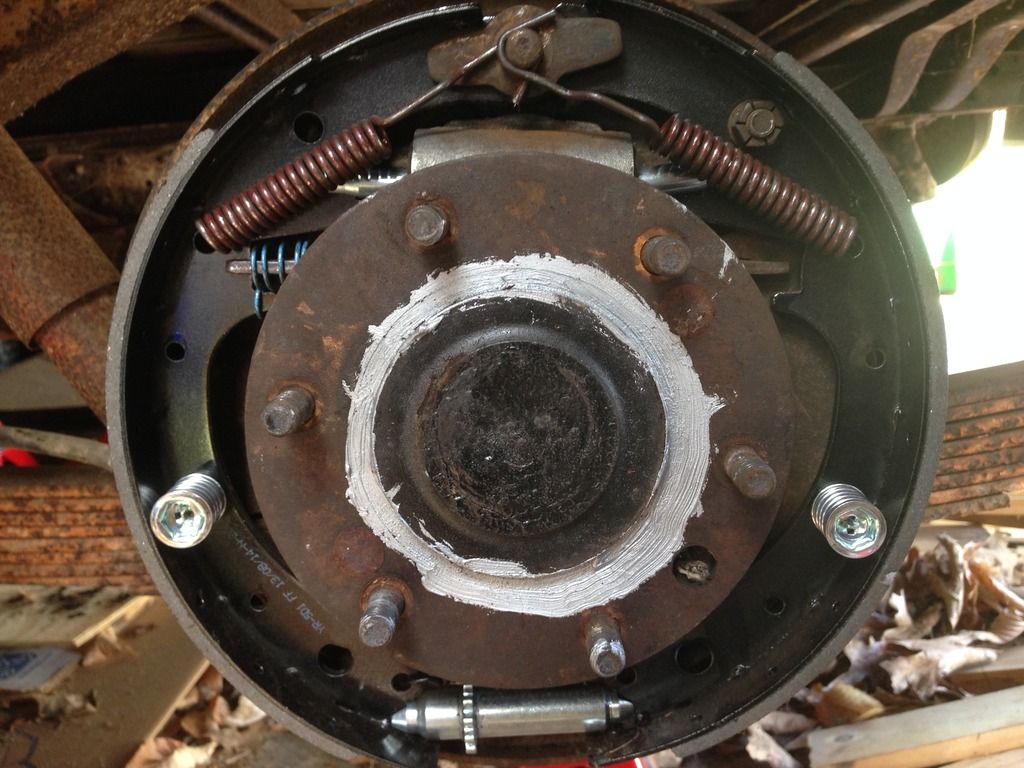
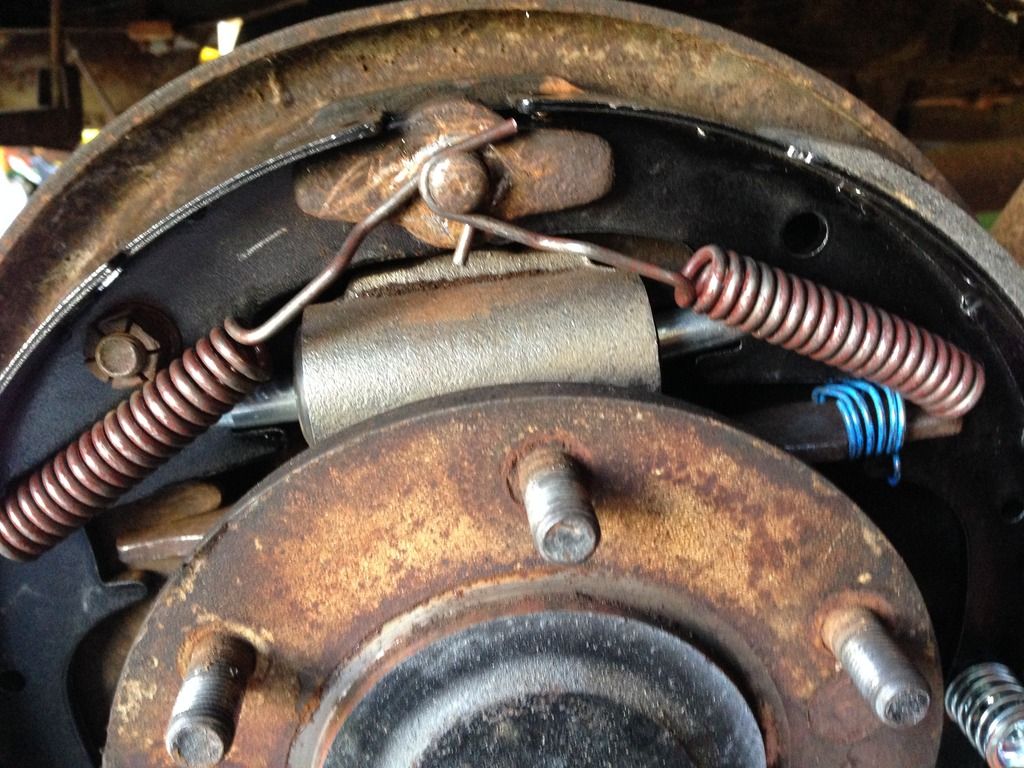
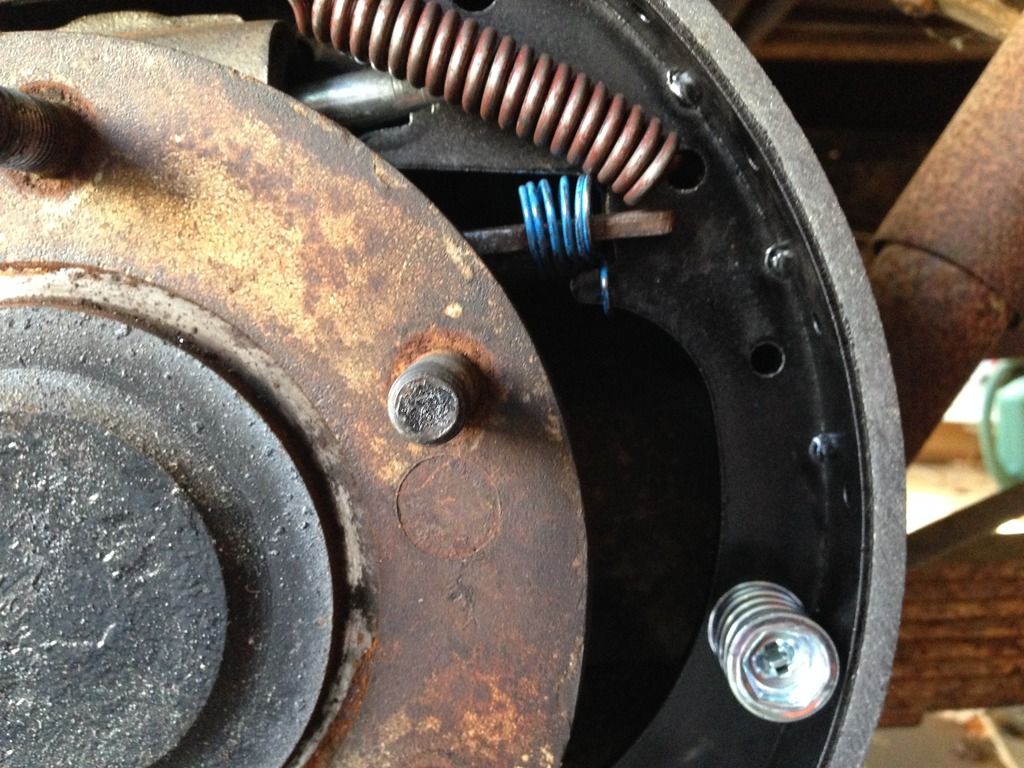
The right rear had the secondary shoe return spring intertwined with the primary shoe return spring. It has since been seated correctly and looks like this:


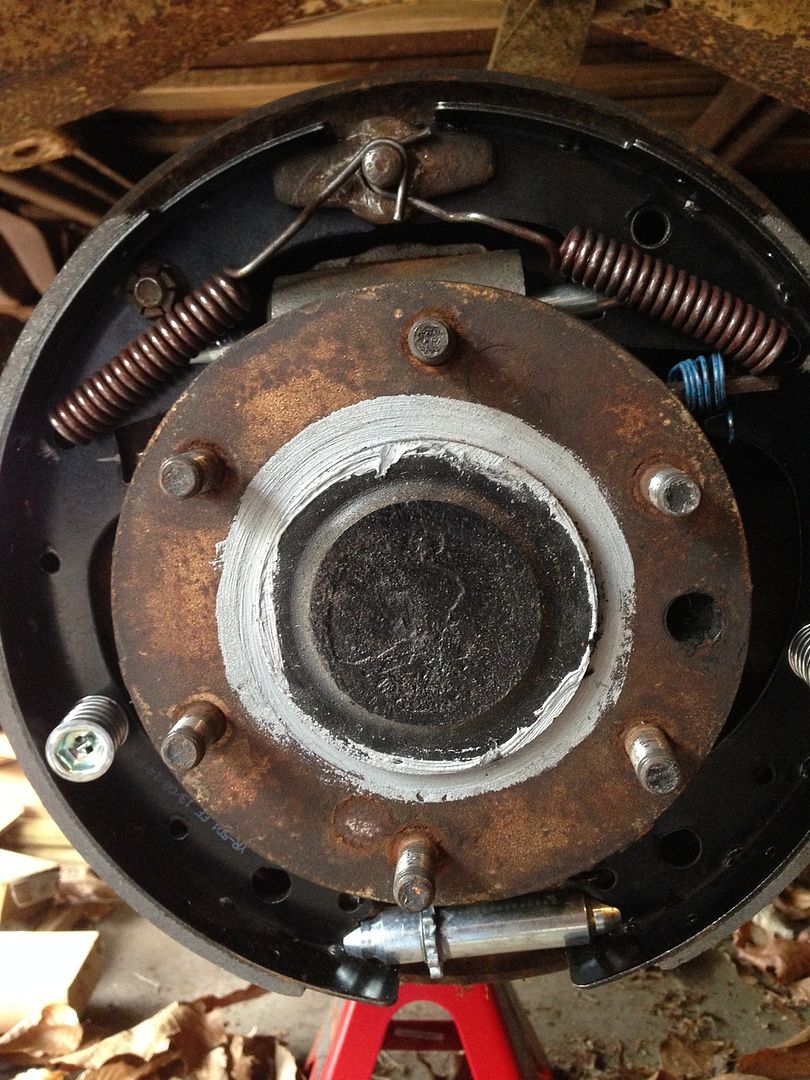
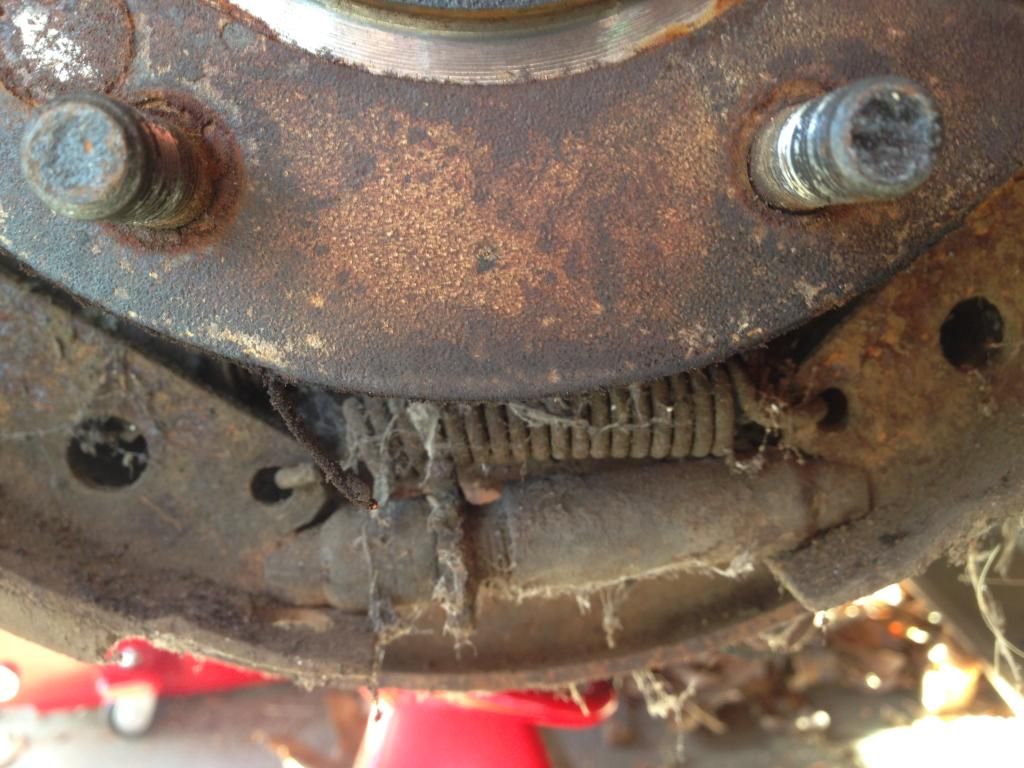
The secondary shoe spring on the left rear brake appeared to barely be seated on the post.  So I took it off, manipulated the butterfly so that it sat more fully on the back of the post and reseated the secondary shoe spring.  The change was less dramatic than the change on the right rear, so I didn't bother to take a picture.  It does, however, sit a little better on the post.  I also bent the end of the spring around the post a little.  Not sure if it will help hold it or not, or if it is needed.

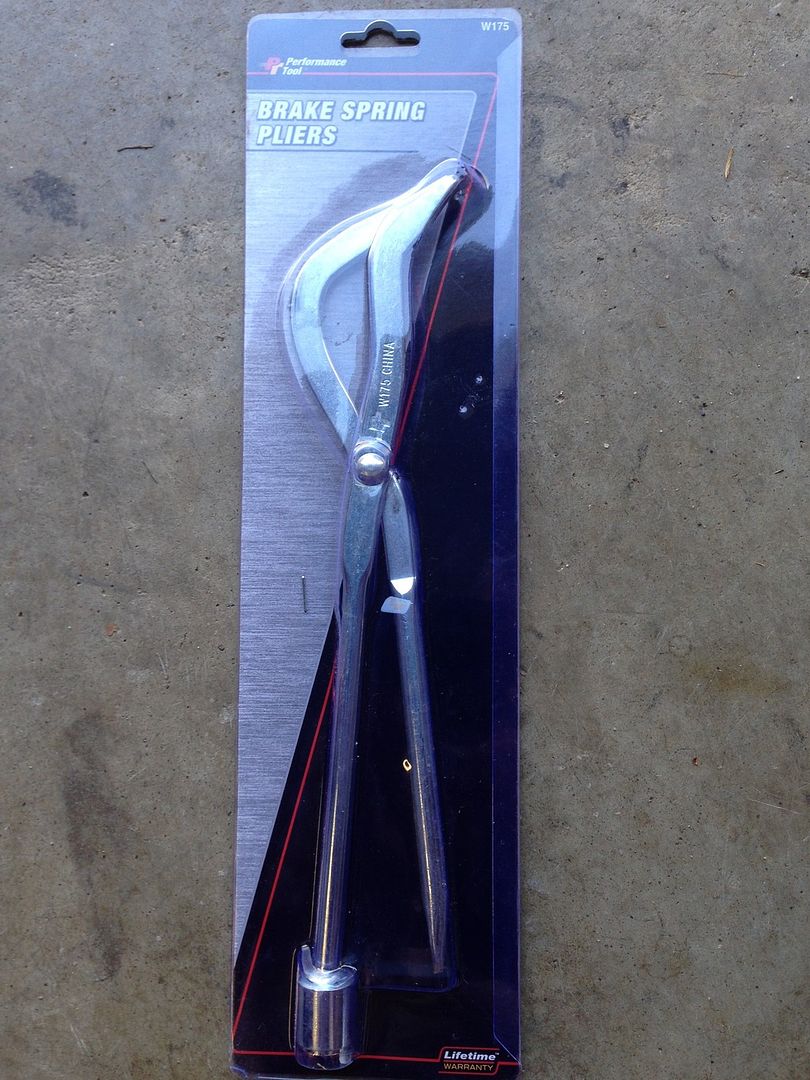
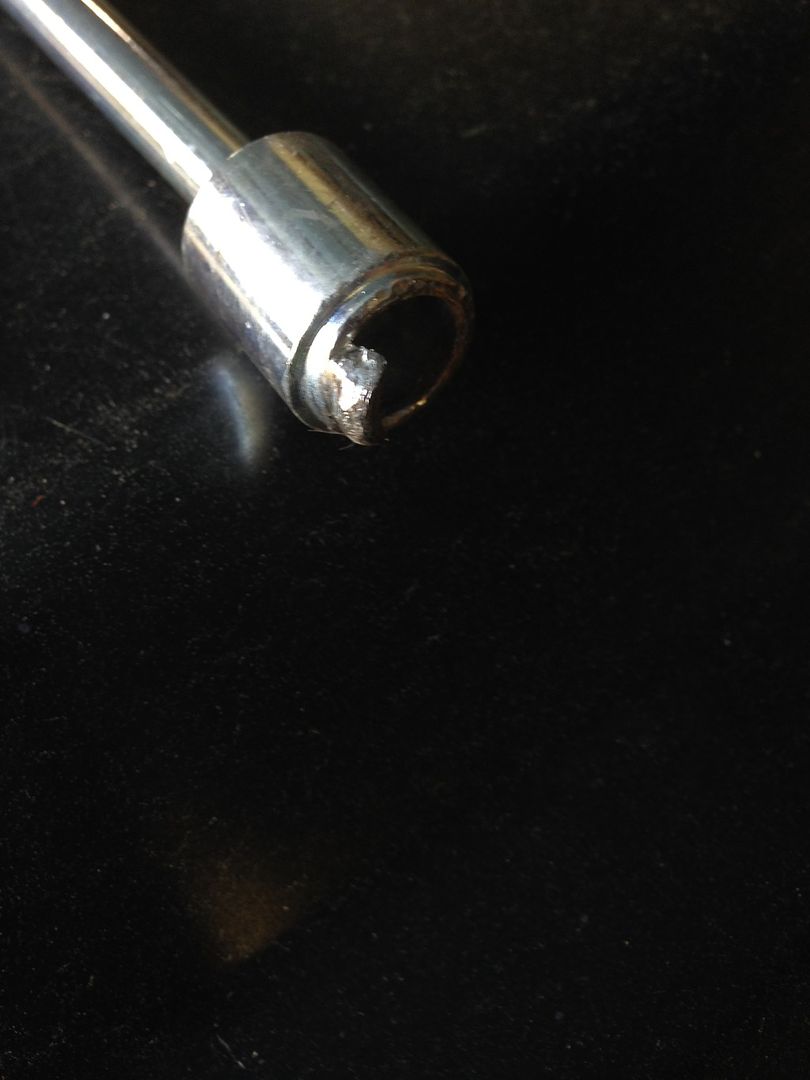
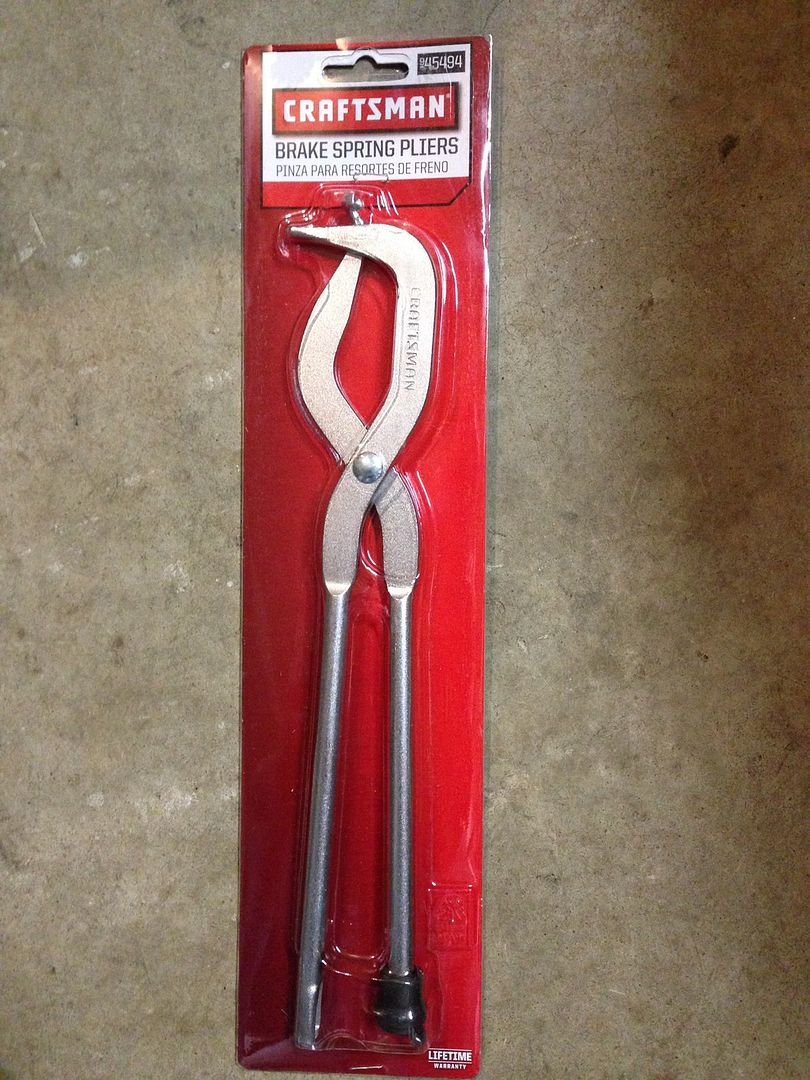
Also last week, I went out and got a new brake spring tool.  As I mentioned in last week's post, the nub on the spring removal side had bent inwards and was rendered inoperative.  So I went to Sears and got a Craftsman version.  It is a lot beefier, all around and looks like this:


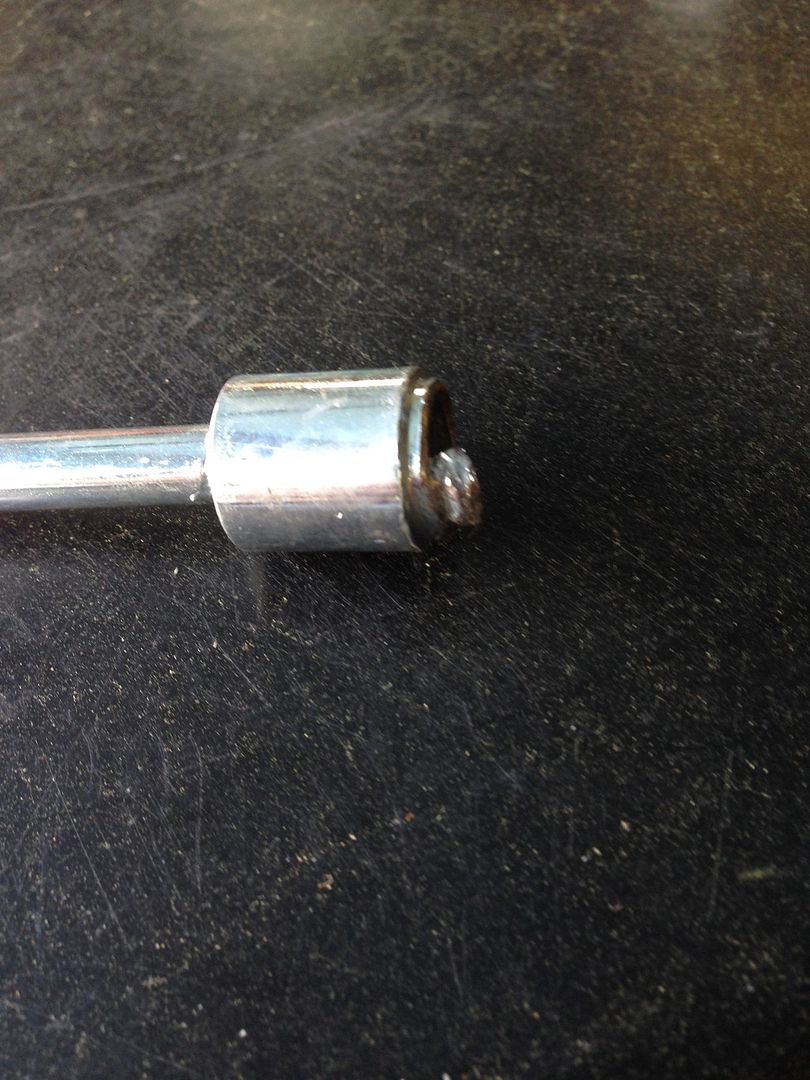
The spring removal end looks like this:


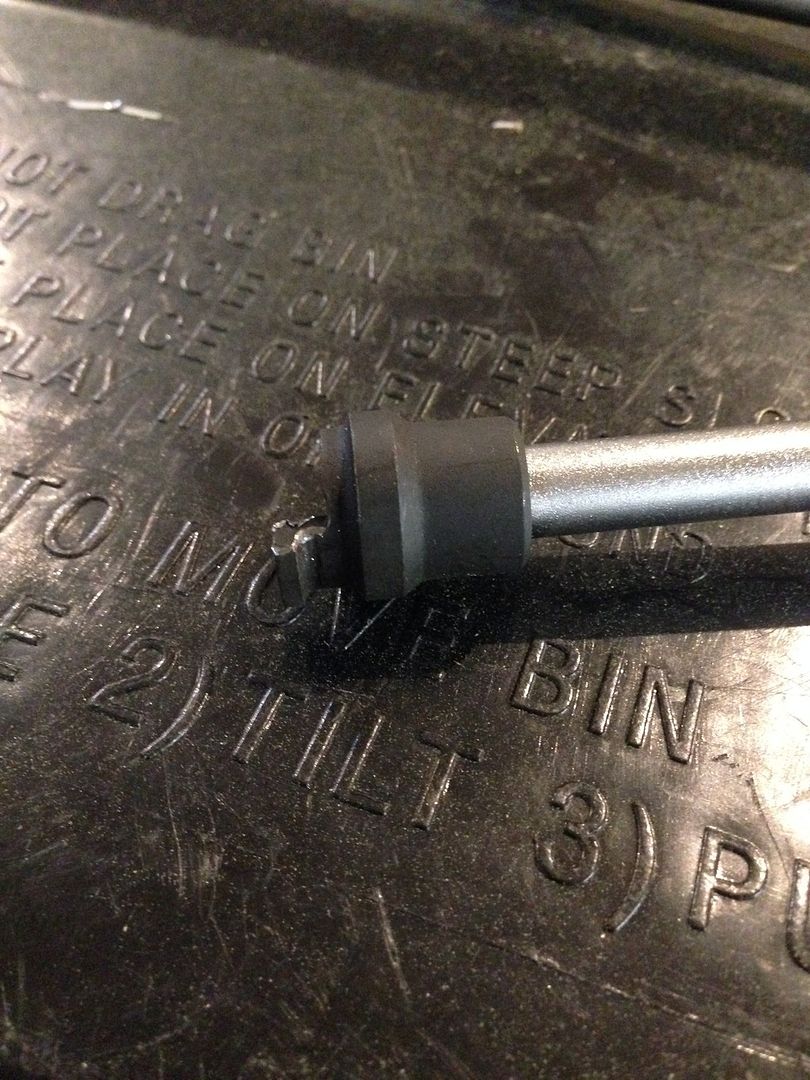
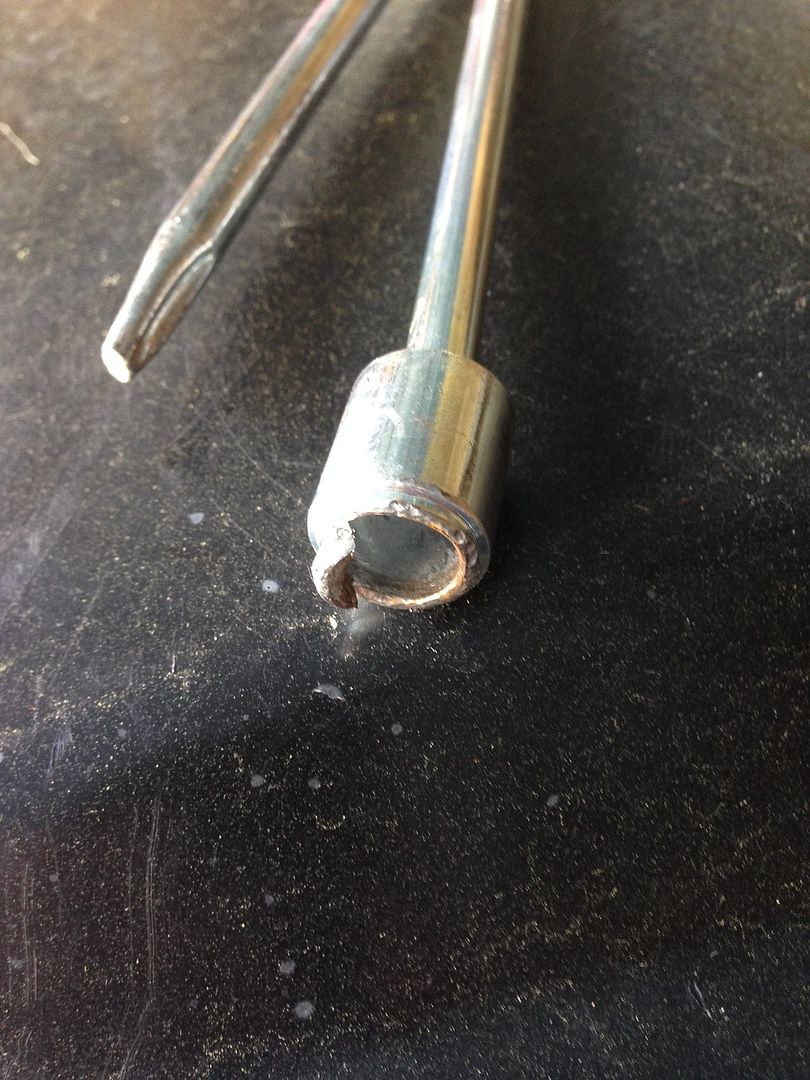
Comparing old and new, the differences are obvious:


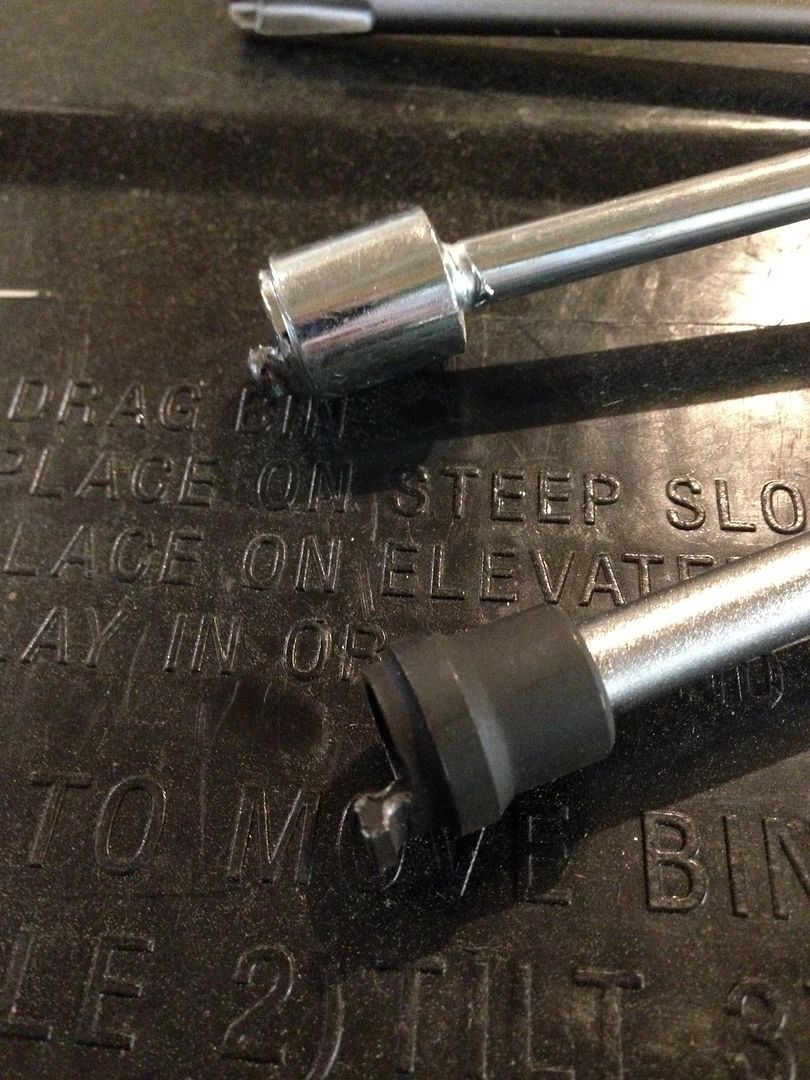
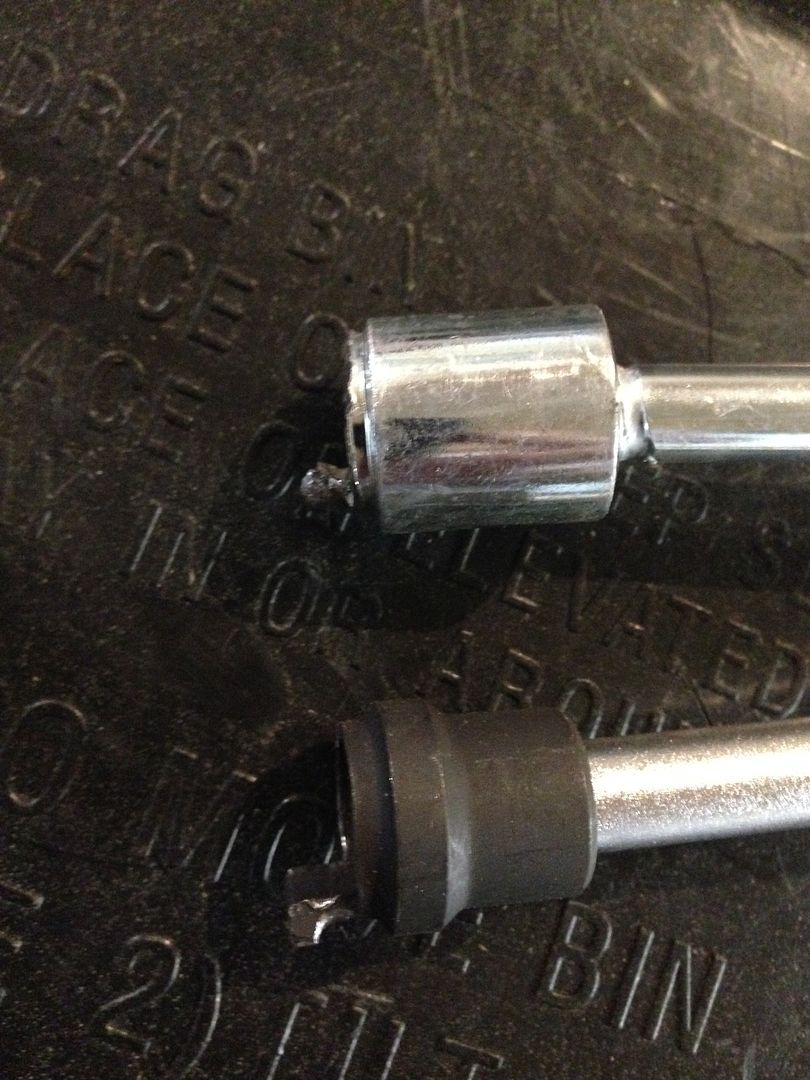
So, I'm sticking with my assessment from last week.  Avoid the brake multi tool from the flaps (it seems like they all sell the same version of this tool) and just get the better tool.  The Craftsman version cost $18.00, but held up to removing the springs where the first one did not.

Saturday, April 18, 2015

The Gray Ghost Gets New Shoes

Today I got out in the garage and took off all of the brake shoes, springs, hold downs etc that I put on last weekend, because the shoes were installed backwards.  Armed with the knowledge of which way to install the long and short shoes, I got down to business.  Here's how the left rear brake assembly looked when I was done:


Here's how the right rear looked after correcting my mistake from last weekend:


The old drums needed to be turned, so I called around to each of the flaps and found that only Pepboys would turn the old drums.  However, they wanted $15.00 to turn each drum!  Brand new drums were available from NAPA for $30.00 each, so that's what I ended up doing.  Buying new drums and some high temp paint.  The results looked like this:


The silver ring around the center of the drum is anti-seize compound.

To get the springs off this morning, I used a brake spring tool that I got from Advance Auto.  It looked like this:


You can see it is the "Performance Tool" number W175.  Unfortunately, it didn't hold up well under use this morning.  After removing only 2 springs, the nub that hooks onto the spring when you rotate the tool looked like this:


So my advice is to avoid this tool.  I really didn't abuse this tool.  It was poorly made.

Now, it's time to turn my attention to the master cylinder and brake line installation.  While I'm doing that, I'll be saving up for the internals to rebuild the front drum brakes.  Basically everything that I just installed on the rear, but this time for the front.

Sunday, April 12, 2015

Brake System Rebuild Begins! But it's a stutter step....

I got the grass cut, did some woodworking repairs and still had a little time left over to work on the truck!  So I started in on the brakes.  I started with the right rear brakes.

Here is the before:


Here is the after:


Here's a shot of the whole assembly:


Here's a close up of the star adjuster before:


The star adjuster after:


You can see an original spring in the background of this pic.  It is attached to the emergency brake.  I did not refurb the emergency brake.

Here is the spreader bar and anti-rattle spring before:


Here is the spreader bar and anti-rattle spring and front shoe hold down after:


You can also see the small rods that go between the new wheel cylinder and the new brake shoes in the top of the pic.


I posted some of these pics on the truck forum for an online inspection and unfortunately, I got the brake shoes reversed.  In the overall pic, you can see that the shoe with the reduced amount of friction material is on the left (or rear) of the wheel assembly.  It should be on the right (which is the front). Sadly, next weekend I will have to take it all apart and reverse the shoes and struggle with the springs...again.  Oh well, whatcha gonna do.

Saturday, April 11, 2015

Don't Over Rev an Engine on the Test Stand! (And Other Good News)

Well, the good news first...the engine doesn't seem the worse for wear after what I've now been told was over revving an engine that had no load applied.  My stovebolt mates made that clear in response to my post.  So, I'll guess I'll have to wait until the engine is in the truck and physically moving it (i.e., under load) before I can see if the rings will reseat and if the engine will stop burning oil.

More good news:  the Starfire tach seems to be shaking off the dust and working better today than yesterday.  Today, it was running about 1/3 behind where the Sunpro II tach is running.  That is what was expected.  So, an adapter should make it work just fine for the counting rpm's on the 235!

I noticed yesterday, that as I ran the gas tank dry, the idle of the 235 improved greatly.  So today, after bringing it up to operating temps, I readjusted the idle to make the mixture more lean.  It seemed to run better but was puffing tons of white smoke, which was really steam.  So I'm concerned that the head gasket will need replacing.  I'll keep an eye on it and see if it gets any worse.  I'll also pull the plugs to see if one (or more) of them is cleaner than the rest. One plug that is cleaner than the rest would indicate where the head gasket is leaking.  On the bright side, I have no indication of water in the oil, which would also point to a failed head gasket.

That's all for this weekend as I've got a jungle of a yard that needs cutting.  That'll be my day tomorrow.

OBTW, there really wasn't any bad news.  Just me getting scolded for over revving, but I can take it.

Friday, April 10, 2015

Starfire Tach Revs, But Engine Has Issues, Maybe

Well,  I got the necessary supplies to temporarily mount the Starfire tach to the engine test stand and wire it to the engine.  Once again, a weak battery caused me to have to take time for a charge, then we were off to the races.  The Starfire tach reacted to the pulses from the coil and it looked like this:


You can see that the tach is reading just short of 400 rpm, which is great, that means that it runs. The problem, though, is that the modern tach that was running at the same time read the following:


You can see it is at 900 rpm.  So a slight mismatch, but this was not unexpected.  The Starfire tach was for an 8 cylinder engine and my 235 is a 6 cylinder.  There are adapters that will make the tach read the 6 correctly, so I'll have to look into one of them a bit later.

For now, I've possibly discovered a new problem with the 235...I was revving it a little higher than I normally do when I'm running it on the test stand and I heard a new sound.  Not a good sound. It was a "tinny" metal on metal sound.  The sound went away when I backed off of the revs and returned when I revved it again.  So clearly, it is rpm related.  I checked around the valves and did a cursory check of the engine side cover, but nothing jumped out at me.  I'm asking on the Chevy truck forum that I belong to (www.Stovebolt.com) for help in trying to figure it out.  We'll see what we can come up with and I'll keep everyone posted.

Sunday, April 5, 2015

Starfire to join the 3100

As I mentioned in the first post, my immediate goal for the truck is to get it running and back on the road.  It's going to look a little ratty, so I figured, why not go with the rat rod look for now.  I want the truck to look like something that a kid in the 1960's would have had.  What I mean by that is the truck is a little beat up cosmetically, but all the mechanicals are rock solid and have been hopped up a little.

So, in keeping with that strategy, I purchased a tachometer to add to the truck, once I get the engines swapped.  The tach came from a 1962 Oldsmobile Starfire and looks like this:


I took the pic while it was on top of the air filter housing that came from a 1964ish Chevy II or Nova. The back of the tach looks like this:


Based on the wiring diagram for similar (but several model years newer) Oldsmobiles, the tan wire is the tach lead.  It has a Bussman AGA-2 (2 amp) inline fuse and connects to the negative post on the coil.  The black wire is the ground.  The white wire is the power feed for the bulb and the bulb is grounded through contact with the back of the tach.

To temporarily mount the tach to the engine stand, I got a 3" pipe hanger from Lowes and wrapped the tach in old bicycle inner tube.  You can see the pipe hanger in the top pic and the inner tube in the bottom pic.

I'm going to hook up the tach to the engine on the test stand to see if the tach is functional.  At this point, I'm guessing that I'll need an adapter to make the tach accurate, as the Starfire was an 8 cylinder engine and my 235 is a 6 cylinder.  We'll see.  The brass plug visible in the bottom pic is a cover over the access hole to a variable resistor.  The AC service bulletin states that you can access the resistor to fine tune the tach's performance.  I don't know if it's possible to tune it to a 6 cylinder from an 8 cylinder or not.  But, first things first, let's see if it still runs at all.  That'll be in the next post.