Well, to remain true to my original goal of reporting the good, bad and ugly of my restoration adventure, I sadly have some bad news to report. Hopefully, down the road it doesn't turn into ugly news.
Where it all began: I decided that I needed a good compressor. Pretty reasonable, considering the adventure that I was beginning. So, I did my research and decided on an Ingersoll Rand 80 gallon, 5 HP beast. Go big or go home! When I got it, I had to do a bunch of research on how it needed to be installed. Meaning electrical requirements and how to plumb the air for my garage. Then, time passes...money gets spent on other things...and hooking up your compressor gets onto the todo list and seemingly never gets done.
Then, one day, you have an electrical problem with the pump on your septic tank. While the electrician is there, he sees your cool, old truck and the compressor sitting idle in the back of your garage and asks why it isn't hooked up? Slightly embarrassed, you explain. He informs you, that it's only about 30 minutes of labor to do the electrical work, if you run the wire prior to their arrival. That creates the spark to get this installed and functional!
The list:
1. vibration isolation pads
2. concrete anchors
3. 6 gauge wire
4. conduit
5. 220v circuit breaker to match my electrical panel
6. Ingersoll Rand compressor break in kit (synthetic oil and air filters)
Slowly, but surely, I got the items on the list. The wire is run from the breaker panel side of the garage to where the compressor will be bolted to the floor and it is encased in conduit. That meant it was time to bolt the compressor to the floor.
The installation instructions that came with the compressor state that it should be at least 1 foot from all walls. So, I measured out 1 foot from the back wall, measured the top sides of the compressor to make sure that each side was equidistant from the wall and marked where each hole should be. Based on the size of the compressor, I used 5/8" concrete anchors and bought the appropriate masonry drill bit. Combined with my hammer drill, I assumed it wouldn't be too difficult a task. Hole #1 wasn't too difficult and took about 10 minutes from start to finish. Hole #2 started off that way, but ran into a bit of a snag when I hit a stone about an inch into the hole. Even with the hammer action and me leaning onto the drill it took more than 10 minutes to bore through it. Once I did, the rest of the hole was easy sailing. On to hole #3. Following the same procedure that I had used for the first two holes, I started the drilling by not using the hammer function. The top of the concrete does not require the hammer function. I drilled down about a quarter of an inch and then switched on the hammer function. What I did not notice was that when the hammering started, the drill bit skipped out of the hole that I had started and was now in the wrong location! Once I figured it out, it was too late. The situation looked grim. I rotated the compressor back into position and saw what I expected to see. Holes #1 and #2 were in exactly the right spots and #3 was off. With the compressor sitting where it needed to be, I did notice that there might be enough room to re-drill the third hole in the correct location without moving the compressor to a new spot in the garage. So, this time, I started the drilling through the hole in the compressor foot. This time I kept on drilling until there was no way that the drill could skip out of the hole before moving the compressor to finish the hole. When I was done, it looked like this:
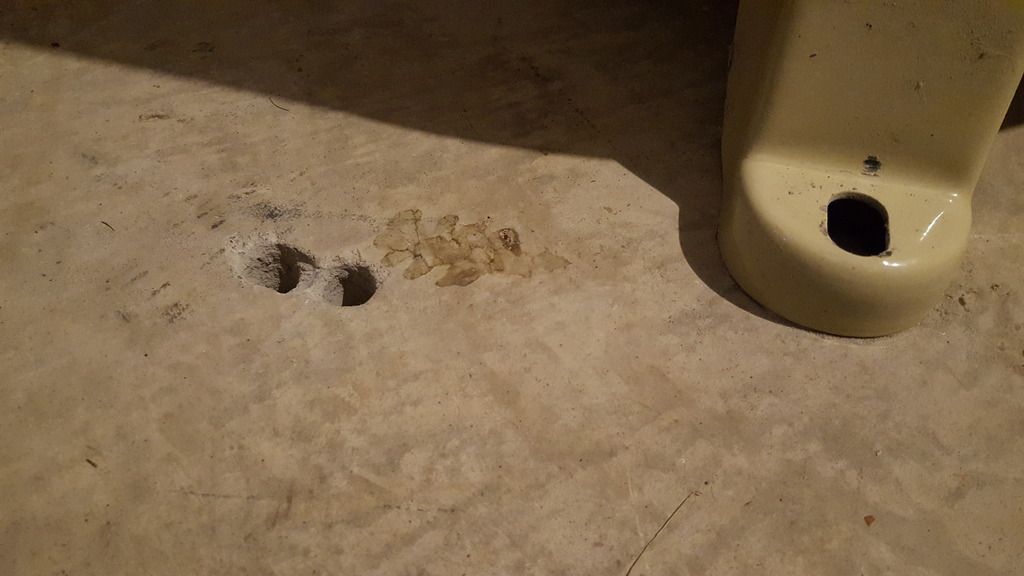
So there it is! The bad! But what to do now? I was worried that using a concrete anchor in the new hole would put enough stress on the errant hole to blow out the small amount of concrete between the 2 holes. After thinking about it, I went to the local home center looking for concrete hole patching or filler. Once there, I must have looked a bit bewildered so one of the guys there came over to see what I was doing. After some discussion, he recommended using another concrete anchor in the errant hole. I thought that since the concrete anchor didn't actually touch all of the sides of the hole, it wouldn't offer enough structural strength. So I ended up settling on the concrete anchor plus super strong epoxy to fill any gaps and hopefully provide some structural strength.
So that's where I'm at right now. I have the new anchor and the epoxy. I have to go measure the exact depth of the hole and then cut off the anchor to the right size. Then its just a matter of mixing the epoxy and putting both down the errant hole. Once the epoxy has dried, I'll feel more comfortable putting the other anchor into the hole and flanging down on it. Once that is done, I can call and schedule the electrician.
Definitely an extra set of steps. All due to a stupid mistake on my part. Thankfully, no one was hurt and nothing was broken. Once its all done and up and running, I'll post a few more pics to show the compete install.
Definitely a bit embarrassing, but that's ok. It's all a part of the restoration adventure!


