
When I got the lamps, I noticed that the BLC lamp had a split in the chrome body that I had not noticed in the auction. I decided to start the restoration on this one, since it was already damaged and would make a good learning piece. Here's how it went....
When I got the lamp in the mail and inspected it, I noticed the split. When I took the lens and cover off, the split looked like this:
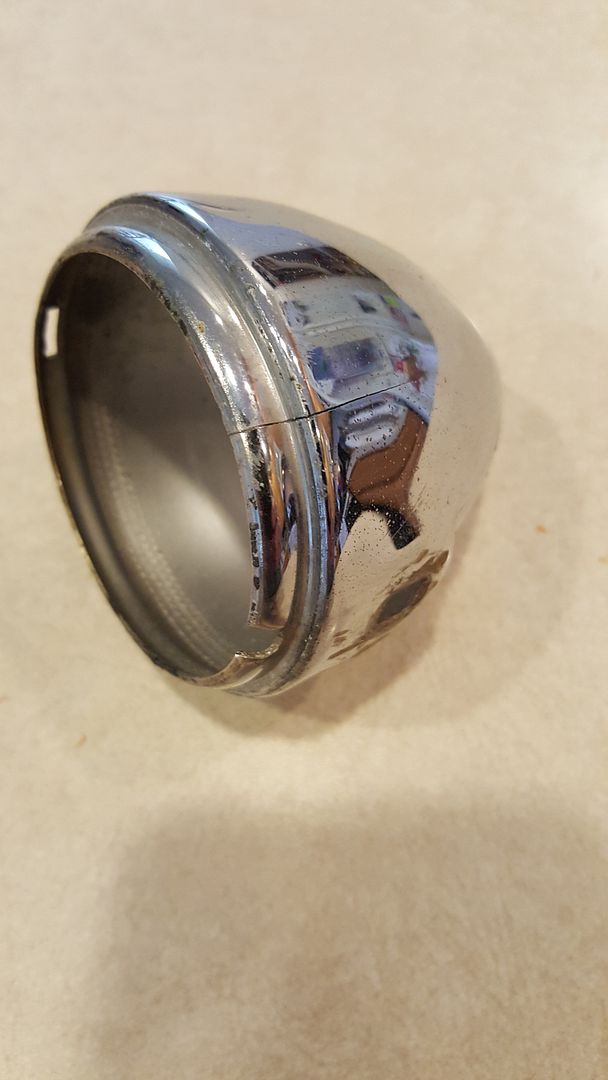
It is a pretty big split, running from the lip about an inch and a half. The metal was too thin for me to try and weld up the split, so I decided to try to save the housing using some JB Weld. I put the JB Weld in the inside of the housing, forcing some down into the split. It looked like this when dry:
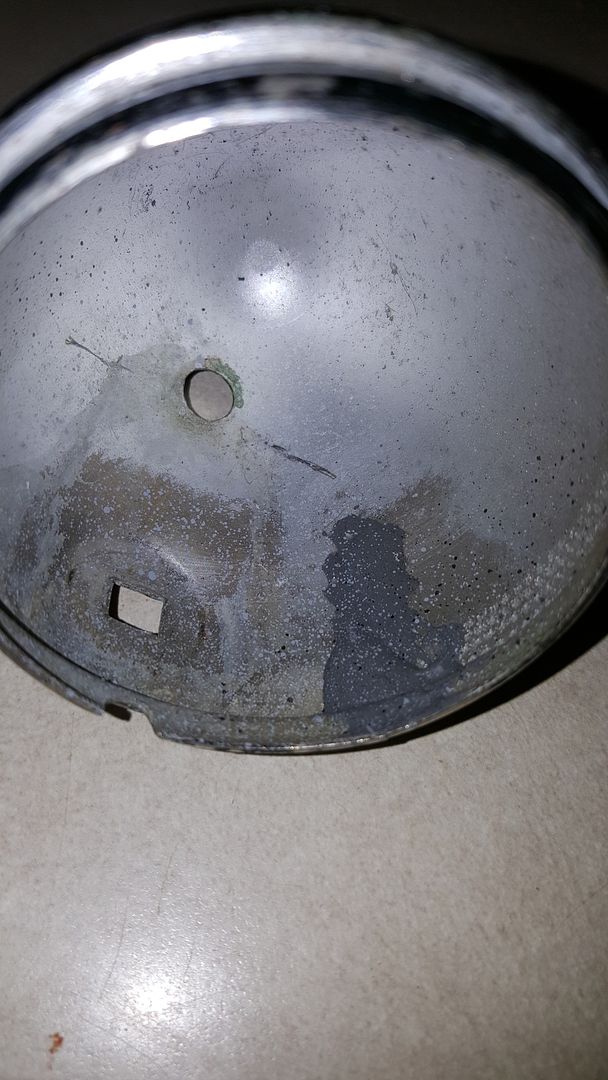
Nothing fancy here, just really strong epoxy. I'm hopeful that it, combined with the lens cover, will hold the split from advancing any further.
Next, I turned my attention to the bulb holder assembly. The original 6v bulb had corroded in the holder, plus there was some surface corrosion on all parts of the holder. To clean this up, I used the Dremel tool with a mildly abrasive wheel. It took it right off and had the added benefit of fitting down inside where the bulb sits. The bulb was a single contact bayonet style bulb and was the same size as the modern 1156 size bulb. The single contact bayonet style bulb gets current through the single contact and grounds through contact with the side of the bulb holder, which in turn must ground through the chassis or frame. Since these backup lights were going to be mounted onto the pretty rusty bumper brackets, it was going to be difficult to get a good ground there. So, I decided that I wanted to switch to a bulb socket that would use 2 contacts instead of 1. Unfortunately, with this style of bulb holder, 2 contacts means 2 positive contacts, not a positive and negative. These would be used for brake lights, where you need a low and high and you would use a double filament bulb. Not what I needed.
I did some research and found that the more recent side marker light used 2 contacts (both positive and negative). The drawback was that they were designed to snap into the side marker housing and lock in place with a twist, not sit in the can that was used for my bulbs. However, they were close in size and I figured that I could trim them down a bit and then they'd fit. Here's a shot of a trimmed socket and an untrimmed socket for comparison:
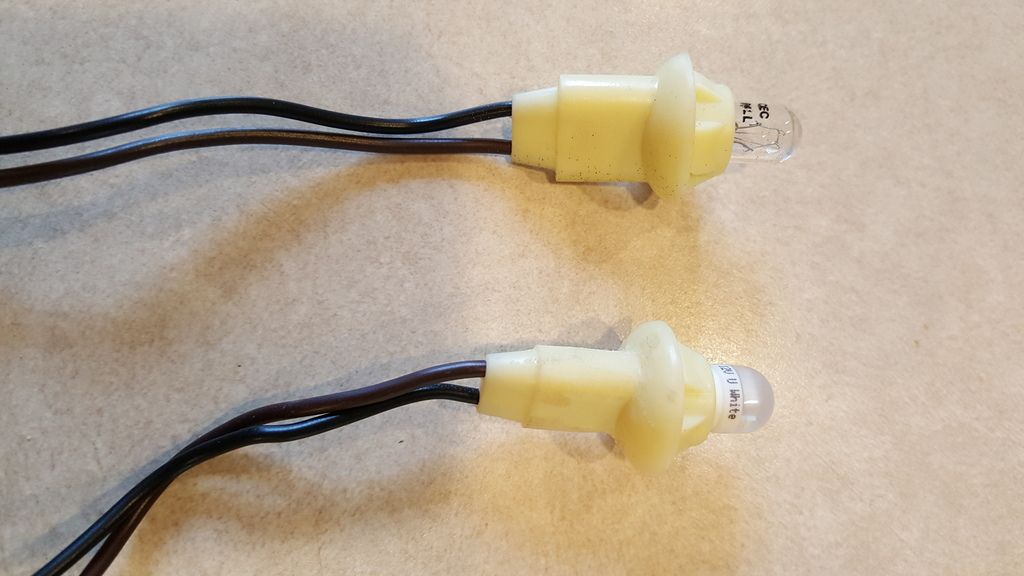
It may be a little hard to tell in this shot, but the bottom one is trimmed and the top one is original size. I used the Dremel tool here, too and just took my time and test fit it repeatedly until I got it just right. It was a snug fit, but the cup near the bulb sits right in the top of the old bulb can and looks like it was meant to be there. Here's a shot of the bulb socket and pigtail being test fit in the housing:
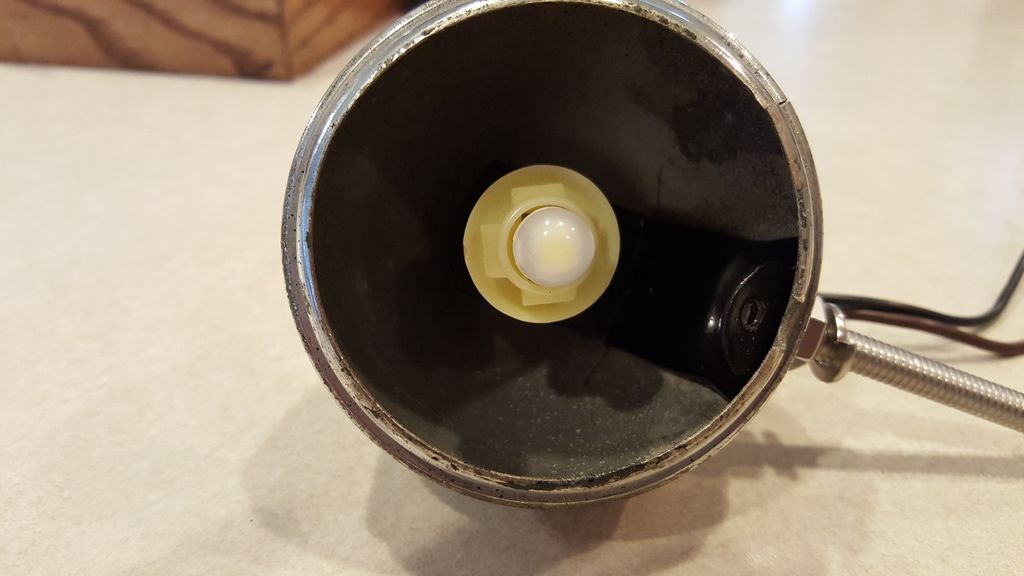
In this shot you can see that after I took care of the corrosion on the bulb holder I went ahead and painted it. Since I no longer needed metal to metal contact for the ground connection, there was no need to leave it bare metal, especially since it had already corroded once. A coat of Rustoleum Automotive Primer and Valspar Satin Black took care of the job nicely. In this shot, you can see the screw hole for the lens cover to attach to the housing. The bulb holder assembly is mounted to the housing through a 1/4" carriage bolt that will also secure the lamp to whatever bracket I end up getting to mount the lights to the truck.
Here is an exploded view of all the parts, numbered, so that I can label them for the reader:

1. Lens Cover
2. Lens Cover Mounting Screw
3. Glass Lens
4. Home Made Rubber Gasket
5. Socket Pigtail
6. Stainless Steel Carriage Bolt, Washer, Nut, Lock Washer and Lock Nut
7. Light Socket Holder
8. Original Grommet
9. Lamp Housing
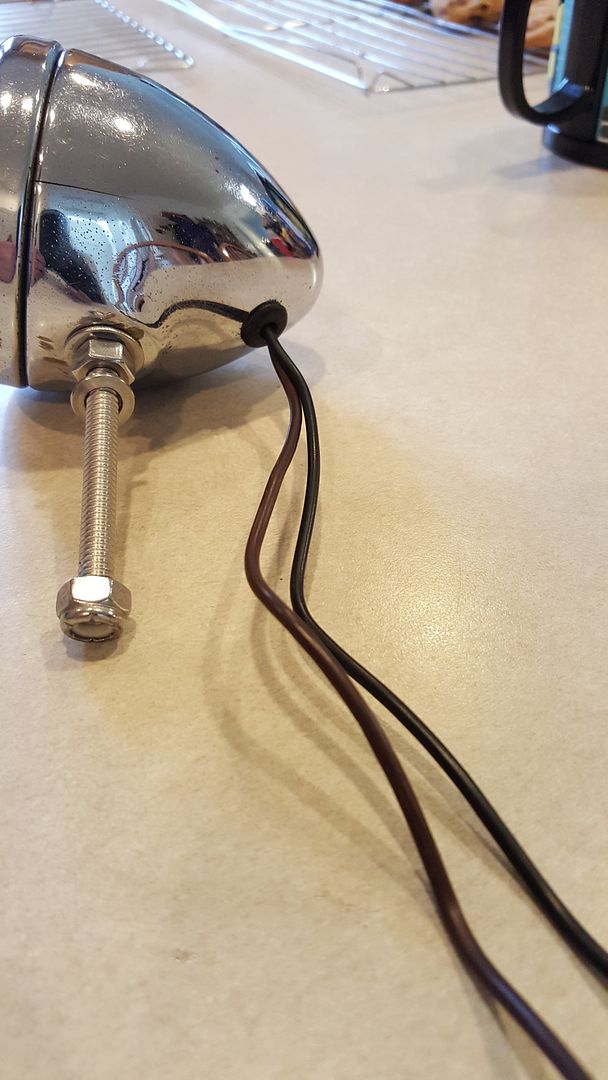
I made the gasket out of an old bicycle inner tube. I used the glass lens as a template and cut out for the drainage hole that is at the bottom of the light. I reused the original grommet. It was kind of hard, so I heated it up with an old hair dryer to soften up the rubber a bit and managed to work it back into place. The grommet and pigtail exit looked like this:
After assembly, I took it into the garage and did a quick test by touching the wires to a battery. It looked like this:
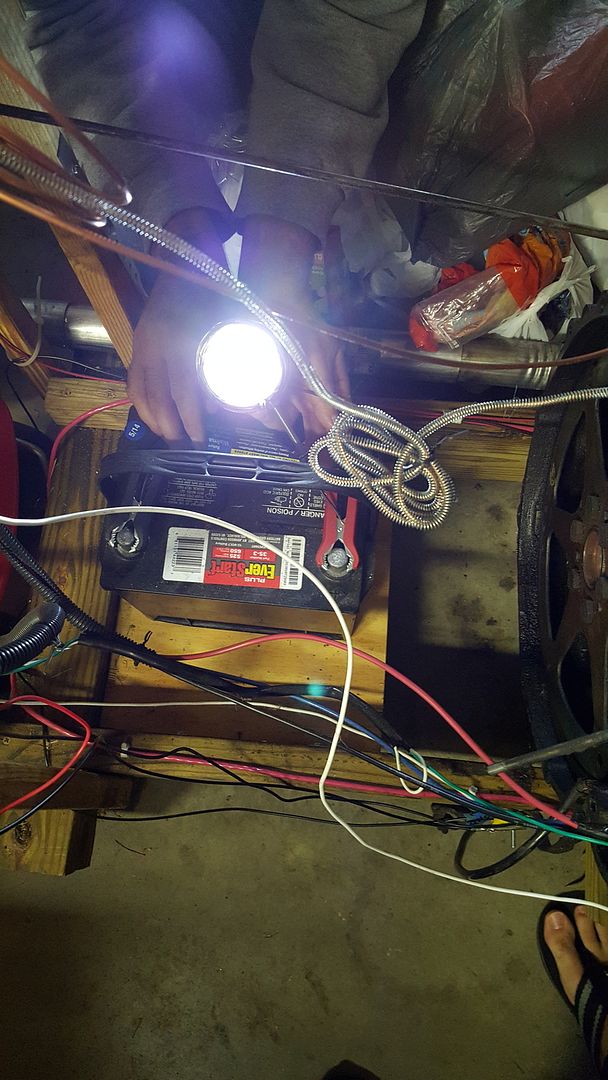
Yay, light!
All in all not bad, as long as the JB Weld holds. We'll see. Not a difficult project, but one I wanted to get done. I've still got the B-31 left to do and will tackle that next weekend sometime. I also bought a light that I'm going to use as a 3rd brake light...but that will be the subject of a separate post.
No comments:
Post a Comment
Let me know what you think. Comments, suggestions, tips or questions. I'll try to post a response as quickly as possible.