
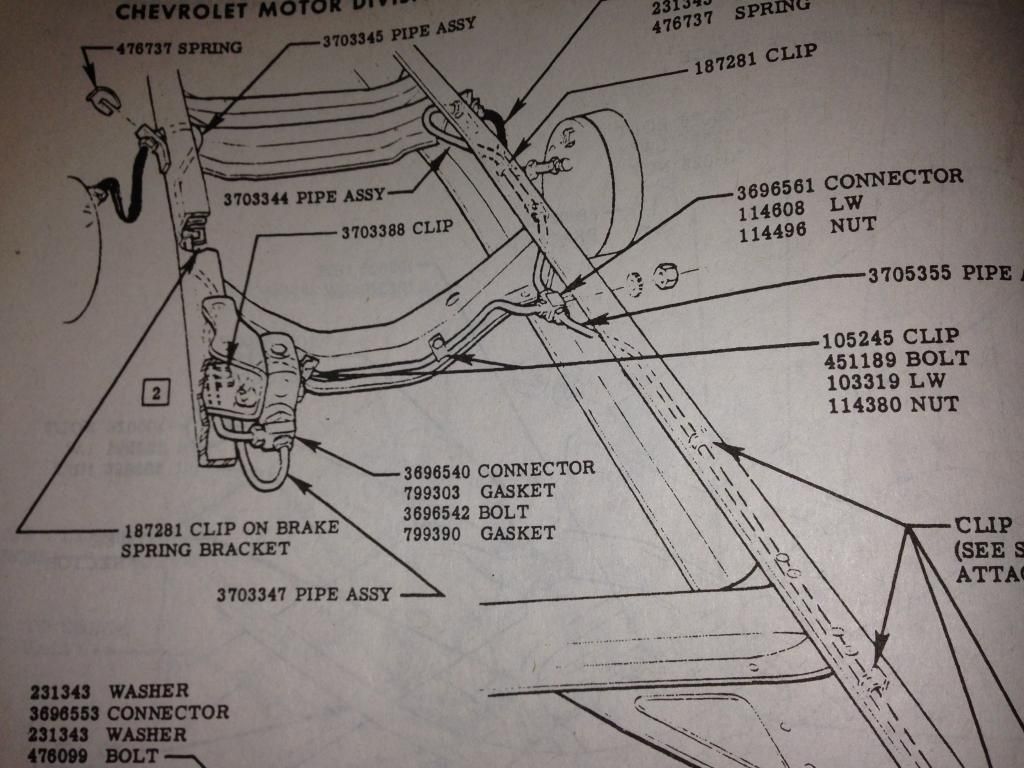
As a point of reference, here's a drawing from the factory assembly manual showing where this equipment is located on the truck:
Here's the panoramic pic from a couple of months ago, showing where we started:
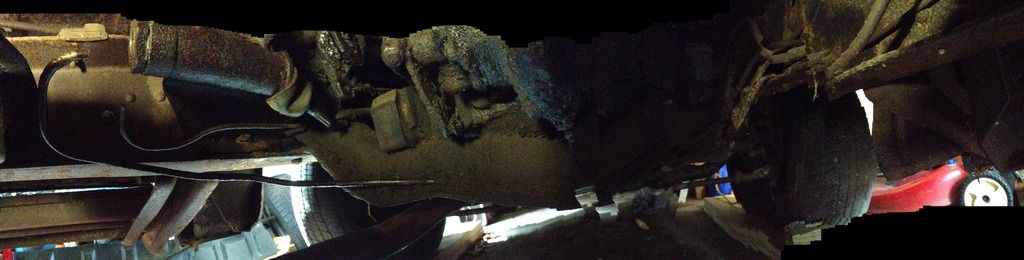
In this pic, I had already cut off the brake line fittings and removed the master cylinder junction block and the infamous banjo bolt. The contrast between the before and after is pretty stark. Even more so when you consider that I really didn't set out to clean anything, just remove the crud so that I could remove the old brake lines. Which is what I did.
Here are some close up pics, starting with the new master cylinder:
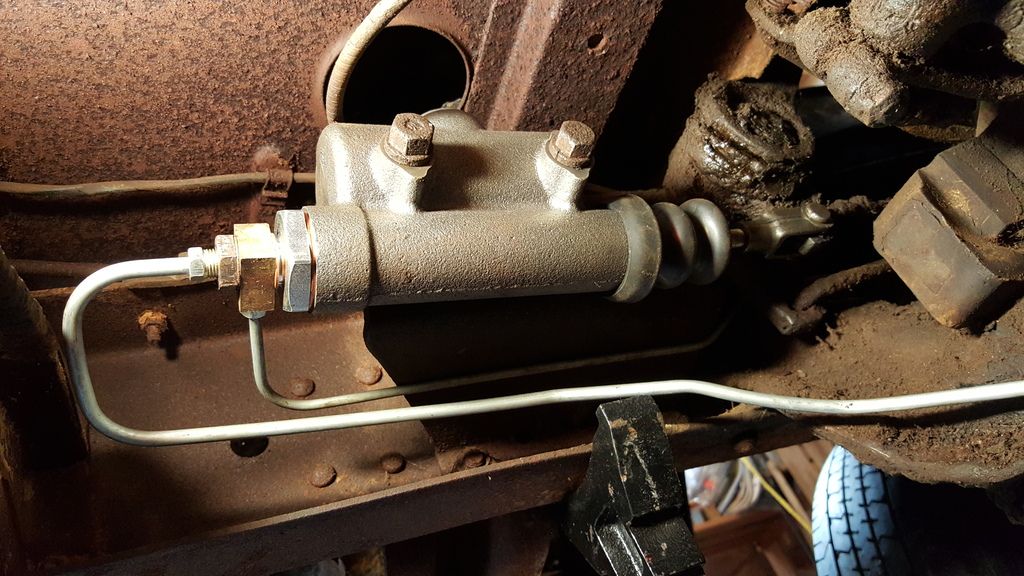
This gives you a really nice view of the new master cylinder with the new hard lines and the old junction block and banjo bolt reinstalled. This also gives you a good view of the routing of the brake line that goes to the front left wheel cylinder that I mentioned in an earlier post. You can see it has to snake past where the brake pedal and clutch pedal connect and then past the transmission shift linkages. It is a tight fit, but it does fit.
Next is a pic of the hard line that runs from the master cylinder, across the frame crossmember and to the passenger side frame rail, where it connects to the junction block with the blind connection. The hard line looks like this:
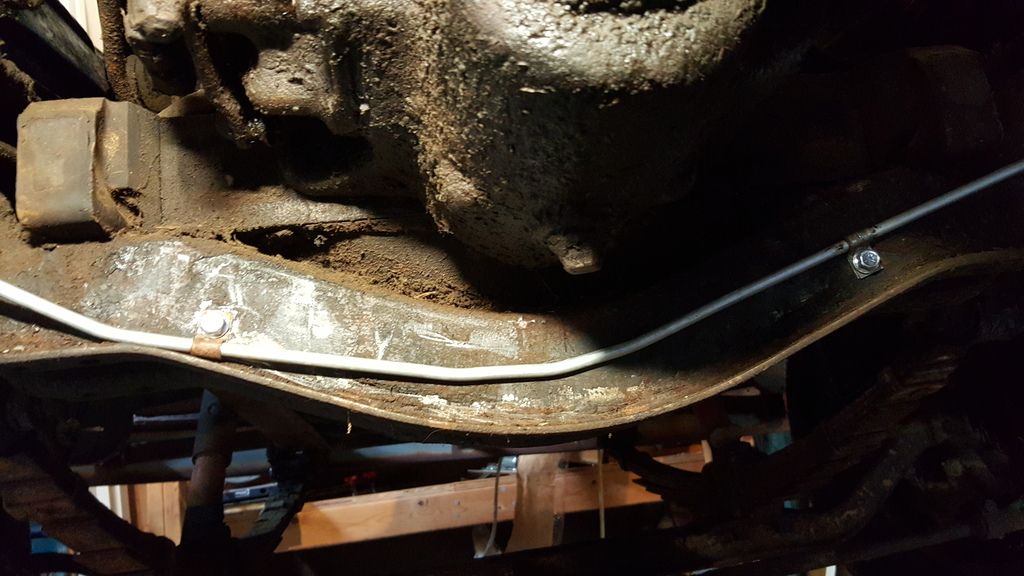
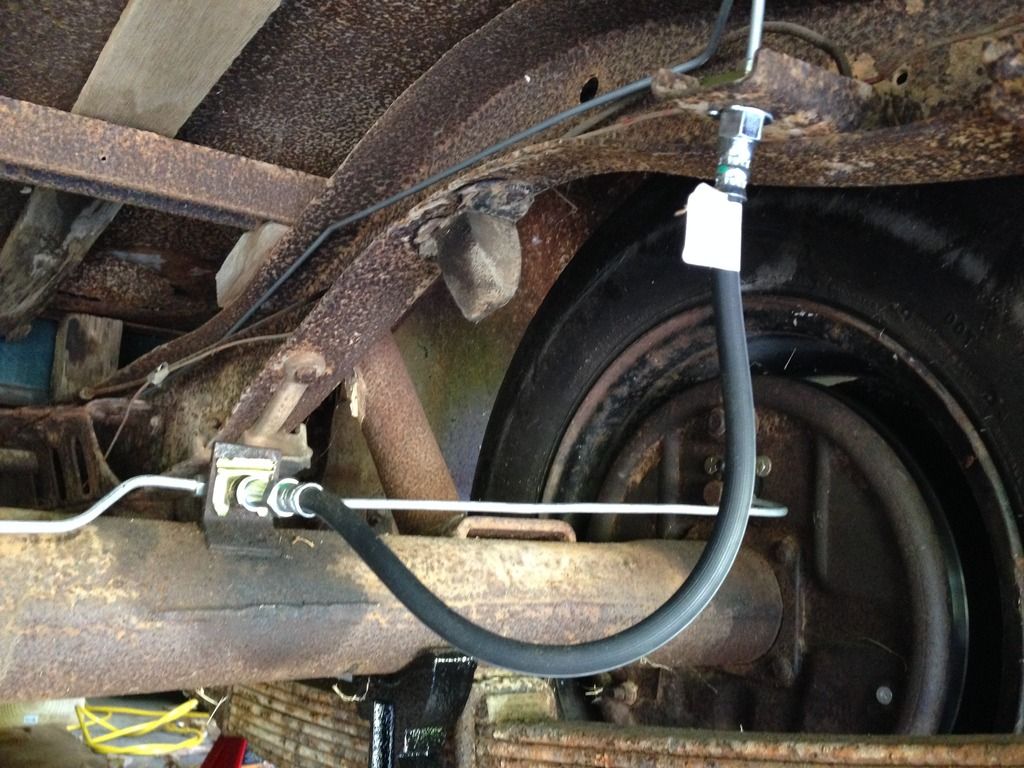
This is one of those situations that I was talking about in an earlier post. The brake lines were purchased premanufactured for my truck. However, that doesn't mean they just dropped into place! This line was supposed to ride along the bottom of the crossmember.... You can see that I had to rotate the clip that holds the line to the cross member. In the end, it did connect up to the junction block, which is what was important, not riding in the cross member. Here's another shot of the far end of this hard line:
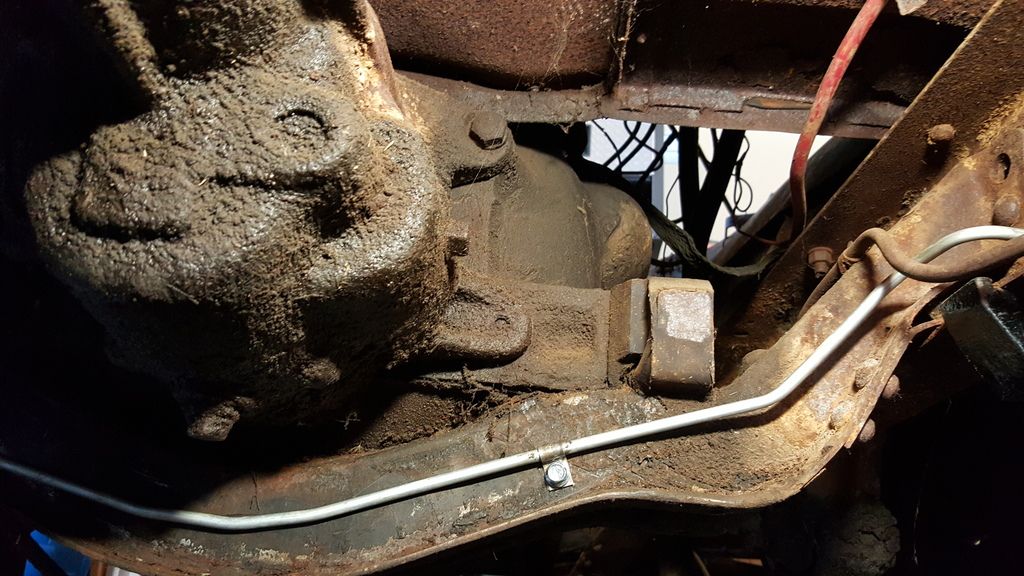
The giant greasy blob on the left is the transmission. I hope to remove it this winter in preparation for transplanting the engine next spring. Just as a point of interest, this pic shows that to remove the transmission from the bell housing, you have 2 bolts that bolt the transmission to the bellhousing from the outside and 2 from inside the bellhousing! That means you have to reach into the bellhousing from underneath to get to the bolts. That means removing the inspection shield at a minimum. I'm not sure what else is involved....
The blind connection junction block looks like this now:
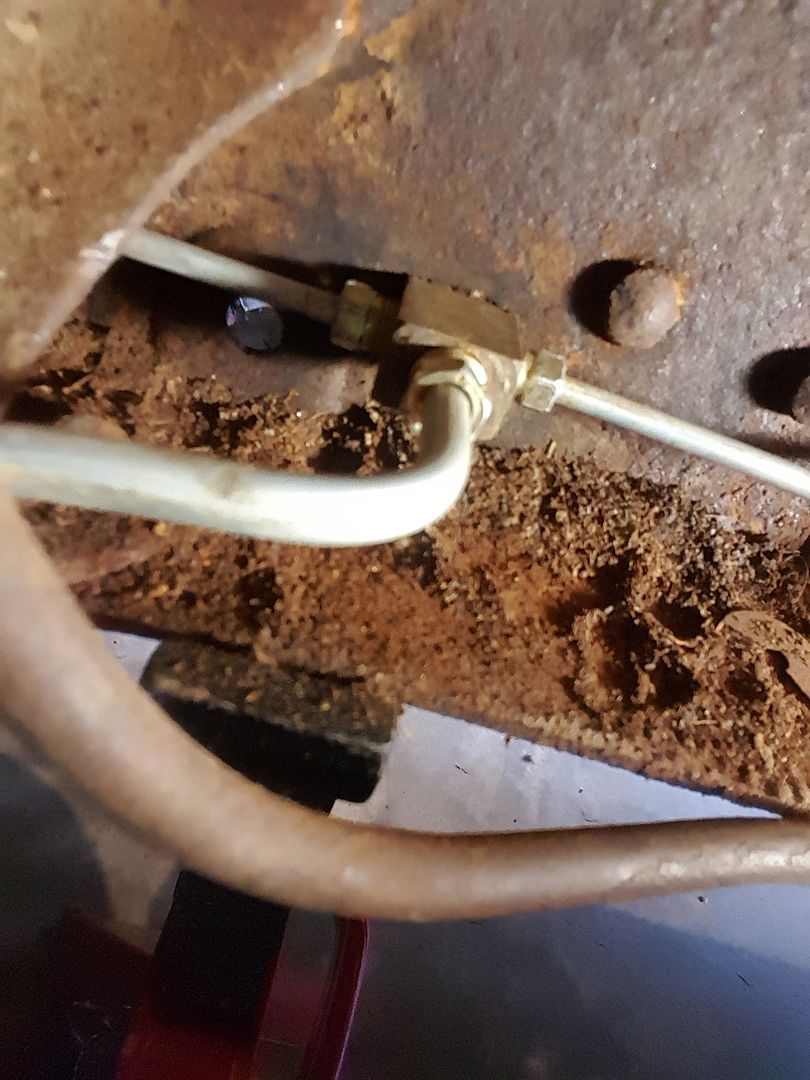
Once again, I just jammed the phone up into the space where I don't fit and snapped this pic. Looks like I need to run the shop vac up there and get out the rust and dirt! What you are looking at in this pic is the larger diameter line going into the junction block is from the master cylinder. The line on the left goes to the right front wheel cylinder and the line on the right goes to the rear end, where it is split between left and right wheel cylinders. The connection at the rear junction block first passes through a soft line and looks like this:
So that's it! Next, it's time to fill the master cylinder and start bleeding the system. With any luck, I won't have any leaks! If I do, then I'll have to go back under and try to tighten the offending connection. Hopefully I'll have a short post with those results in a couple of days.
No comments:
Post a Comment
Let me know what you think. Comments, suggestions, tips or questions. I'll try to post a response as quickly as possible.