
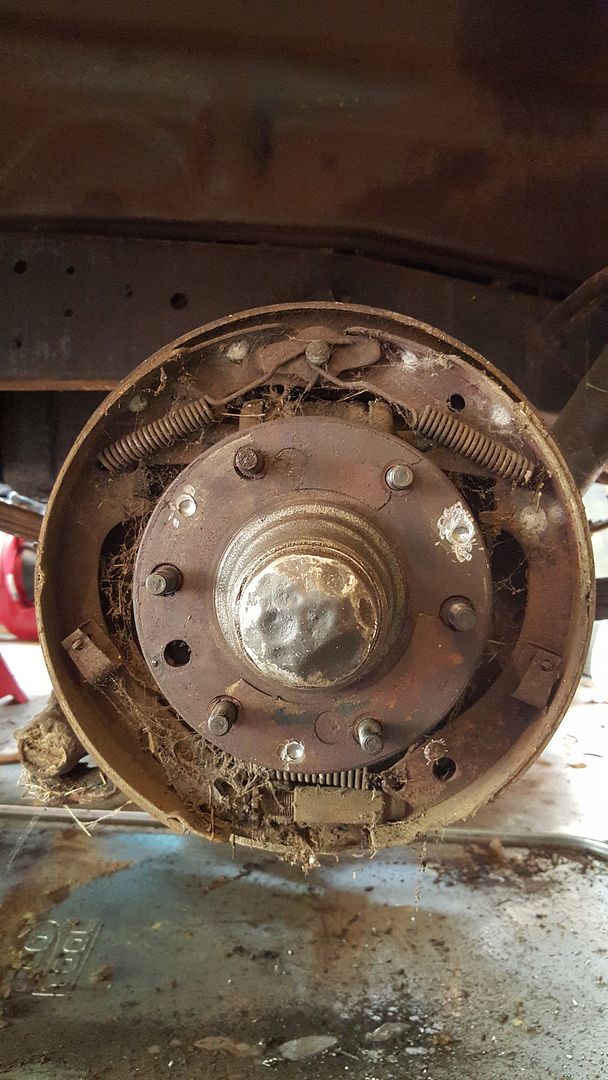
Kinda gnarly. Brake dust, rust, spider webs , dead bugs and old grass. Just like the rest of the truck! So I set off to do the disassembly, which was pretty uneventful. After removing the old parts and cleaning the backer plate with some brake cleaner, I added the new wheel cylinder. It looked like this:
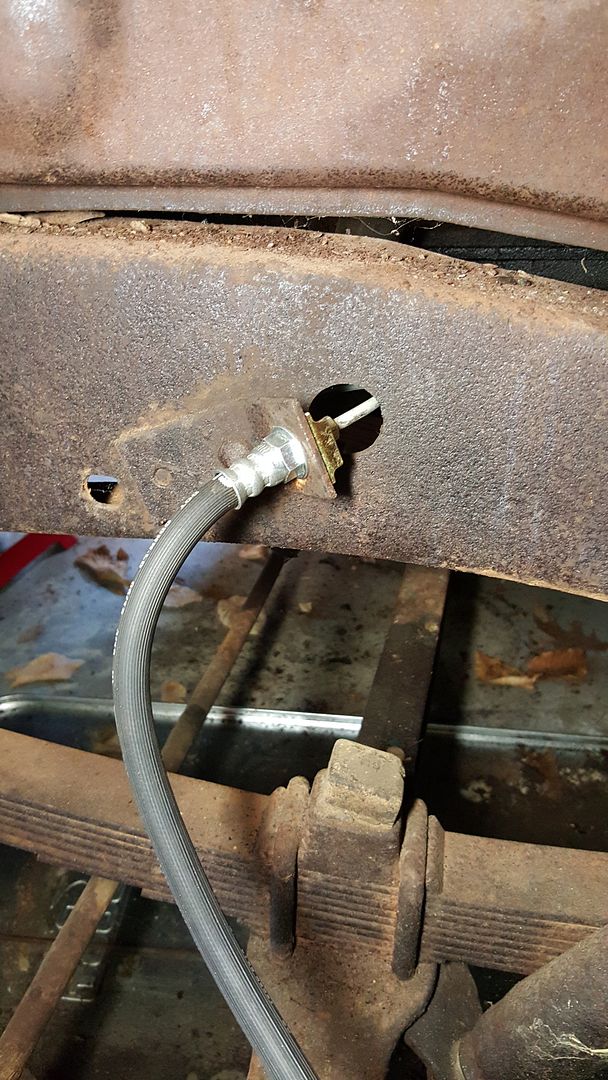
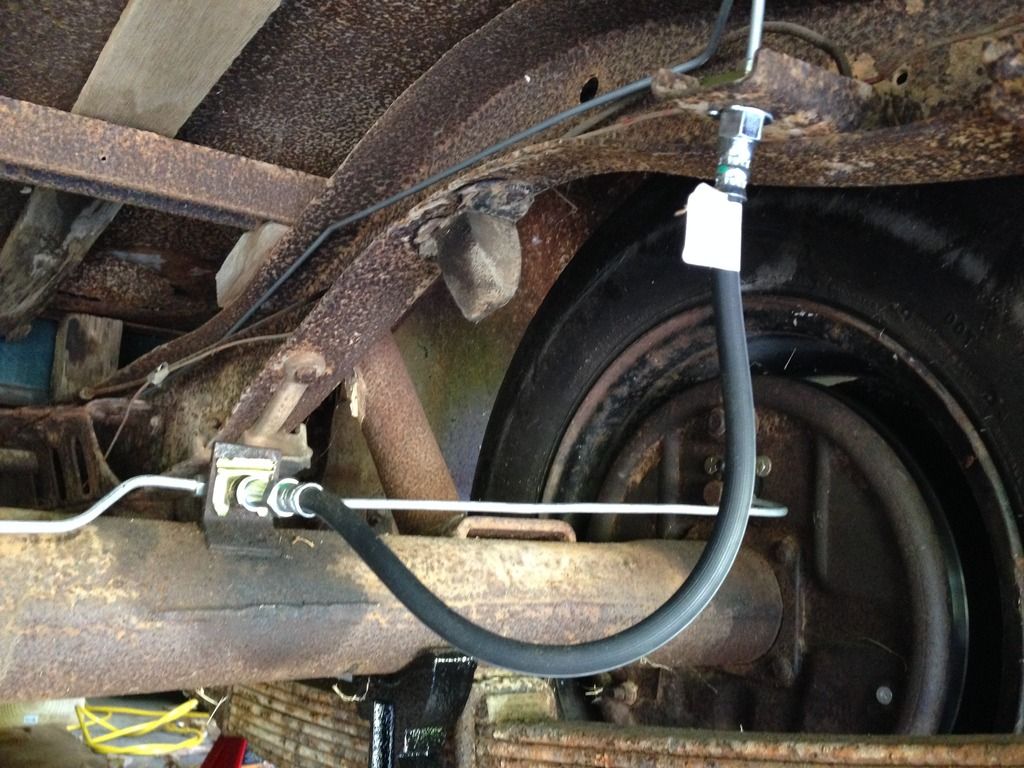
Nothing about this experience has been easy, so this wasn't expected to be either. And it wasn't. The picture of the new wheel cylinder installed hides the issues that I went through to get it there. Those included 2 trips to the home store for hardware, searching in vain just about everywhere in my garage for the missing hardware and then finding out that the wheel cylinder in the box labelled right front didn't fit. That last one is a mystery. I could have accidentally switched them last winter when I got them, they could have been put in the wrong boxes before I got them or maybe the wheel hub assemblies were put on the wrong sides. Who knows, but probably the first option. My first clue was when the wheel cylinder labelled for front right would not go into the opening on the wheel backer plate. No matter how I tried to wiggle it in, it would not go. So I compared it to the original and found that the brake hose opening was on the wrong side of the wheel cylinder (front instead of back). I then got the other wheel cylinder out of the box and compared it to the original and it matched. So I tried to get it into position on the backer plate and it just dropped right into place. Go figure. When I hooked up the brake hose to the wheel cylinder and the hard brake line, it was bent exactly like the original hose. I gave the wheel a tug to see if the hose would kink when the steering was turned, but it didn't kink, so that's how I left it. The soft hose connection to the hard line looks like this:
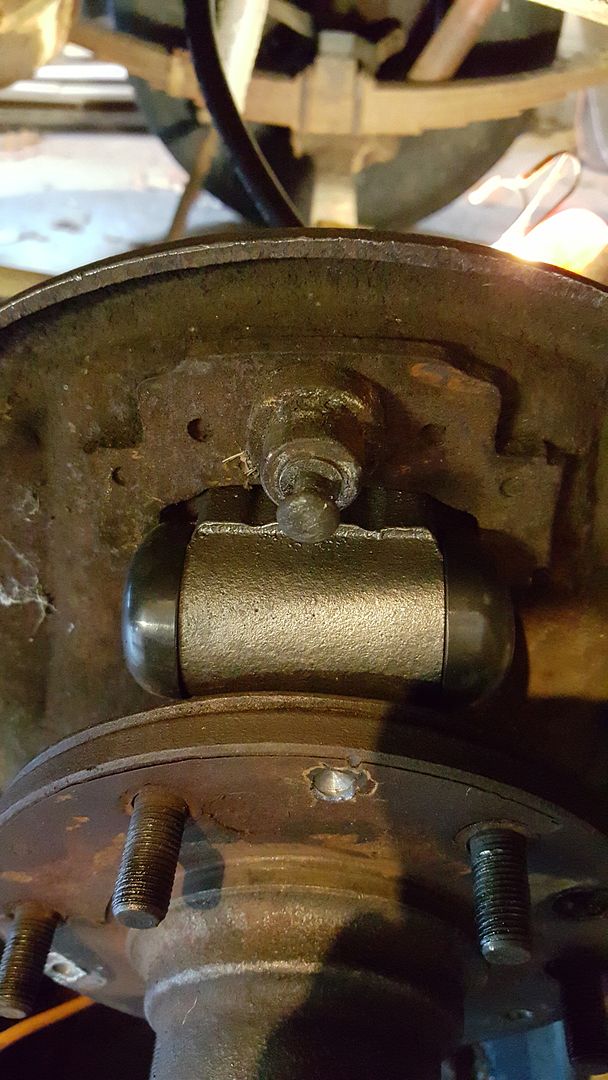
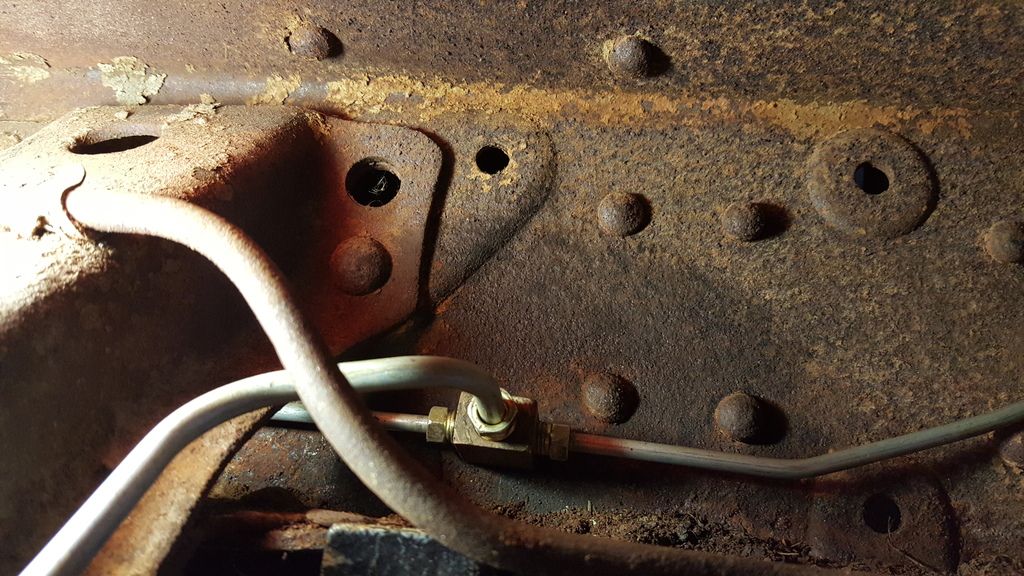
The soft hose connection to the wheel cylinder looks like this:
In these pics,, you can see that I also replaced the attaching hardware. In the top pic, you can see the retaining clip on the back side. In the bottom pic, you can see the copper washer that came with the wheel cylinder and new, grade 8 bolts and lock washers to hold the wheel cylinder to the backer plate.
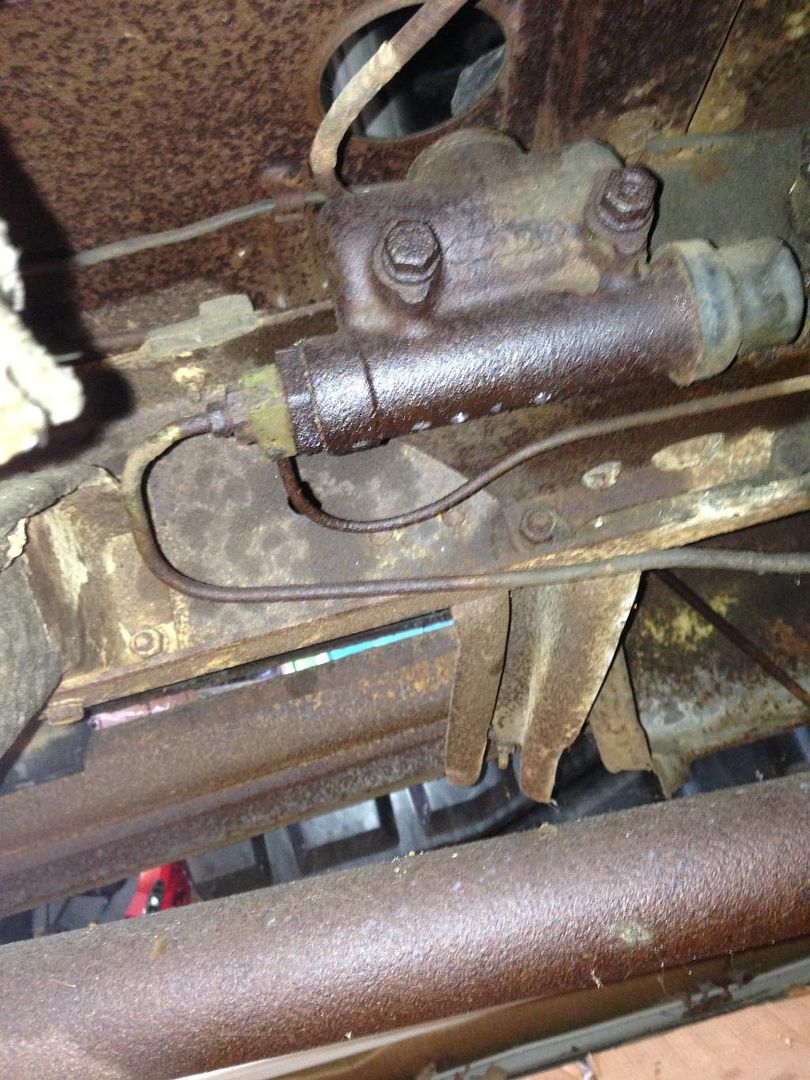
Under the truck, I also replaced the old master cylinder with the new one. For a refresher, here's what the old one looked like before I starting cutting out the old brake lines:
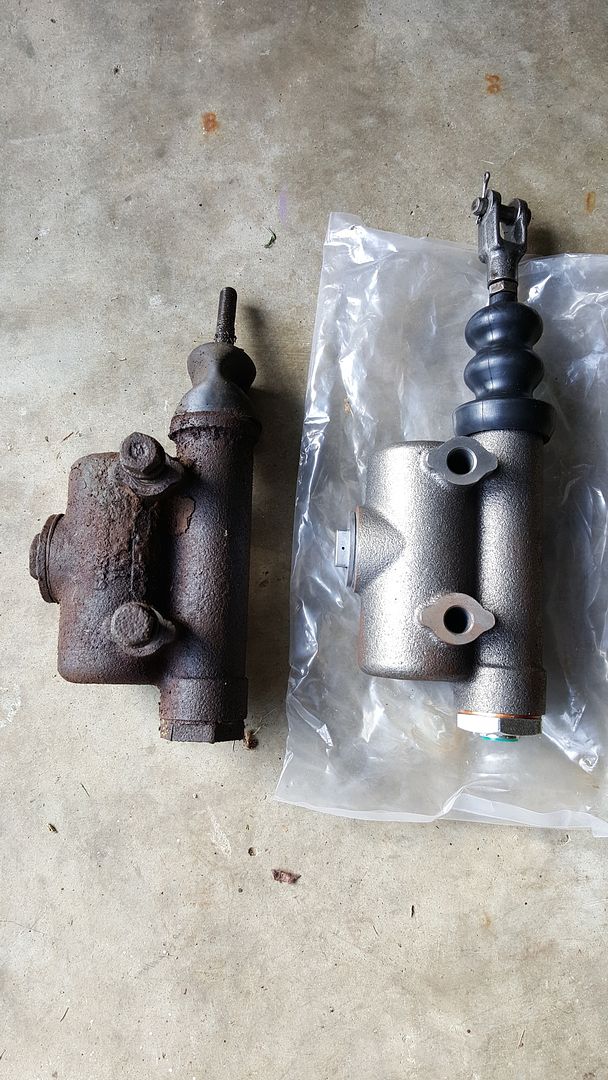
Here's the new one compared to the old one:
And with the infamous banjo bolt and J Block attached:

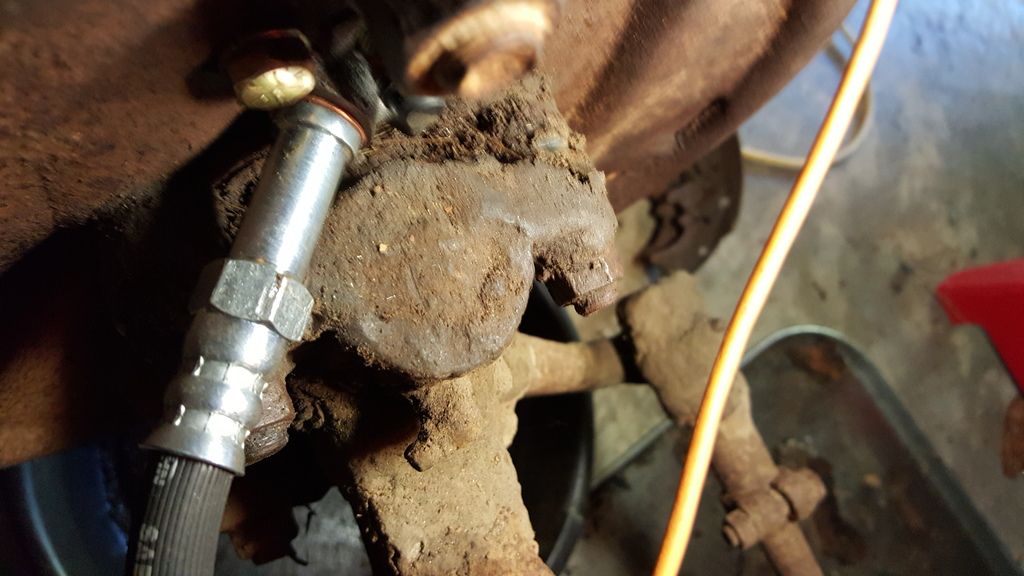
From a step 1, step 2 perspective, I actually replaced the master cylinder first, then installed the hard line that connects the master cylinder to the far side of the frame J block that distributes brake fluid to the right front and both back wheel cylinders. Getting that J block connected to the 3 different brake lines that attach to it was one of the hardest things that I've done so far. It is almost a blind connection and it is in a very confined space. Here's what it looked like when I was done:
You look at the pic and think, that's not a blind connection! In reality, I just shoved the phone up there where I could not get my head and took the pic. What you see in the pic is the cross member that holds the transmission on the left, 3 brake hard lines attaching to the J block, which is screwed into the frame rail. Also, you can see the bottom of the frame rail. What you can't see is just off screen on the right...another cross member. The fat line in the foreground is the fuel line, which is still to be replaced. On top of the blind connection issue, is the issue that the brake hard lines are made for this truck, but that does not mean that they bolt right up! Nope, you gotta finesse them. Alot. That meant going back to the rear of the truck, disconnecting the rear of the hard line on the right in the above pic, making the connection that you see above. Then going back to the rear of the truck and reconnecting the hard line there. That connection looks like this:
It was much easier to make the blind connection first, then wiggle the hard line around until it matched up with the hose connection again. So that's what I did. Then it was back to the front wheel reassembly. I attached the hard line and soft hose as shown above, then replaced the brake shoes, springs, clips, adjusters, et al. It looks like this now:

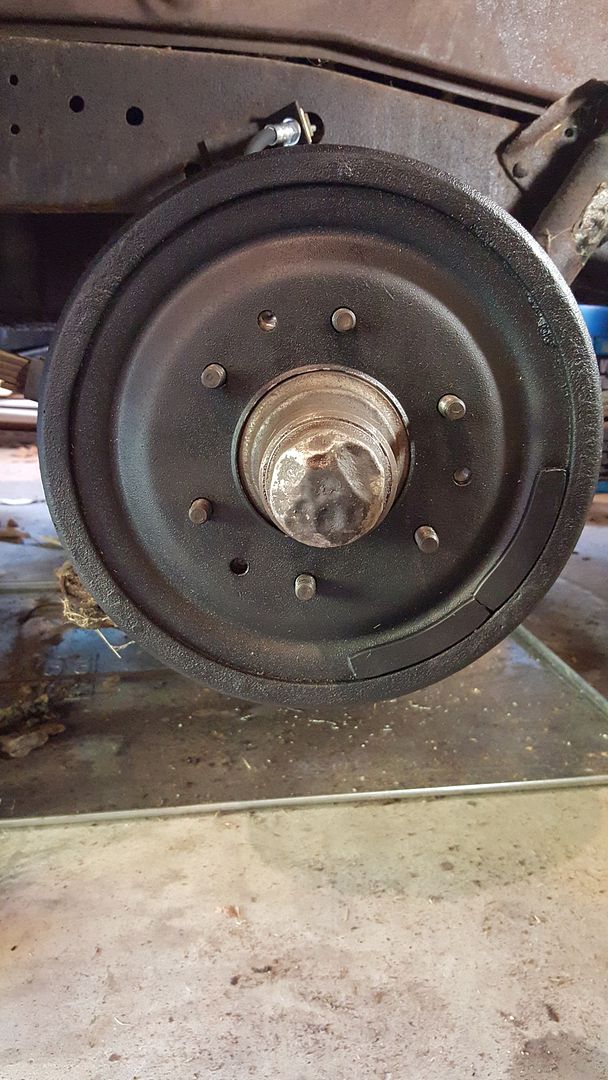
Then all I had to do was add the new brake drum and we were done. It now looks like this:
Once the wheel was back on, I gave it a spin and it sounded great! No grinding in the bearings and no sound of the new drum hitting the shoes. I'll adjust the shoes later, after I get done with the install and add brake fluid to the system.
That's all for now. Tomorrow, I'm planning to attack the left front and add the last hard line. If I can get that done, I'll be ready for brake fluid!
No comments:
Post a Comment
Let me know what you think. Comments, suggestions, tips or questions. I'll try to post a response as quickly as possible.